Valentine’s Day is the perfect opportunity to whip up something sweet for the loved ones in your life, and I can’t wait to share my favorite dessert recipes that are sure to impress! From decadent chocolate treats to delightful strawberry creations, this list has everything you need to make the day extra special. With detailed recipes and easy-to-follow tutorials, I promise you’ll find inspiration for delicious desserts that will not only satisfy your sweet tooth but also warm hearts. So, let’s dive into these enchanting recipes that will transform your Valentine’s celebration into a memorable feast of love and sweetness!
1. Strawberry Jam Sheet Cake with Cream Cheese Frosting
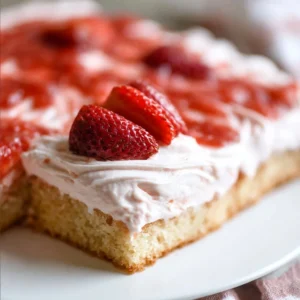
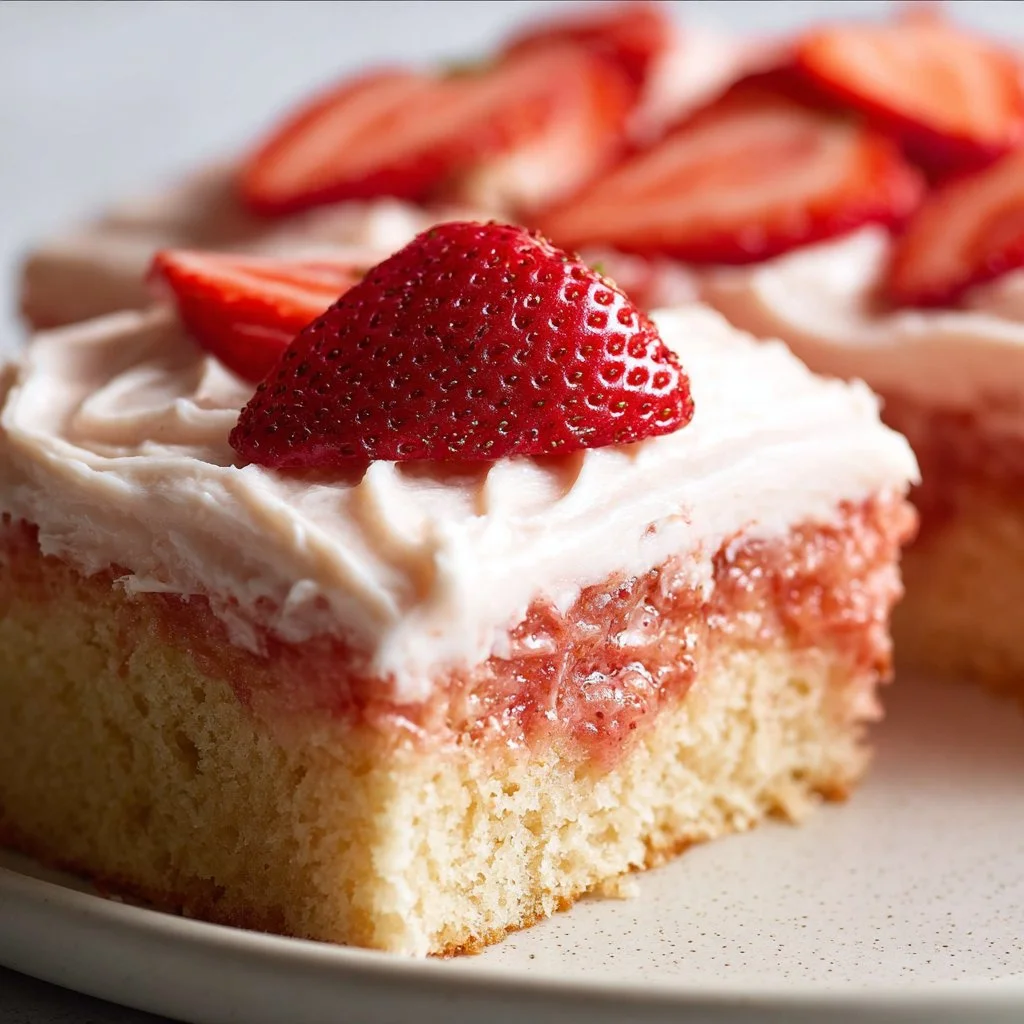
Strawberry Jam Sheet Cake with Cream Cheese Frosting is the kind of recipe that brings a smile as soon as the oven door opens. This moist sheet cake, gently flavored with strawberry jam and finished with a tangy cream cheese frosting, is perfect for spring and summer gatherings when berries are at their best — but it’s comforting any time of year. The cake’s tender crumb, balanced sweetness, and bright pink hue (optional) make it a crowd-pleaser for potlucks, family dinners, and simple weekend baking. If you love a classic cream cheese finish, you might also enjoy my take on pumpkin bars with cream cheese frosting, which uses the same silky frosting technique in a seasonal fall context.
Ingredients & Equipment
Ingredients
- 3/4 cup unsalted butter, room temperature
- 1 cup white sugar
- 3 eggs
- 1/2 cup milk, whole
- 1/2 cup strawberry jam (*see notes)
- 1 1/2 tsp vanilla extract
- 3 tsp baking powder
- 2 1/4 cups all purpose flour
- 1/2 tsp salt
- Optional: Red Food Dye (or natural alternatives listed below)
For the frosting:
- 8 oz cream cheese, room temperature
- 1/2 cup unsalted butter, room temperature
- 1/3 cup + 1 tbsp strawberry jam
- 1/2 cup powdered sugar
- 1/2 tsp vanilla extract
Notes on ingredients
- Strawberry jam: Use a good-quality, seedless jam for a smooth texture. If your jam is very thick, warm it briefly (10–20 seconds in the microwave) and stir so it combines easily with milk or frosting.
- Milk: Whole milk gives the best texture, but 2% works in a pinch.
- Red food dye: Optional. If you prefer natural color, try 1–2 tbsp freeze-dried strawberry powder, or 1–2 tbsp beet powder for a muted pink tone.
- Cream cheese: Full-fat cream cheese gives the creamiest frosting. Light cream cheese will work but the frosting may be slightly less rich.
Helpful tools & equipment
- 9×13-inch baking pan (sheet pan)
- Stand mixer with paddle attachment or hand mixer
- Mixing bowls (large and medium)
- Whisk and rubber spatula
- Measuring cups and spoons
- Cooling rack
- Toothpicks or cake tester
- Offset spatula or bench scraper for frosting (optional)
- Parchment paper (optional, for lining the pan)
Tip: If you’re short on mixer attachments, a strong whisk and a bit more elbow grease will do for the cake batter — but the frosting is easiest with an electric mixer to avoid lumps.
Directions
- Preheat your oven to 350°F (175°C). Grease a 9×13-inch sheet pan, and optionally line it with parchment for easier removal and cleaner edges.
- In a large mixing bowl or the bowl of a stand mixer, add the 3/4 cup unsalted butter and 1 cup white sugar. Beat with an electric mixer or paddle attachment on medium speed until light, pale, and fluffy (about 2–3 minutes). Scrape down the bowl once. Tip: Properly creamed butter and sugar add air, giving a lighter crumb.
- Add the 3 eggs one at a time, beating until just combined after each addition. Avoid overbeating once the eggs are in.
- In a separate large bowl, whisk together the dry ingredients: 2 1/4 cups all purpose flour, 3 tsp baking powder, and 1/2 tsp salt. Set aside.
- In a medium bowl, combine 1/2 cup milk and 1/2 cup strawberry jam. Whisk until the jam is well dispersed in the milk. If the jam is thick, warming it briefly helps this step.
- Add the flour mixture and the strawberry milk to the butter-egg mixture alternately, beginning and ending with the flour mixture. Follow this sequence: Flour → Milk → Flour → Milk → Flour. Beat just until combined after each addition — stop as soon as you can’t see streaks of flour. Overmixing can make the cake dense.
- Optional: If you’d like a pinker cake, add a few drops of red food dye or 1–2 teaspoons of freeze-dried strawberry powder and fold gently until the color is even. Remember that color will deepen slightly when baked.
- Stir in 1 1/2 tsp vanilla extract until incorporated. Give the batter a final gentle stir with a spatula to ensure everything is evenly combined.
- Pour the batter into the prepared 9×13 sheet pan, spreading it evenly with an offset spatula or the back of a spoon. Smooth the top so it’s level.
- Bake for about 30 minutes at 350°F. Start checking at 25 minutes: a toothpick inserted into the center should come out with a few moist crumbs, not wet batter. Oven times can vary; if the top browns quickly, loosely tent with foil.
- While the cake bakes, make the frosting. In a large mixing bowl, beat 8 oz room-temperature cream cheese and 1/2 cup room-temperature unsalted butter until smooth and combined. Scrape down the sides as needed.
- Add 1/3 cup + 1 tbsp strawberry jam, 1/2 cup powdered sugar, and 1/2 tsp vanilla extract to the cream cheese mixture. Beat on low first to avoid powdered sugar puffing, then increase speed to medium and beat until silky and lump-free. Taste and adjust sweetness: add up to 2–3 tbsp more powdered sugar if you like a firmer or sweeter frosting.
- Remove the cake from the oven and let it cool completely in the pan on a wire rack. If you frost while the cake is warm the frosting will melt and slide off. Patience pays off for neat piping or spreading.
- Once cool, spread the cream cheese frosting evenly over the cake. For a decorative finish, add a few spoonfuls of extra strawberry jam in small dollops on top and swirl gently with a toothpick or drop fresh sliced strawberries across the cake. Chill briefly (15–30 minutes) if you prefer firmer frosting for slicing.
- Slice into squares and serve. Enjoy!
Tips and variations
- Jam vs. fresh berries: If you’d rather use fresh strawberries, macerate 2 cups chopped strawberries with 2–3 tbsp sugar for 15–30 minutes and stir a couple of tablespoons into the milk. Fresh berries add texture; jam adds concentrated flavor and color.
- Natural color: Use freeze-dried strawberry powder or a small amount of red-purple beet powder instead of food dye for a naturally tinted cake.
- Flavor boost: Fold in 1 tsp lemon zest to the batter for a bright lift that complements the strawberry notes.
- Gluten-free option: Substitute a 1:1 gluten-free flour blend formulated for baking; some blends require slightly more liquid, so check the batter’s consistency.
- Single-layer upgrade: If you’d like individual servings, bake the same batter in lined cupcakes for about 18–22 minutes.
Storage, Freezing & Make-Ahead Tips
Storing leftovers
- Room temperature: Store leftover cake covered in an airtight container or covered tightly with plastic wrap in the refrigerator for up to 3–4 days. Because the frosting contains cream cheese, refrigeration is recommended to keep it safe and fresh.
- Slicing: Cut the cake into individual portions before storing for easy grab-and-go snacks and portion control.
Freezing
- Whole cake: You can freeze the unfrosted cake (cool completely) tightly wrapped in plastic wrap and a layer of foil for up to 2 months. Thaw in the refrigerator overnight before frosting.
- Frosted cake: For best texture, freeze the cake without frosting. If you must freeze after frosting, place it in the freezer for 30–45 minutes to firm the frosting, then wrap gently with plastic wrap and foil. Thaw in the refrigerator to avoid condensation puddles.
- Frosting-only: You can freeze the cream cheese frosting in an airtight container for up to 1 month. Thaw in the refrigerator and re-whip briefly with a mixer before using.
Make-ahead
- Bake the cake a day ahead and keep it in the refrigerator un-frosted, or freeze it as described. The frosting can be made a day ahead and stored in the fridge; bring it to room temperature and re-whip before spreading.
- If you want a party-ready dessert with minimal prep, bake and cool the cake the day before, refrigerate overnight, and frost just before serving.
Portioning advice
- A 9×13 sheet yields about 12–15 generous squares or up to 24 smaller party portions. For neat slices, chill the cake briefly so the frosting firms, then use a sharp knife warmed under hot water and wiped dry between slices.
How to Use / Serve This Dish
Serving ideas
- Simple serving: A slice of this cake alongside a mug of tea, a glass of cold milk, or a hot cup of coffee makes a cozy treat. (Avoid pairing with any beverages that are not suited to your dietary preferences.)
- Picnic or potluck: The sheet format is easy to transport. Cut into squares and place on a platter for an effortless party dessert.
- Layered trifle: Crumble slices of the cake into a trifle bowl layered with whipped cream and fresh strawberries for a quick, showy dessert.
- Dessert bars: Top individual squares with a dollop of whipped cream and a fresh strawberry slice for elegant serving.
Creative variations
- Swirl: Gently swirl extra jam into the cake batter before baking for a marbled effect.
- Lemon-strawberry: Add lemon curd swirls and a squeeze of lemon zest into the frosting for a tart-sweet combination.
- Mini versions: Make cupcakes with this batter and pipe the frosting for single-serve treats that are perfect for birthdays or gatherings.
Pairing suggestions
- Light, non-alcoholic beverages such as herbal iced tea, lemonade, or flavored sparkling water pair beautifully.
- For a brunch spread, this cake complements fruit salads, yogurt bowls, and light egg dishes.
While you’re exploring comforting desserts and versatile cream cheese frostings, you might enjoy checking out an easy savory option like the easiest crockpot white chicken chili with cream cheese for a cozy meal contrast to your sweet baking.
FAQ
Q: Can I replace the eggs to make this egg-free?
A: Yes — for an egg-free version, use commercial egg replacers (follow package directions) or substitute each egg with 1/4 cup applesauce plus 1/2 tsp baking powder to help leavening. Texture will be slightly different — a touch denser — but still delicious.
Q: How long will the cake keep in the refrigerator?
A: With the cream cheese frosting, store covered in the fridge for 3–4 days. For the best texture, consume within that timeframe.
Q: Can I use low-fat cream cheese or Greek yogurt in the frosting?
A: Low-fat cream cheese works, though the frosting will be less rich and possibly thinner. Avoid substituting all the cream cheese with yogurt as it’s runnier; if you must use yogurt, strain it to thicken and combine with cream cheese to keep structure.
Q: What’s the best way to prevent the cake from sticking to the pan?
A: Grease the pan well and consider lining with parchment paper with a slight overhang so you can lift the cake out for slicing. Parchment also helps ensure even edges.
Conclusion
This Strawberry Jam Sheet Cake with Cream Cheese Frosting is a welcoming, from-scratch dessert that celebrates bright berry flavor and a comforting, tender crumb — perfect for seasonal gatherings, casual get-togethers, or a special treat at home. If you want to explore more takes on strawberry-infused frostings and cakes, the recipe inspiration here pairs well with resources like Strawberry Jam Sheet Cake with Cream Cheese Frosting for a similar sheet cake approach, or The Best Strawberry Cake with Cream Cheese Frosting – Fed & Fit for another full-layer cake idea. For specialized frosting techniques using jam, try Strawberry (Jam!) Cream Cheese Frosting Recipe – Allrecipes, and for a small-batch frosting adaptation, see Strawberry Cream Cheese Frosting – Dessert for Two. I hope this recipe brings a little seasonal sunshine to your kitchen — if you try it, please share how you decorated it or any personal twists you added. Happy baking!
2. Strawberry Shortcake Cookie Cups
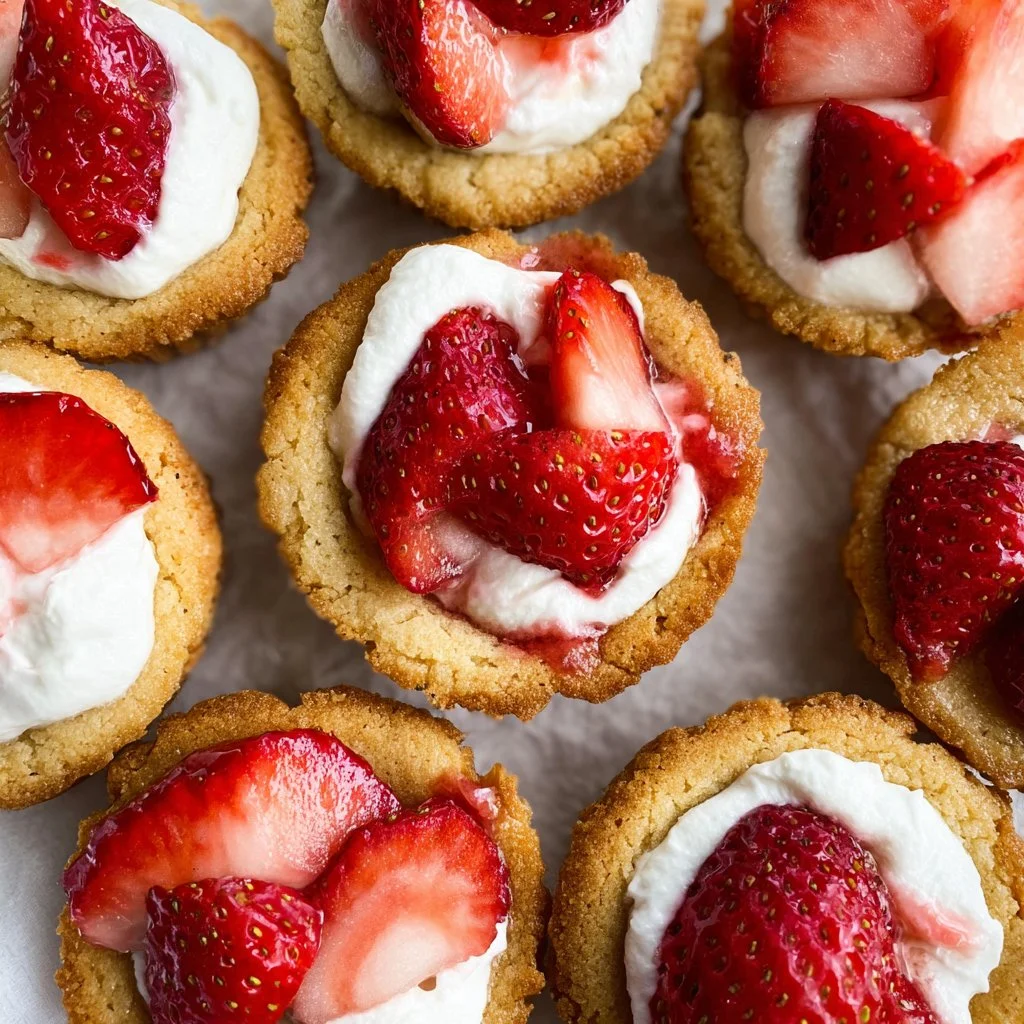
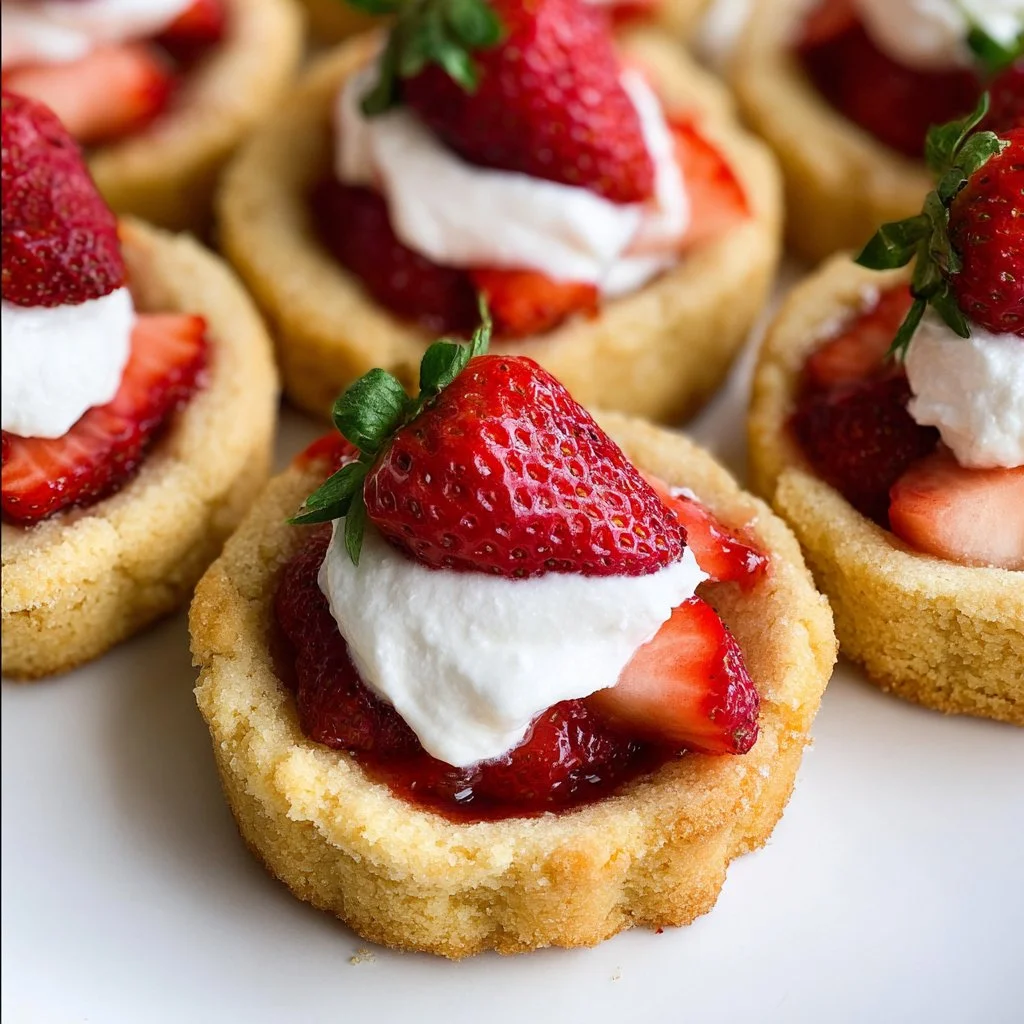
Strawberry Shortcake Cookie Cups are a delightful seasonally-inspired treat that’s easy to make from scratch and perfect for sharing. Imagine a tender almond-cookie shell, lightly sweetened and coconut-kissed, cradling juicy chopped strawberries and a cloud of whipped cream — each bite is a balance of soft, crumbly cookie, bright fruit, and creamy topping. Whether you’re baking for a picnic, a family dessert, or a weekend afternoon tea, these cookie cups celebrate fresh strawberries and simple, from-scratch baking. If you love small-batch cookie projects (similar to how I adore a classic chewy pumpkin cookies recipe in cooler months), you’ll find these cups both comforting and refreshingly seasonal.
Why you’ll love these Strawberry Shortcake Cookie Cups
- Small, shareable, and charming — they’re practically giftable.
- Grain-forward almond flour gives them a naturally tender texture.
- Quick to assemble: one bowl wet, one bowl dry, a little shaping, and you’re ready to bake.
- Easily customized for dietary needs (gluten-free base, dairy-free whipped options).
- Great for using peak-season strawberries — you’ll appreciate the contrast of warm cookie and cold cream.
Ingredients & Equipment
Ingredients:
- 1/2 cup Purecane Baking Sweetener (or sugar)
- 1 egg
- 1/4 cup melted refined coconut oil
- 1 cup almond flour
- 1 tsp vanilla extract
- 1/2 tsp baking powder
- 1/8 tsp salt
- chopped strawberries (about 1 to 1 1/2 cups, depending on how full you like the cups)
- whipped cream (whipped heavy cream or coconut whipped cream for dairy-free)
Brief notes:
- Purecane Baking Sweetener can be swapped 1:1 with regular granulated sugar if you prefer.
- Refined coconut oil is neutral-tasting; if you prefer a coconut hint, use unrefined.
- Almond flour yields a tender, slightly nutty cookie base and keeps these naturally gluten-free.
- Use fresh, ripe strawberries for the best flavor; you can macerate them with a touch of sweetener if you want them juicier.
Helpful tools:
- Mixing bowls (one for wet, one for dry)
- Measuring cups and spoons
- Muffin tin (standard 12-cup works; recipe forms 8 larger cups)
- Nonstick spray or a pastry brush and a bit of oil for greasing
- Spatula and spoon
- Small cookie scoop or teaspoon for portioning dough
- Cooling rack
- Optional: blender or food processor if you want super-smooth almond flour or to blitz strawberries for a sauce
If you enjoy experimenting with other cookie-style desserts, you might also like the texture contrasts found in this crumbl pecan pie cookies recipe — a great inspiration for nut-forward flavors.
Step-by-Step Instructions (with tips)
-
Set the oven to 350 degrees. (If you prefer Celsius, set to 175°C.)
Tip: Preheating ensures even baking from the moment the tin goes in. -
In a mixing bowl combine the baking sweetener (or sugar), egg, melted coconut oil, and vanilla extract. Whisk until smooth and slightly glossy.
Tip: If your melted coconut oil is too hot, let it cool briefly so it doesn’t cook the egg. -
In a separate bowl combine the almond flour, baking powder, and salt. Whisk these dry ingredients to break up any lumps.
Tip: Measure almond flour by spooning it into the cup and leveling; packing can make dough too dense. -
Add the dry ingredients to the wet ingredients and combine. Use a spatula to fold gently until a uniform dough forms. It should be slightly sticky but workable.
Tip: If the dough is very wet, chill 10–15 minutes; if it’s crumbly, add a teaspoon of water or milk at a time until it holds together. -
Roll the dough into a little larger than tablespoon sized balls. It should make 8 cookies. Place the dough balls into a greased muffin tin and flatten each ball slightly with your fingers or the back of a spoon so there’s a compact mound that can be shaped into a cup.
Tip: A small cookie scoop helps make even cups. -
Bake for 18 minutes. The edges should be lightly golden and the tops set.
Tip: Oven temps vary; begin checking at 16 minutes. Almond flour browns quickly — don’t overbake. -
Remove from the oven and while still warm press the inside of each cookie with your fingers to form a cup shape. Be gentle so you don’t crack the shell.
Tip: Use the back of a small spoon or your knuckle if the cookie is too hot to touch. -
Bake again for 3 minutes to set the cup shape. This helps the inside hold better when filled.
Tip: If a cup got too thin, you can gently press the edges back up after the second bake while still warm. -
Remove from the oven and let cool completely in the tin, then transfer to a cooling rack. Cooling fully helps the cups firm up.
Tip: If you plan to fill immediately, letting them cool for 10–15 minutes will keep the whipped cream from melting. -
Fill with chopped strawberries, top with whipped cream, and enjoy! For a classic presentation, add a small strawberry slice or mint leaf on top.
Tip: Macerate strawberries with 1–2 teaspoons of sweetener for 10–20 minutes if you like them extra juicy and syrupy; skip macerating for a fresher, firmer bite.
Variations and kitchen tips:
- Dairy-free: Use coconut whipped cream and ensure any store-bought topping is labelled dairy-free.
- Berry swap: Try raspberries or a mix of berries for a different seasonal profile.
- Stabilized whipped cream (if making ahead): Whip heavy cream with a tablespoon of powdered sugar and a teaspoon of cornstarch or a small amount of cream cheese for longer hold.
- Texture twist: Fold 1/4 cup finely chopped toasted almonds into the dough for crunch.
- Roasted vs. fresh strawberries: Roasting strawberries (toss with a touch of sweetener and roast at 375°F for 12–15 minutes) concentrates flavor and is lovely in cooler months. Macerating (just tossing with sweetener and letting sit) brightens them and keeps them juicy — choose based on the season and desired texture.
Storage, Freezing & Make-Ahead Tips
Storing leftovers:
- Room temperature: Unfilled cookie cups can be stored in an airtight container at room temperature for up to 3 days. Keep them layered with parchment between layers to prevent sticking.
- Refrigerator: Once filled with strawberries and whipped cream, store in the fridge and consume within 24 hours for best texture. The moisture from the fruit will soften the cookie over time.
Freezing:
- Unfilled cups freeze best. Arrange cooled cookie cups on a baking sheet, freeze until solid (about 1–2 hours), then transfer to a freezer-safe container or bag for up to 2 months. Thaw at room temperature before filling.
- Filled cups don’t freeze well because the whipped cream and fruit change texture when frozen.
Make-ahead strategy:
- Make the cookie shells up to 3 days in advance and store at room temperature. Chop strawberries and store in the fridge; whip cream just before serving or use a stabilized whipped cream if you need a few extra hours of hold.
- For party prep: bake shells in the morning, fill just before guests arrive, and top with whipped cream moments before serving.
If you like prepping desserts ahead, you may enjoy adapting techniques from other cookie projects like this irresistible cowboy cookies recipe for large-batch make-ahead ideas.
How to Use / Serve This Dish
Serving ideas:
- Afternoon tea: Plate two cookie cups per person alongside a pot of tea or herbal infusion.
- Mini dessert course: Offer as a light palate-pleasing dessert after a bright salad or grilled main.
- Kids’ party: Let little ones decorate with sprinkles (choose halal-friendly sprinkles) and extra berries.
- Picnic: Pack shells and fruit separately and assemble just before serving so the cookies stay crisp.
Creative variations:
- Lemon zest: Add 1 teaspoon lemon zest to the dough for a citrus note that pairs beautifully with strawberries.
- Honey glaze: Drizzle a tiny bit of honey or agave over the strawberries for added sheen and sweet depth. (Use honey if it fits your taste and dietary preferences.)
- Chocolate dip: For a luxe twist, dip half the base of each cup in melted dark or milk chocolate (wait until cups are fully cooled). Be mindful: chocolate will add richness and pairs well with the almond base.
Pairings:
- Beverages: Serve with fruit-forward teas, chilled rose lemonade, or sparkling water with strawberry slices for an elegant, non-alcoholic pairing.
- Other desserts: Pair with a light sorbet or a small scoop of vanilla ice cream for an extra-treat option.
FAQ
Q: Can I make these gluten-free?
A: Yes — the recipe already uses almond flour, which is naturally gluten-free. Ensure your baking powder and any other packaged ingredients are certified gluten-free if you have a strict sensitivity.
Q: What can I use instead of almond flour?
A: Almond flour gives a tender crumb and slightly nutty flavor. You can try finely ground oat flour or a gluten-free flour blend, but textures will vary and you may need to adjust liquid. If using regular all-purpose flour (not gluten-free), the cookie texture will be denser; swap 1:1 but consider chilling the dough for 20–30 minutes.
Q: How long do the filled cups last?
A: Once filled with strawberries and whipped cream, eat within 24 hours. The fruit releases moisture that softens the cup, and whipped cream will lose volume and texture over time.
Q: Can I make the whipped cream from scratch?
A: Absolutely — whip chilled heavy cream with a tablespoon of powdered sugar and a teaspoon of vanilla extract until soft peaks form. For dairy-free options, chill a can of full-fat coconut milk, scoop the solid cream, and whip with a little powdered sugar and vanilla.
Conclusion
These Strawberry Shortcake Cookie Cups are a joyful celebration of seasonal strawberries and simple from-scratch baking — warm almond-cookie cups, bright chopped fruit, and a soft crown of whipped cream make an inviting dessert for any table. If you’re looking for recipe variations or inspiration from other cooks, check out this Mini Strawberry Shortcake Cookie Cups Recipe – Creations by Kara for a smaller bite-sized approach, or see a classic take at Strawberry Shortcake-Cookie Cups | Philadelphia – Kraft Heinz. For a semi-homemade shortcut version and helpful assembly tips, this Strawberry Shortcake Cookie Cups Recipe (Semi-homemade) is a useful reference, and for another home-cook perspective try Strawberry Shortcake Cookie Cups – – Cooking With Karli. I hope you’ll try these this strawberry season — if you do, I’d love to hear how you filled them or what variations you tried. Share the recipe with friends and enjoy the cozy, fresh flavors!
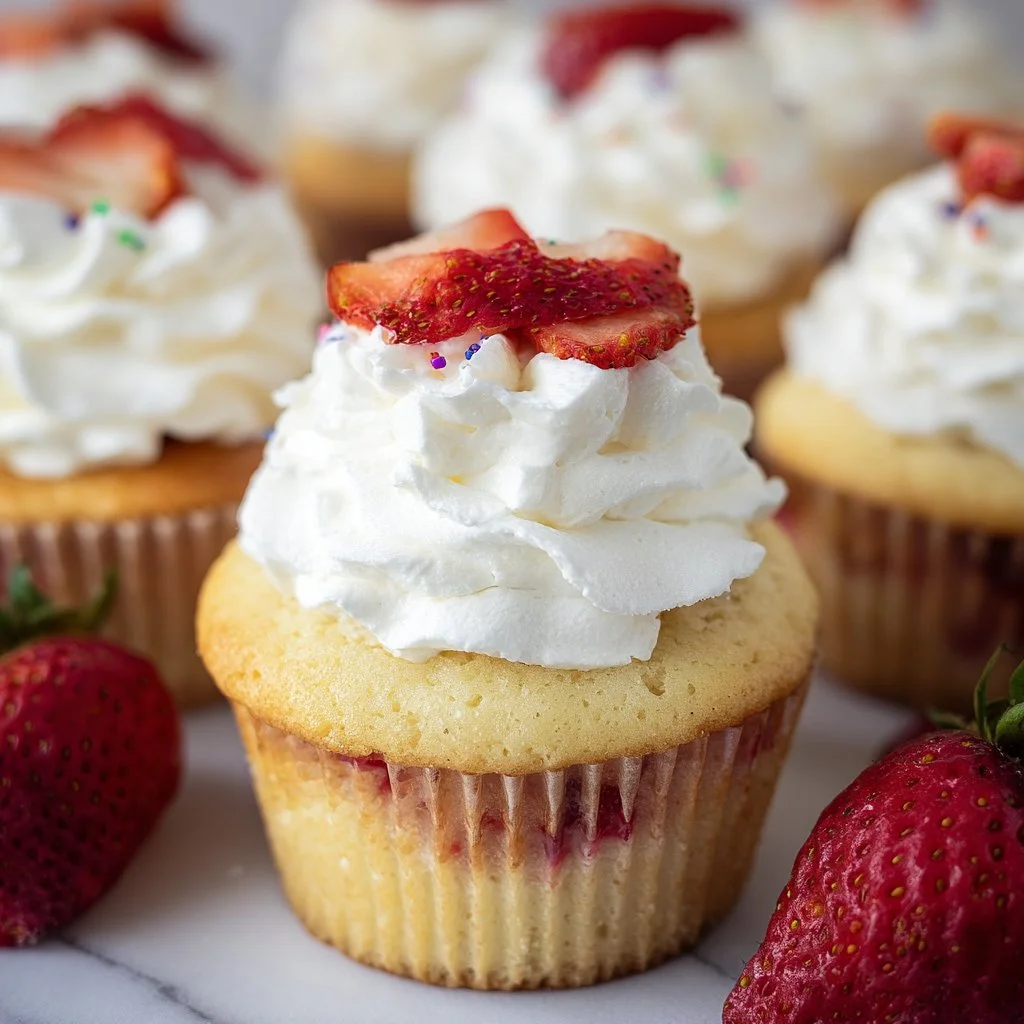
3. Strawberry Shortcake Cupcakes
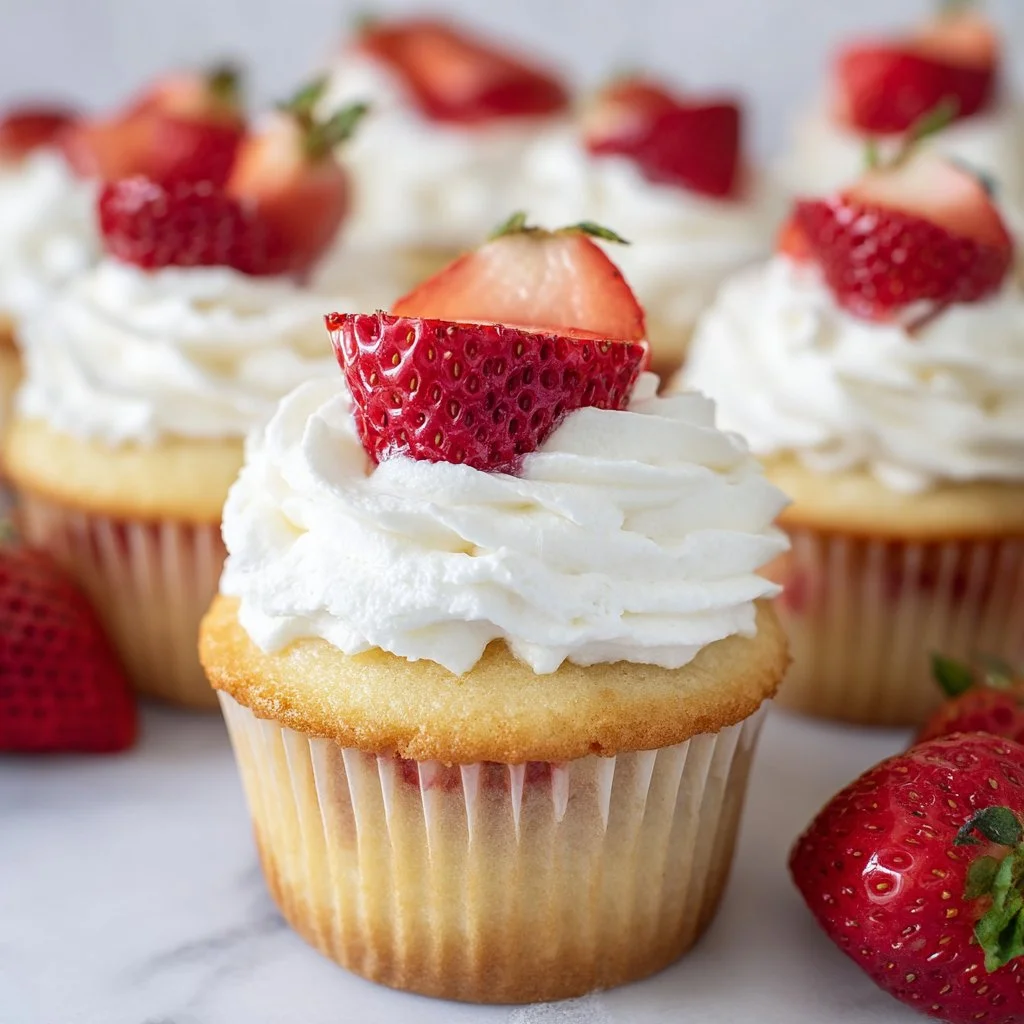
Strawberry Shortcake Cupcakes
Strawberry Shortcake Cupcakes are a bright, seasonal treat that bring the sunny flavors of fresh strawberries into a tender, buttery cupcake topped with cloud-like whipped cream. These cupcakes highlight simple ingredients — ripe strawberries, vanilla, and a soft cake crumb — while offering a lovely contrast between the lightly sweet cake and juicy berry topping. If you love baking from scratch and celebrating the flavors of spring and summer, this recipe is worth trying: it’s approachable for weekday baking yet pretty enough for weekend gatherings and potlucks. For another strawberry-forward dessert idea, you might also enjoy a strawberry milkshake pound cake for a different twist on the same fruit-forward notes: strawberry milkshake pound cake recipe.
Ingredients & Equipment
Ingredients
- 1/2 cup salted butter, softened
- 1 cup sugar
- 2 eggs
- 1 1/2 cup all purpose flour
- 1/2 cup milk
- 1 tsp vanilla extract
- 2 tsp baking powder
- 1 1/2 cup heavy whipping cream
- 1/2 cup powdered sugar
- 1 cup chopped strawberries
- 1 tbsp sugar
Notes
- Use room-temperature butter and eggs for the best emulsion and volume in the cupcakes.
- If your strawberries are very sweet, reduce the 1 tbsp sugar for the chopped berries to 1/2 tbsp.
- Powdered sugar in the whipped cream helps stabilize it and adds sweetness without grittiness.
Helpful equipment
- Electric mixer (hand or stand mixer) — for creaming and whipping.
- Muffin tin and 12 cupcake liners.
- Ice cream scoop or large spoon for portioning batter evenly.
- Chilled metal mixing bowl (for whipping cream).
- Spatula and small bowl for macerating strawberries.
- Wire rack to cool cupcakes.
For another strawberry-saturated dessert idea that complements this style, consider trying a denser strawberry loaf for sipping with tea: strawberry milkshake pound cake guide.
Step-by-Step Instructions (with tips)
-
Preheat the oven.
- Set the oven to 350 degrees Fahrenheit and position a rack in the center.
-
Cream the butter and sugar.
- In a large mixing bowl add the butter and sugar. Beat with an electric mixer until light and fluffy, about 2–3 minutes. This step creates tiny air pockets that help the cupcakes rise.
-
Add the eggs.
- Next add the eggs one by one, beating after each egg. Scrape down the bowl as needed to keep everything evenly mixed.
-
Build the batter.
- Then alternately add the flour and milk into the cupcake batter until all is added. Beat until combined after each addition. Start and end with the flour for the smoothest texture.
-
Stir in flavoring.
- Stir in the vanilla extract. Avoid overmixing once the flour is fully incorporated to keep cupcakes tender.
-
Fill the tins.
- Next line a muffin tin with cupcake liners and add about ice cream scoop sized spoonfuls of the batter to each cupcake. You will be able to make 12 cupcakes. An ice cream scoop ensures uniform bake times.
-
Bake.
- Bake for 20 minutes, or until a toothpick inserted in the center comes out with a few moist crumbs. Ovens vary; check at 18 minutes the first time you make these.
-
Macerate the strawberries.
- While the cupcakes are baking combine the chopped strawberries and sugar. Place in the fridge until needed. Macerating draws out juices and softens the fruit, creating natural syrupy pockets.
-
Whip the cream.
- Then make the whipped cream frosting. Add the heavy whipping cream to a chilled bowl (just place in the freezer 30–60 minutes before needed!). Beat with an electric mixer until soft peaks form. This will take a few minutes.
- Next add in the powdered sugar. Beat again until the frosting forms. Be careful not to over mix — you want soft, stable peaks.
-
Assemble.
- Once the cupcakes have cooled, add whipped cream frosting to each cupcake and spread with a spoon or use a frosting bag and tip. Add a spoonful of the strawberries on top.
-
Enjoy!
- These cupcakes are best enjoyed the same day but can be stored (see storage tips below).
Baking tips and variations
- Even-sized cupcakes: Use an ice cream scoop to keep cupcakes uniform so they bake evenly.
- Roasted strawberry option: Instead of macerating, toss sliced strawberries with a touch of sugar and roast at 375°F for 10–15 minutes to deepen flavor and concentrate sweetness. Cool before topping.
- Fresh vs. cooked berry topping: Fresh macerated strawberries keep a bright, juicy flavor; roasted strawberries add caramelized depth. Both are delicious.
- Stabilizing whipped cream longer: Add 1 teaspoon of vanilla and 1 tablespoon of instant vanilla pudding mix to the whipped cream for a firmer frosting that holds up longer at room temperature.
- Dairy-free version: Use a plant-based whipping cream alternative and dairy-free butter substitute; results will vary but remain delicious.
- Gluten-free cupcakes: Substitute a 1:1 gluten-free flour blend for all-purpose flour, and test for doneness as gluten-free batters can behave differently.
For a companion strawberry recipe in your baking rotation, try this nostalgic loaf as a follow-up: strawberry milkshake pound cake.
Storage, Freezing & Make-Ahead Tips
Storing leftovers
- Short-term (same day): Keep cupcakes covered loosely with plastic wrap or in an airtight container in the refrigerator. The whipped cream topping is best chilled.
- Up to 3 days: Store assembled cupcakes in a single layer in an airtight container in the fridge. The whipped cream will soften over time, so consuming within 24–48 hours is ideal for texture.
Freezing
- Unfrosted cupcakes: Freeze cooled cupcakes in a single layer on a baking sheet until solid, then transfer to a freezer-safe bag or container. Freeze up to 2 months. Thaw overnight in the refrigerator before frosting.
- Frosted cupcakes: Whipped cream is delicate; freezing assembled cupcakes can cause texture changes. If you must freeze assembled cupcakes, flash-freeze on a tray, then wrap individually and freeze up to 1 month. Thaw in the fridge and note the whipped cream may weep slightly.
Make-ahead strategy
- Make the cupcakes and refrigerate unfrosted for up to 2 days; whip the cream and macerate strawberries the morning of serving for the freshest topping.
- For parties: Bake cupcakes a day ahead, refrigerate in an airtight container, and whip the cream the day of the event. Assemble shortly before guests arrive to keep toppings lively.
Portioning and transport
- For picnics: Place cupcakes in a cupcake carrier or a snug container with a layer of paper towels to absorb any excess moisture. Keep chilled until serving time.
- For sharing: Consider packaging unfrosted cupcakes with a small container of macerated strawberries and whipped cream so recipients assemble fresh at home.
How to Use / Serve This Dish
Serving ideas
- Afternoon tea: Present these cupcakes on a pretty platter with small forks; their delicate flavors pair beautifully with herbal or fruity teas.
- Brunch addition: Offer them as a sweet option alongside fresh fruit salads and light pastries for a seasonal brunch spread.
- Kid-friendly treat: These are easy to assemble with kids — let little hands spoon strawberries on top or pipe simple rosettes of whipped cream.
- Decoration ideas: Add a thin slice of strawberry fan, a small mint leaf, or a sprinkle of finely grated white chocolate for a refined finish.
Creative variations
- Layered mini shortcakes: Spoon a little jam or strawberry compote into the center of each cupcake before topping to create a filled surprise.
- Lemon-berry twist: Add 1 teaspoon of lemon zest to the batter for a bright citrus note that elevates the strawberry flavor.
- Crunchy contrast: Top with chopped toasted almonds or a few crushed graham cracker crumbs for a shortcake-inspired crunch.
Pairing suggestions (non-alcoholic)
- Hot beverages: Earl Grey, chamomile, or green tea complement the sweet tartness of the strawberries.
- Cold beverages: Sparkling water with a squeeze of citrus or chilled iced tea make light, refreshing companions.
FAQ
Q1: Can I use frozen strawberries for the topping?
A1: Yes, you can use frozen strawberries. Thaw them first and drain excess liquid, then gently macerate with the sugar. Keep in mind frozen berries tend to be softer and may be more syrupy than fresh when thawed.
Q2: How long does the whipped cream frosting hold up?
A2: Fresh whipped cream made with powdered sugar holds up well for a few hours at room temperature and up to 24–48 hours in the refrigerator. For longer stability (e.g., for a party), add a small stabilizer like 1 tablespoon of instant pudding mix or use cream stabilizer designed for whipped toppings.
Q3: Can I make mini cupcakes instead of standard size?
A3: Absolutely. Use a mini muffin tin and reduce baking time to about 10–12 minutes; check frequently with a toothpick. Yield will increase and they’re perfect for bite-sized servings at large gatherings.
Q4: What is a good egg substitute if I need to avoid eggs?
A4: For a vegan or egg-free option, try a commercial egg replacer or use flax “eggs” (1 tablespoon ground flaxseed + 3 tablespoons water per egg, mixed and rested). Texture may be slightly denser, so consider adding a touch more leavening (an extra 1/4 tsp baking powder) to compensate.
Conclusion
These Strawberry Shortcake Cupcakes are a simple, satisfying way to celebrate peak strawberry season — tender vanilla cupcakes, soft whipped cream, and sweet, bright strawberries make a comforting dessert that’s easy to share. If you’re inspired to explore more strawberry shortcake variations, Chocolate with Grace offers a lovely take on the classic, and Sally’s Baking Addiction has a tested guide with helpful tips. For science-forward tips on strawberry textures and baking outcomes, check Scientifically Sweet, and Girl Vs Dough shares a beautiful, photo-rich version if you want visual assembly ideas. For more inspiration, see these reliable takes on the strawberry shortcake cupcake: Chocolate with Grace’s Strawberry Shortcake Cupcakes, Sally’s Baking Addiction strawberry shortcake cupcakes, Scientifically Sweet’s strawberry shortcake cupcakes, and Girl Vs Dough’s Strawberry Shortcake Cupcakes Recipe.
I hope you bake a batch and enjoy them with friends or family — if you try this recipe, I’d love to hear how your cupcakes turned out or see a photo of your finished treats. Happy baking!
4. Cupid’s Vodka Spiked Raspberry Lemonade

Cupid’s Vodka Spiked Raspberry Lemonade
Cupid’s Vodka Spiked Raspberry Lemonade is the kind of seasonal cocktail that feels like a warm hug in a glass — bright, slightly fizzy, and dressed up for celebration. If you love raspberries and sunny citrus with a playful adult twist, this recipe brings together raspberry vodka, fresh berries, and tangy lemonade to make something both comforting and flirty. It works beautifully for Valentine’s gatherings, spring brunches, or any time you want a pretty, easy-to-make drink that tastes like summer is just around the corner. For a similar bright spritz idea and more citrus inspiration, check out this raspberry spritz twist I love: citrus margarita and pomegranate mint raspberry spritz recipe.
Why this recipe works (quick overview)
This vodka-spiked raspberry lemonade balances sweet and tart with a clean vodka backbone. The fresh raspberries add texture and real fruit flavor, while edible glitter makes it feel festive and elevated without any complicated bartending skills. It’s refreshing, visually appealing, and simple enough to whip up in minutes for a crowd or keep chilled for a cozy night with someone special.
Ingredients & Equipment
Ingredients
- 1 cup raspberry vodka
- 2 cups lemonade (homemade or high-quality store-bought)
- 1 cup fresh raspberries (plus extra for garnish)
- 1–2 tablespoons edible glitter (petal or pearl shimmer works nicely)
- Ice (large cubes or crushed)
- Lemon slices for garnish
Notes:
- If you prefer less alcohol, reduce vodka to 3/4 cup and top with sparkling water for extra fizz.
- Use organic lemons if making your own lemonade for the freshest flavor.
Helpful Equipment
- Pitcher (large enough for at least 4 cups)
- Blender or muddler (for crushing raspberries) — a blender makes a smoother drink; a muddler keeps more texture.
- Fine mesh sieve (optional, if you prefer seed-free lemonade)
- Long spoon for stirring
- Measuring cups and spoons
- Serving glasses (highball, mason jars, or coupe glasses for a more elegant look)
- Small bowl or baking tray (to dust rims with glitter if desired)
- Ice bucket (optional for parties)
Tip: If you want a super-smooth texture, blend the raspberries with a little lemonade and strain through a fine sieve to remove seeds before combining with vodka.
Step-by-Step Instructions (with tips)
1. Combine vodka and lemonade
In a large pitcher, pour 1 cup raspberry vodka and 2 cups lemonade. Stir gently to combine so the flavors marry without flattening the lemonade’s brightness.
Tip: For a lighter cocktail, use 1/2 cup vodka and 2 cups lemonade, then add 1 cup soda water. For a fizzy variation, replace half the lemonade with chilled sparkling lemonade or lemon-lime soda.
2. Stir in fresh raspberries
Add 1 cup fresh raspberries directly to the pitcher. Use a muddler or the back of a spoon to gently crush a few raspberries to release juices while leaving some whole for texture and garnish.
Variation: If you prefer a roasted flavor, toss the raspberries on a baking tray with a teaspoon of sugar and roast at 375°F for 8–10 minutes until softened and slightly caramelized. Cooling them slightly before adding will introduce a deeper, jammy note to the drink. Alternatively, for a brighter, fresher berry pop, bring raspberries to a quick boil with a tablespoon of sugar and simmer for 2 minutes; cool before adding — this makes a simple raspberry syrup.
3. Add ice to glasses and pour
Fill serving glasses with ice and pour the vodka lemonade mixture over the ice. If serving a crowd, keep the pitcher on ice or in a larger bowl filled with ice to maintain chill.
Tip: Use large ice cubes to reduce dilution, or crushed ice for a more slushy presentation. Pre-chill the pitcher and glasses for a bolder chill and cleaner taste.
4. Stir in edible glitter for a sparkling effect
Sprinkle 1–2 tablespoons of edible glitter into the pitcher or into each glass and stir gently so the shimmer disperses throughout the drink. Edible glitter is safe to consume — look for cosmetic-grade or food-grade glitter labeled as edible.
Kitchen tip: If you want the glitter to cling to the rim, dampen the rim of each glass with a lemon wedge and dip lightly into glitter on a shallow plate before pouring.
5. Garnish and serve
Top each glass with a lemon slice and a few fresh raspberries on a skewer or floating in the drink. Serve immediately while cold and sparkling.
Flavor suggestion: Add a sprig of fresh mint or a few basil leaves to each glass for a herbal lift. A tiny splash of elderflower liqueur (about 1 tablespoon per pitcher) brings a floral sweetness that pairs beautifully with raspberries.
Variations & Pro tips
- Mocktail version: Replace vodka with raspberry syrup or a splash of cranberry juice and top with sparkling water. Keep the edible glitter for the same festive look.
- Rosé twist: Swap vodka for a chilled rosé wine (about 2 cups) and reduce lemonade to taste for a lighter, wine-based spritz.
- Frosty slush: Freeze lemonade in ice cube trays; blend frozen cubes with vodka and raspberries for a blended frozen cocktail.
- Sugar rim or salted rim: Use sugar for a sweeter finish, or for a savory contrast, try a lemon-pepper or rosemary-salt blend for a sophisticated edge.
Storage, Freezing & Make-Ahead Tips
Storing leftovers:
- Refrigerate any leftover vodka lemonade in a sealed pitcher or bottle for up to 48 hours. Fresh raspberries will soften over time and may bleed color into the lemonade, which is fine but reduces texture. Give the pitcher a gentle stir before serving.
Freezing:
- Do not freeze the finished cocktail with vodka if you want the same texture later — alcohol lowers the freezing point and will make a slushy or partially frozen texture. If you’d like to prep ahead, freeze the lemonade (without vodka) in ice cube trays. When ready to serve, blend the frozen lemonade cubes with vodka and raspberries for an instant frozen cocktail.
- For longer-term storage, make a raspberry syrup (cook raspberries with sugar, strain, and freeze syrup in airtight containers). Thaw and combine with lemonade and vodka as needed.
Make-ahead:
- Make the raspberry component ahead by making a quick raspberry compote or syrup (equal parts raspberries and sugar simmered until thick, then cooled). Store in the refrigerator for up to a week. When serving, mix syrup with vodka and lemonade to taste, and add fresh raspberries for garnish.
Portioning advice:
- This recipe yields about 3–4 standard cocktail servings (depending on glass size). For a party, scale up maintaining roughly a 1:2 ratio of vodka to lemonade (1 part vodka to 2 parts lemonade) and adjust sweetness or fizz with soda water as needed.
How to Use / Serve This Drink
Serving ideas:
- Valentine’s Day or romantic dinners: Serve in coupe glasses with a raspberry and lemon twist perched on the rim, and soft music in the background. Edible glitter gives it an extra romantic sheen.
- Brunch or garden parties: Offer a non-alcoholic mocktail alongside by swapping vodka for sparkling water; place a tray with garnishes like mint, lemon wheels, and extra raspberries so guests can personalize their drinks.
- Pairings: This cocktail pairs beautifully with light bites — think goat cheese crostini with honey, smoked salmon canapés, lemon herb chicken skewers, or fresh summer salads with feta and berries. For desserts, serve with shortbread cookies, lemon bars, or a raspberry tart.
Creative presentations:
- Make a pitcher “bar”: provide a large pitcher of the vodka-lemonade base and small bowls of garnishes: roasted raspberries, mint, basil, edible flowers, and glitter. Guests can build their own glasses.
- Frozen pops: Freeze the lemonade (no vodka) in popsicle molds, insert a fresh raspberry or two in each mold for a pretty swirl. Serve to kids or as a non-alcoholic treat while adults enjoy the spiked version.
FAQ
Q: Can I substitute another spirit for vodka?
A: Yes. Gin adds herbal, floral notes that complement raspberries and lemon very well. Tequila blanco gives a brighter, slightly savory edge. For a lighter, wine-based option, try chilled rosé. Keep in mind the strength and flavor of the spirit when substituting — gin will change the profile more than tequila or wine.
Q: How long will this cocktail keep in the fridge?
A: If mixed with vodka, it will keep for about 24–48 hours refrigerated, though the texture of the fresh raspberries will change and drink may look cloudier. For best flavor and appearance, serve within the first day. If you’ve used sparkling components, they will lose fizz over time, so add bubbly at the last moment.
Q: Are there good alternatives to edible glitter?
A: Yes — you can use a splash of champagne or sparkling wine for shine and fizz, or a few drops of clear vanilla syrup or lemon simple syrup for a glossy finish. Edible flower petals also add visual charm without shimmer.
Q: Can I make this drink less sweet or more tart?
A: Absolutely. Use tart homemade lemonade or reduce the amount of store-bought lemonade and add fresh lemon juice to taste. You can also increase vodka slightly to counter sweetness, or add a splash of club soda for dilution and brightness.
Tips for hosting
- Prepare garnishes in advance: wash raspberries and slice lemons the morning of your event. Keep them chilled on a tray.
- Label an alcohol-free version clearly if you’re serving guests with varying preferences. A fun sign, chalkboard, or small tag helps.
- If serving for a big group, pre-batch multiple pitchers with vodka and lemonade separately and add raspberries, ice, glitter, and garnishes just before serving to keep things fresh.
Conclusion
There’s something effortlessly charming about Cupid’s Vodka Spiked Raspberry Lemonade — it’s bright, comforting, and celebratory, perfect for seasonal gatherings or cozy evenings when you want a drink that looks as good as it tastes. If you want to see festive drink specials for Valentine’s Day that capture a similar playful spirit, check out this round-up of Applebee’s Drink Specials – $6 Smoocho Valentine’s Day Cocktails. For cocktail makers who enjoy clever convenience, consider exploring Bartesian Cocktail Capsules | Bartesian Machine Drink Pods for inspiration on flavor pairings and easy serving ideas. And if you love seasonal cocktail menus and news about returning favorites, you might enjoy reading about Applebee’s® Tipsy Cupid & More Return for Valentines Day.
Try this recipe, make it your own, and share it with friends — whether you’re toasting a holiday, a small victory, or just a sunny afternoon, Cupid’s Vodka Spiked Raspberry Lemonade is a delightful way to celebrate.
5. How to Make Strawberry Hearts

There’s something wonderfully simple and joyful about turning fresh strawberries into little hand-held tokens of love. “How to Make Strawberry Hearts” is a seasonal, comforting project perfect for spring and summer when berries are at their peak — sweet, fragrant, and vibrant red. Whether you’re planning a cozy dessert for a family meal, a festive treat for Valentine’s Day, or a fun weekend activity with kids, these chocolate-dipped strawberry hearts deliver on flavor and charm. If you enjoy making from-scratch seasonal goodies, you might also like my guide to how to make homemade pumpkin puree for autumn baking and preserves.
Ingredients & Equipment
- 2 lbs fresh strawberries (medium to large)
- 2 cups dark or milk chocolate chips
Notes: Buy firm, ripe strawberries — they should be bright red with fresh green caps and no bruises. If you prefer a sweeter finish, choose milk chocolate chips; for a richer, slightly bitter contrast, use dark chocolate. You can also use high-quality chopped chocolate or couverture if you have it.
Helpful equipment:
- Small, sharp paring knife for carving
- Wooden skewers or popsicle sticks
- Microwave-safe bowl or a heatproof bowl for a double boiler
- Parchment paper or a silicone baking mat
- Baking tray or plate
- Small offset spatula or spoon for drizzling (optional)
- Kitchen thermometer (optional but helpful for tempering chocolate)
If you enjoy pairing sweets with savory brunch items, consider adding a fun contrast from a favorite recipe like Bangin’ Breakfast Potatoes to your spread.
Step-by-Step Instructions (with tips)
Preparation
- Rinse and gently pat dry fresh strawberries. Make sure strawberries are completely dry — any surface moisture can cause melted chocolate to seize or not adhere properly.
- With a small, sharp knife, in a circular motion, carve out the stem of the strawberry. Take your time; a gentle circular cut around the green cap removes the core while keeping the berry intact. See image above.
- Slice the strawberry in half. Use a steady hand and a sharp knife to get a clean, even cut so both halves look symmetrical.
- At the top center of each berry half, cut a small V-shape. This creates the notch that forms the “heart” at the top. A tiny V, about 1/4 inch deep, is usually enough for a medium strawberry.
- Gently insert a wooden stick at the bottom of the heart shape. Push the skewer up just far enough to secure the half without splitting it — this makes dipping easier and gives you a cute handheld presentation.
- Heat chocolate chips in the microwave for 30 seconds. Repeat in 30-second intervals, stirring in between, until chocolate is melted and smooth. Alternatively, melt chocolate using a double boiler over gently simmering water, stirring until silky. If using a thermometer, aim to keep melted chocolate around 88–90°F for dark chocolate and a few degrees lower for milk. Overheating can make the chocolate grainy.
- Dip strawberries in melted chocolate. Hold the skewer and tilt the bowl or spoon the chocolate to coat as much of the heart as you’d like. You can fully coat, half-coat, or just dip the tip for a decorative look.
- Let dry on parchment paper until chocolate firms. Place dipped strawberries on parchment-lined trays with the chocolate side up and allow to set at room temperature. For faster setting, chill briefly in the fridge (6–10 minutes), but avoid long refrigeration which can create condensation and dull the chocolate’s sheen.
Tips while you work:
- If chocolate thickens as you work, add a teaspoon of neutral oil (coconut or vegetable) or a small amount of melted cocoa butter to loosen it. Stir gently.
- For a glossy finish, consider tempering the chocolate by cooling and re-warming it to the correct temperature ranges; this gives the chocolate a snap and shine. If you’re not tempering, keep the chocolate smooth and avoid getting water in it.
- Decorations: before chocolate fully sets, sprinkle crushed nuts, toasted coconut, crushed cookies, or edible glitter. Drizzle white chocolate for contrast after the first layer sets.
- Work in a single layer without crowding the tray so strawberries don’t touch and stick together.
- To troubleshoot: if chocolate seizes (becomes grainy), add a small amount of warm cream or oil and whisk until smooth; this may change the texture but often salvages it.

Variations
There are a few lovely ways to mix up this basic technique:
- Oven-roasted strawberry hearts: Halve and cut hearts as directed, place on a baking sheet with a sprinkle of sugar, and roast at 350°F for 8–12 minutes for intensified flavor and a slightly jammy texture. Cool before dipping.
- Fresh macerated version: Toss cut strawberries in a tablespoon of sugar and a squeeze of lemon for 10–15 minutes to bring out juices; pat dry before dipping for a sweeter, juicier bite.
- White chocolate or ruby chocolate: Swap the dark/milk chips for white or ruby chocolate for a different flavor and color palette. Remember white chocolate melts differently and can be more temperamental.
- Nutty or boozy finish: Dip in chopped pistachios or hazelnuts, or brush with a light rum- or Grand Marnier-infused glaze before serving for an adult twist.
Storage, Freezing & Make-Ahead Tips
Best practices for keeping your strawberry hearts fresh and beautiful:
- Short-term storage: Store dipped strawberries in a single layer in an airtight container lined with parchment. Keep them in the coolest part of the refrigerator, but not in the crisper drawer where humidity can cause sweating. Use within 24–48 hours for best texture.
- Avoid stacking: If you must stack layers, place parchment between layers to prevent sticking and smudging.
- Freezing: Freezing fresh strawberries dipped in chocolate is possible but tricky. Chocolate can develop a white film (bloom) from moisture changes. If you plan to freeze, flash-freeze the plain, halved hearts on a tray first for 1 hour, then dip in tempered chocolate and freeze in a single layer. Thaw slowly in the fridge to minimize condensation. Note: texture may change slightly; frozen-thawed berries will be softer.
- Make-ahead: You can prepare the cut heart-shaped strawberries a few hours ahead and keep them uncoated in the fridge on a paper towel-lined tray. Dry them thoroughly and bring them to room temperature before dipping to avoid moisture issues.
- Portioning: For parties, arrange on tiered platters or pre-stick the skewers into a block of floral foam (covered in parchment) for a cute display. Individual servings on dessert plates with a dollop of whipped cream are elegant and simple.
For a richer dessert table idea, pair these treats with something sticky-sweet like my burnt honey pie for an unforgettable contrast.
How to Use / Serve This Dish
Strawberry hearts are wonderfully versatile. Here are serving ideas and pairing suggestions to make them shine:
- Classic dessert: Serve 2–3 strawberry hearts per person alongside a scoop of vanilla bean ice cream and a drizzle of balsamic reduction for a restaurant-style finish.
- Party platter: Arrange on a platter with other dipped fruits (pineapple wedges, banana slices) and small cookies for a colorful dessert board.
- Breakfast or brunch accent: Add one or two to waffles, pancakes, or a stack of French toast for a romantic brunch touch; they pair surprisingly well with savory dishes like crispy breakfast potatoes or omelettes — try them with Bangin’ Breakfast Potatoes for a sweet-savory spread.
- Drinks pairing: Champagne, Prosecco, or even a sparkling rosé complements the chocolate and strawberry combination beautifully. For non-alcoholic options, serve with sparkling elderflower soda or a chilled hibiscus iced tea.
- Gift idea: Pack chilled strawberry hearts in small boxes with parchment and a cooling pack for a thoughtful edible gift (deliver the same day to avoid melting).
Frequently Asked Questions
1. Can I use frozen strawberries for this recipe?
It’s not ideal. Frozen strawberries release moisture as they thaw, which can cause the chocolate to seize and create soggy fruit. If you must use frozen berries, thaw completely, pat very dry, and use right away. Consider flash-freezing fresh halves before dipping for a longer shelf life instead.
2. How long will chocolate-dipped strawberry hearts keep?
Stored properly in a single layer in an airtight container in the fridge, they’re best eaten within 24–48 hours. After that, strawberries can soften and release juice that affects the chocolate texture and flavor.
3. What’s the best chocolate to use — chips, bars, or couverture?
All can work. Chocolate chips are convenient and designed to hold shape, but they sometimes contain stabilizers that affect gloss. High-quality chopped chocolate or couverture melts more smoothly and gives a superior texture and shine if you’re comfortable tempering; milk or dark chocolate choice depends on your preferred balance of sweet vs. bitter.
4. How do I prevent the chocolate from sliding off the strawberry?
Make sure strawberries are completely dry before dipping and don’t overfill the chocolate coating. Let the chocolate set upright on parchment at room temperature. If you chill immediately for too long, condensation can form and cause sliding or dullness — a quick chill (6–10 minutes) is fine but avoid long refrigeration.
Conclusion
Creating “How to Make Strawberry Hearts” is an easy, heartfelt way to celebrate the season and make simple ingredients feel special. The combination of ripe, juicy strawberries and glossy chocolate is comforting and festive — perfect for sharing, gifting, or enjoying quietly at home. If you’d like to see a different visual approach, check out this helpful tutorial from The BakerMama for step-by-step photos. For another professional take, California Strawberries offers a clear, illustrated guide at How to Make Strawberry Hearts | California Strawberries. If you want alternate cutting techniques to refine your hearts, Glamorosi Cooks has a great visual walkthrough: How to Cut Strawberries into Hearts – Glamorosi Cooks.
Give this recipe a try this season — take your time carving, enjoy the little imperfections, and share a photo of your strawberry hearts with someone you love. Happy dipping!
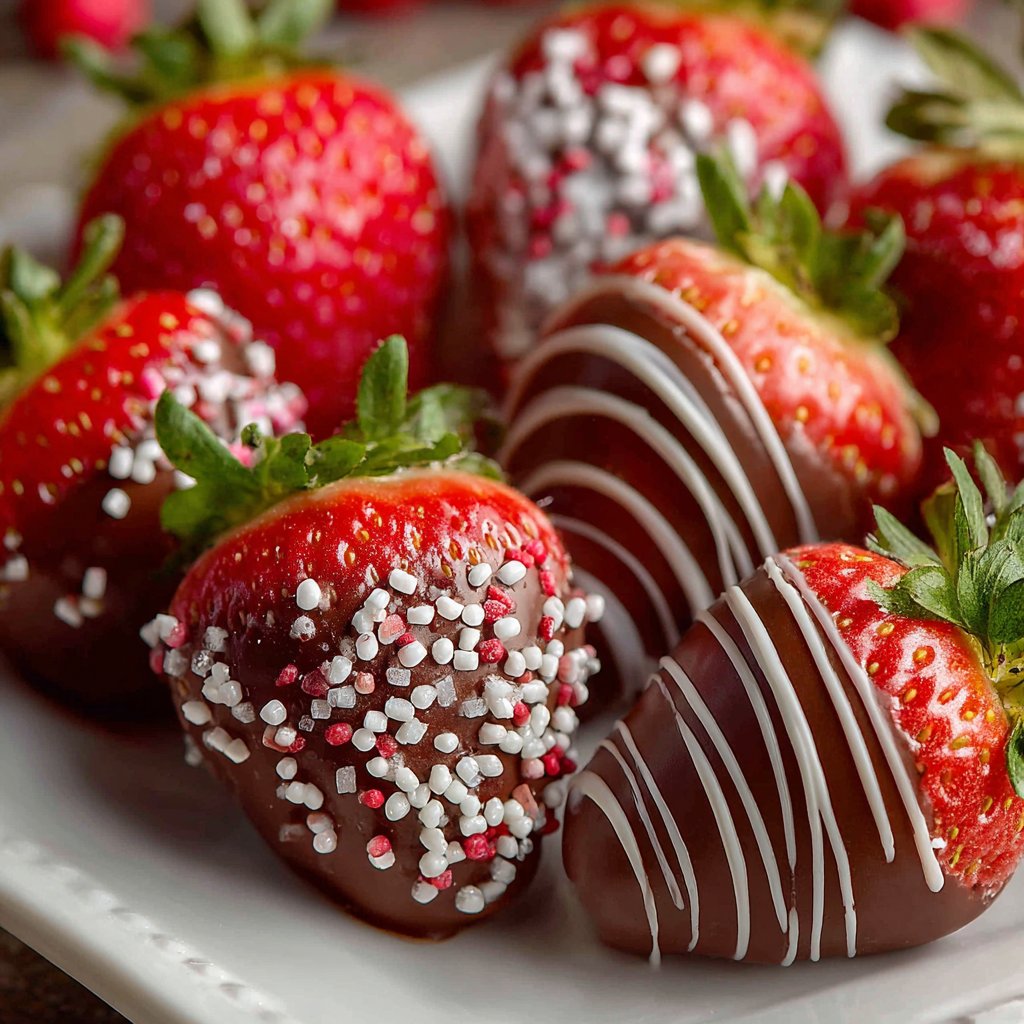
6. Valentine’s Day Chocolate Strawberries

Valentine’s Day Chocolate Strawberries are one of those simple, elegant treats that say “I love you” without much fuss — just sweet, juicy strawberries cloaked in silky chocolate and sprinkles. Whether you’re baking for a loved one, hosting a Galentine’s night, or making a seasonal gift, these chocolate-dipped strawberries bring color, flavor, and a homemade touch to the celebration. The seasonality of fresh strawberries and the cheerful red, white, and pink candy melts make this recipe a natural pick for February. If you love easy holiday projects, you might also enjoy more seasonal ideas on this Valentine’s Day inspiration page to pair with your strawberries.
Why these chocolate strawberries are worth trying
Homemade chocolate-covered strawberries are faster and more personal than store-bought arrangements, and they let you control the sweetness, chocolate quality, and decoration style. They’re customizable — dip, drizzle, sprinkle, or leave plain — and they make a lovely plate for an at-home date night or as part of a dessert spread. Best of all, they’re fun to make: this recipe is forgiving, craft-like, and perfect for cooks of all skill levels.
Ingredients & Equipment
Ingredients
- 16 strawberries (large, fresh, firm)
- Red candy melts
- White candy melts
- Pink candy melts
- Valentine assorted sprinkles
Notes:
- Choose fresh strawberries with green tops intact — the stem makes dipping easier and looks pretty on the finished berry.
- Candy melts are easier to work with than tempered chocolate; if you prefer dark or milk chocolate, see substitutions in the FAQ.
Equipment & helpful tools
- Baking tray or sheet
- Parchment paper or silicone baking mat
- 3 microwave-safe bowls (one for each color)
- Rubber spatula or spoon
- Toothpicks or forks (for poking holes in candy melts if needed)
- Small piping bag or resealable plastic bag (for drizzling)
- Double boiler (optional, if you prefer stovetop melting)
- Candy thermometer (optional, only needed if tempering chocolate)
- Paper towels and a plate for rinsing strawberries
Helpful tip: Use a baking tray that fits in your fridge so you can chill dipped berries quickly. If you expect to make a lot, a cooling rack set over parchment lets excess chocolate drip evenly.
Step-by-Step Instructions (with tips)
-
Rinse and dry strawberries.
- Gently rinse each strawberry under cool water and pat completely dry with paper towels. Drying is essential — water will make the chocolate seize or prevent it from sticking well.
- Leave the green tops intact for easy dipping and to add a decorative finish.
-
Prepare your workspace.
- Line a baking sheet with parchment paper or a silicone mat. Place bowls of candy melts nearby with a spoon or spatula for each.
- Have your sprinkles in shallow bowls for quick access.
-
Melt the chocolate according to the package directions.
- Important: Melt each chocolate one at a time in the microwave, not all three bowls together. This prevents overheating and makes it easier to control consistency.
- Microwave method: Heat candy melts in 20–30 second bursts, stirring between each burst until smooth. If you overheat, add a teaspoon of vegetable oil or coconut oil to smooth the mixture.
- Double-boiler alternative: Place candy melts in a heatproof bowl over simmering water and stir until fully melted.
-
Dip each strawberry into the different colors of chocolate.
- Hold the strawberry by the green stem and dip about two-thirds of the fruit into the chocolate, swirling to coat evenly.
- For a playful tray, dip some entirely in red, some in white, and some in pink. Vary the dipped height for visual interest.
-
Place on a parchment-lined baking sheet and immediately add the sprinkles.
- After dipping, set each berry on the prepared tray and quickly sprinkle while the coating is still wet so sprinkles adhere.
- Use assorted sprinkles to create hearts, pearls, or nonpareils for a festive Valentine’s look.
-
Create extra designs (optional).
- You can also dip some strawberries plain in one color and then drizzle a different color of chocolate over them once the base has set slightly.
- For drizzling: transfer melted chocolate to a small piping bag or a resealable bag with a tiny corner snipped off and drizzle back and forth.
-
Have fun and create different looks.
- Try half-dipped berries (dip half the fruit), polka dots made by dotting with a contrasting color, or marbled berries by lightly swirling two colors while wet.
- Use edible glitter or small candy pearls for sophistication.
-
Let it dry and enjoy!!
- Allow dipped strawberries to set at room temperature for about 30–60 minutes, or place them in the refrigerator for 10–20 minutes to firm up more quickly.
- Serve chilled or at cool room temperature.
Kitchen tips:
- Avoid chocolate flowers: If your candy melts become grainy, reheat gently and stir; add a small amount of oil if needed.
- For a glossier finish with real chocolate, tempering is best, but candy melts are more forgiving for home cooks.
- If you want a firmer shell that won’t bloom or soften at room temperature, chill briefly after dipping.
Variations:
- Use dark, semi-sweet, or milk chocolate instead of candy melts for a richer flavor. See the FAQ for tips on melting and tempering real chocolate.
- Add a sprinkle of sea salt to dark chocolate-dipped berries for a sophisticated sweet-salty contrast.
- For adult parties, dust one color with a drop of liqueur (e.g., Grand Marnier) before dipping for a grown-up twist.
Storage, Freezing & Make-Ahead Tips
Short-term storage:
- Store chocolate-covered strawberries in a single layer on parchment paper inside an airtight container. Place a paper towel under the lid to absorb any excess moisture.
- Keep them refrigerated and eat within 24–48 hours for best texture. Strawberries release moisture over time, which can soften the chocolate coating.
Freezing:
- Freezing dipped strawberries is possible but not ideal for texture. If you must freeze them, place the tray with strawberries in the freezer until fully firm (about 20–30 minutes). Then transfer to an airtight, freezer-safe container with parchment layers between berries.
- Thaw in the fridge before serving. Expect slightly softer berries and potential moisture separation after thawing.
Make-ahead advice:
- For the freshest presentation, dip strawberries the same day you plan to serve them.
- If you need to prepare in advance, wash and thoroughly dry strawberries up to 1 day ahead, but don’t dip until serving day. Uncoated fresh strawberries keep best at room temperature for a few hours or refrigerated for up to 24 hours.
- Make the melted chocolate decorations (drizzles or dipped pieces) a few hours ahead and store in a cool place; reheat briefly if needed.
Portioning suggestions:
- This recipe makes 16 strawberries, which is a lovely tray for two people as a dessert or for a small gathering of 4–6 as part of a dessert selection.
- Double or triple the recipe for larger parties and use multiple baking sheets and bowls to keep colors separate and easy.
How to Use / Serve This Dish
Serving ideas:
- Present the strawberries on a pretty platter with a few fresh mint sprigs and a small dish of extra sprinkles for guests to add.
- Pair with a cheese board: mild cheeses (ricotta, mascarpone) and a few salty crackers balance the sweetness.
- For a brunch twist, serve alongside warm pastries and a pot of fresh coffee or sparkling wine.
Pairings:
- Sparkling wine or Champagne complements the berries and chocolate beautifully — the bubbles cut through richness.
- A light rosé or a fruity Pinot Noir is also a lovely red wine match.
- For non-alcoholic pairings, chilled hibiscus tea or sparkling water with a lemon twist brightens the palate.
Creative uses:
- Turn these into a centerpiece: arrange dipped strawberries around the base of a cake or atop a small tart.
- Gift idea: pack 6–8 strawberries in a small box with tissue paper and a ribbon for a homemade Valentine’s gift.
- Brunch add-on: For a special Valentine morning, add a platter of chocolate strawberries to waffles or pancakes.
For a sweet-and-salty board, you might also include other easy homemade treats like these 4-ingredient chocolate peanut butter bites from this simple recipe idea. If you’re building a full brunch menu, think about complementing the strawberries with something savory like these brunch potatoes — see this brunch potatoes recipe for inspiration.
FAQ
Q: Can I use fresh dark or milk chocolate instead of candy melts?
A: Yes. Use couverture chocolate or chocolate chips and melt gently. If using raw chocolate, you can melt in the microwave in short bursts (20–30 seconds) stirring frequently, or use a double boiler. For the best shine and snap, temper the chocolate — but if you want simplicity, adding a teaspoon of neutral oil (vegetable or coconut) can smooth melted chocolate and make it easier to dip.
Q: How long do chocolate-covered strawberries last?
A: Best eaten within 24–48 hours when stored in the refrigerator. Beyond that, strawberries will begin to release moisture that softens the fruit and can make the chocolate coating look dull or soggy.
Q: Can I freeze dipped strawberries for later?
A: You can freeze them, but texture will suffer. If freezing is necessary, freeze solid on a tray first and store airtight. Thaw in the fridge before serving. Expect some moisture loss and possible chocolate separation.
Q: Any tips for preventing chocolate from seizing or looking grainy?
A: Make sure strawberries are completely dry before dipping. If the chocolate gets a little thick or grainy, add a small amount (1/2–1 teaspoon) of neutral oil and stir until smooth. Avoid overheating; melt in short bursts and stir thoroughly.
Conclusion
Valentine’s Day Chocolate Strawberries are a warm, simple way to celebrate — they’re colorful, customizable, and offer a homemade charm that’s hard to beat. Whether you keep them classic with rich chocolate or play with candy melts and sprinkles, these berries bring joy to the table and a smile to the face of anyone lucky enough to receive them. If you’re looking for inspiration for arrangements or ready-made options, check out this guide to Valentine’s Chocolate Covered Strawberries from a popular gift company for presentation ideas. For gift-wrapping tips and delivery options if you prefer ordering rather than making, see this helpful page on Valentine’s Day gift deliveries and chocolate strawberries. If you’d like a step-by-step video-style walkthrough and more decorating ideas, this video-backed recipe complements the tips above beautifully. Try this recipe and share your unique designs — I’d love to hear how your tray turns out!
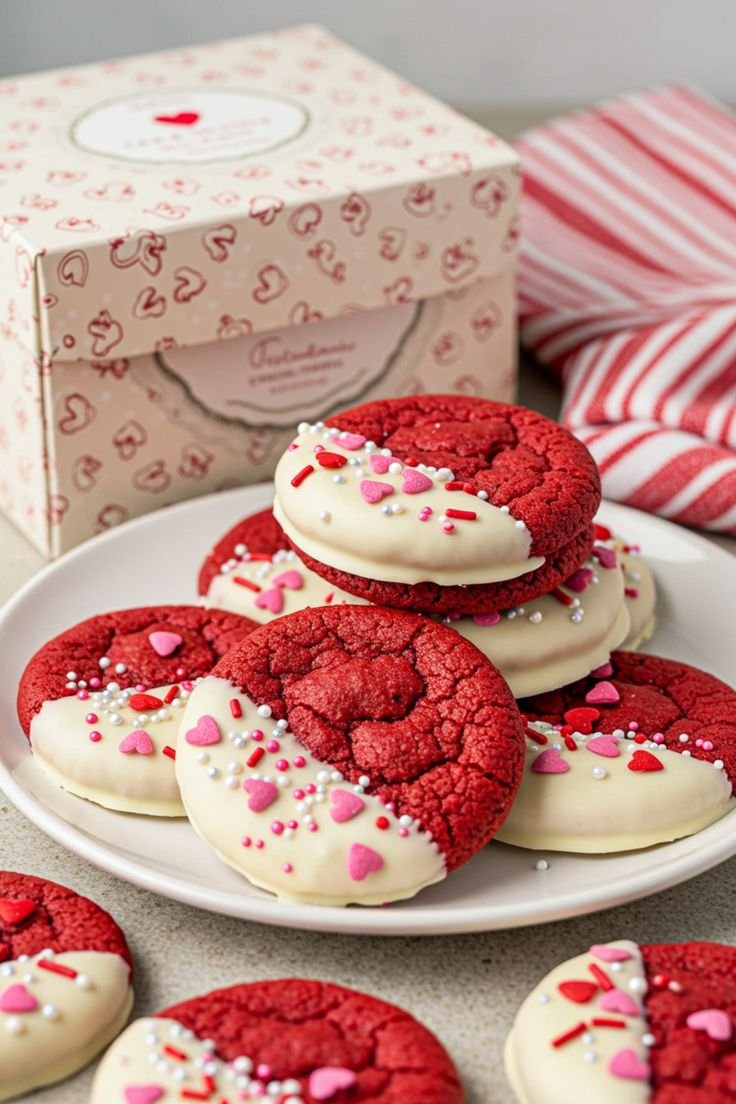
7. Valentine’s Day Red Velvet Cookies
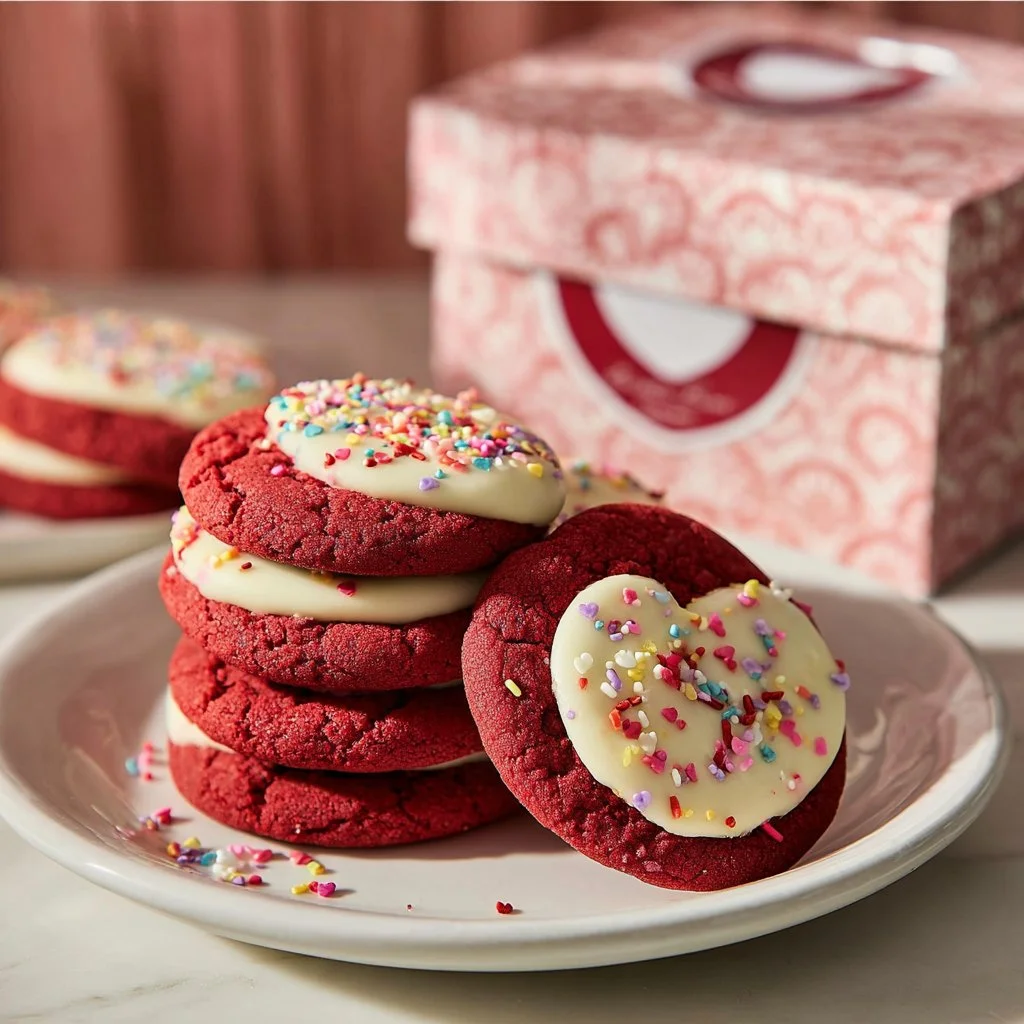
Valentine’s Day Red Velvet Cookies are the kind of recipe that promises warmth, nostalgia, and a little bit of sparkle — all in a single, tender bite. These cookies take the beloved red velvet cake flavor and turn it into a quick, crowd-pleasing cookie that’s perfect for gifting, school parties, or a cozy night in with someone special. With a base of red velvet cake mix and a few pantry staples, you can whip these up in under an hour and still look like you spent all afternoon in the kitchen. If you enjoy simple, satisfying desserts that pack a lot of flavor with minimal fuss, you might also love this 4-ingredient chocolate peanut butter balls as another easy homemade treat to pair alongside.
Ingredients & Equipment
Ingredients
- 1 (15 oz.) box red velvet cake mix
- 1/3 cup vegetable oil
- 2 large eggs
- 1 teaspoon vanilla extract
- 11 oz white chocolate chips
- Sprinkles (red, pink, or mixed — use as much as you like)
Notes on ingredients
- The boxed red velvet cake mix is the shortcut that gives these cookies great structure and the signature flavor quickly. You can use any brand you prefer.
- Vegetable oil keeps the cookies soft and tender; melted butter will work but will change the texture slightly (a little more richness and chew).
- White chocolate chips provide a beautiful contrast to the red cookies; if you can’t find white chips, use chopped white chocolate or a cream cheese frosting dip.
- Sprinkles add a festive Valentine’s touch — use jimmies, nonpareils, or heart-shaped sprinkles.
Helpful equipment
- Mixing bowl and spatula (or a stand mixer paddle)
- Baking tray(s)
- Parchment paper or silicone baking mat
- Oven thermometer (optional, but helpful for oven accuracy)
- Small cookie scoop or tablespoon
- Microwave-safe bowl or double boiler for melting chocolate
- Cooling rack
Tip: If you want super-uniform cookies, chill the dough in a piping bag or shape with a scoop and chill on a tray before baking. For easy cleanup, line trays with parchment.
Step-by-Step Instructions (with tips)
- Prep the baking sheet
- Preheat your oven to 350°F (177°C). Line a baking sheet with parchment paper or a silicone mat so cookies don’t stick and cleanup is easy.
- Place racks in the middle of the oven for even heat.
- Mix cake mix, oil, eggs, and vanilla; chill for 20 minutes
- In a medium mixing bowl, add the red velvet cake mix. Stir in 1/3 cup vegetable oil, 2 large eggs, and 1 teaspoon vanilla until a soft dough forms. The dough will be slightly sticky but should hold together when scooped.
- Cover the bowl (or transfer dough to a bowl covered with plastic wrap) and chill for 20 minutes. Chilling helps the cookies hold their shape and yields a tender, cakey center.
Kitchen tip: If your dough seems too wet, chill longer or add a tablespoon of extra cake mix. If it’s too dry, add a teaspoon of milk or a little more oil.
- Scoop and bake at 350°F for 8–10 minutes
- Use a small cookie scoop or tablespoon to portion dough into even balls (about 1.5 tablespoons each). Place them about 2 inches apart on the prepared baking sheet.
- Bake in the preheated oven at 350°F for 8–10 minutes. The cookies should look set on top but still slightly soft in the centers; they continue to set as they cool.
Baking tip: For chewy edges with soft centers, bake closer to the lower end of the time range. For a cakier, fully set cookie, bake a minute or two longer. If you’re using a convection oven, reduce temperature by 25°F and start checking earlier.
- Dip cookies in melted chocolate and add sprinkles
- While cookies cool slightly on the baking sheet for 2–3 minutes, melt the white chocolate chips in a microwave-safe bowl in 20–30 second bursts, stirring between each burst until smooth. Alternatively, use a double boiler for more control.
- Dip the tops of each cookie into the melted white chocolate or drizzle the chocolate over the cookies with a spoon. While the chocolate is still wet, sprinkle on the sprinkles so they stick.
Chocolate tip: For a shinier finish and to avoid streaking, temper the white chocolate or add a small amount of coconut oil (1 teaspoon) to help smooth it out. If you want a pink-tinged dip, stir in a drop of oil-based red food coloring into the chocolate — avoid water-based coloring, which can seize white chocolate.
- Set for 10 minutes
- Transfer dipped cookies to a cooling rack or back onto parchment and let the chocolate set for about 10 minutes. If you’re short on time, chill them briefly in the refrigerator (3–5 minutes) but don’t leave them too long or condensation can form.
- Once set, store or plate for serving.
Variations and flavor suggestions
- Natural red: If you prefer natural color, make a small beet puree (roast or boil a beet, then blend) and add 1–2 teaspoons to the dough. Roasting vs boiling beets gives different flavor profiles — roasting concentrates sweetness and deepens the color, while boiling is milder. Test a small batch before changing the whole dough.
- Swap chips: Use dark chocolate chips, milk chocolate, or chopped white chocolate instead of chips for different flavor balances.
- Frosting-dipped: Skip the melted chocolate and top with a quick cream cheese glaze (mix 4 oz cream cheese, 1/2 cup powdered sugar, and 1–2 tbsp milk).
- Sandwich cookies: Spread cream cheese frosting between two cookies for a red velvet cookie sandwich.
Kitchen safety & troubleshooting
- If white chocolate seizes (becomes grainy) in the microwave, try adding a teaspoon of vegetable oil and gently stirring to smooth it. If that fails, discard and melt a new batch carefully at lower power.
- Uneven baking? Rotate your tray halfway through baking or check your oven temperature with an oven thermometer.
Storage, Freezing & Make-Ahead Tips
Short-term storage
- Store cooled cookies in an airtight container at room temperature for up to 3 days. Place a sheet of parchment between layers to prevent sticking and preserve appearance.
- For a slightly softer result, add a slice of bread to the container; it releases moisture that keeps cookies tender.
Long-term freezing
- Freeze baked cookies: Arrange cooled cookies in a single layer on a baking sheet and flash-freeze for 1–2 hours. Once firm, transfer to a freezer-safe bag or container with layers separated by parchment. Freeze for up to 3 months.
- Freeze dough balls: Portion the cookie dough into balls and freeze on a tray until firm, then transfer to a bag. Bake from frozen — add 1–2 minutes to the bake time.
Thawing and reheating - Thaw frozen baked cookies at room temperature for 20–30 minutes. Warm briefly in a 300°F oven for 3–5 minutes if you prefer a fresh-baked feel.
Make-ahead ideas - You can bake these a day ahead and decorate the day-of for fresher chocolate shine; after dipping, allow them to set and store in a cool spot.
- Prepare the dough and refrigerate up to 24 hours before scooping and baking to deepen the flavor.
Portioning advice
- This recipe yields roughly 24 small cookies (depending on scoop size). For larger cookie batches for parties, double the recipe and bake on multiple trays, rotating for even baking.
How to Use / Serve This Dish
Serving ideas
- Gift-ready: Arrange cookies in a decorative box or cellophane bag with tissue paper and add a handwritten tag for Valentine’s gifts.
- Dessert platter: Serve these cookies alongside small scoops of vanilla bean ice cream, chocolate-covered strawberries, and mini brownies for a romantic dessert board.
- Brunch sweet: Pair a plate of warm red velvet cookies with coffee, cappuccino, or a pink-hued hot chocolate for a themed brunch; they also go well with fresh berries.
Pairings and creative variations
- Cheese and cookies: For a playful pairing, serve with a mild cream cheese dip or whipped mascarpone; the tang balances the cookie sweetness.
- Cocktail pairing: Pair with a sparkling rosé, a coffee liqueur cocktail, or a milky lavender latte.
- Make them decorative: Use heart-shaped sprinkles or pipe tiny cream cheese roses on top for an elevated look.
If you’re assembling a sweet table for a Valentine’s gathering or pairing these cookies with savory brunch items, consider complementing them with a crowd-pleasing savory side like these bangin’ breakfast potatoes to balance sweet and savory on your spread.
FAQ
Q: Can I use a different cake mix flavor instead of red velvet?
A: Yes — you can swap the red velvet box for chocolate, yellow, or even spice cake mix for different flavors. Keep in mind the signature red color and slight cocoa of red velvet will change, so adjust decorations if desired.
Q: How long will these cookies stay fresh?
A: At room temperature in an airtight container, cookies remain tender for about 2–3 days. Refrigerating extends the life to about 5 days, but refrigeration can firm the texture; bring to room temperature before serving.
Q: Can I substitute the white chocolate chips?
A: Absolutely. Use milk or semisweet chocolate chips, chopped chocolate, or even candy melts. If you use a darker chocolate, the flavor will be richer and contrast nicely with the sweet red cookie base.
Q: My white chocolate seized — what can I do?
A: If the chocolate becomes grainy, try stirring in a teaspoon of vegetable oil or coconut oil to loosen it. If that doesn’t help, start with a fresh batch and melt at a lower power in short bursts or use a double boiler for better temperature control.
Q: Any tips for making the color more vibrant naturally?
A: For natural coloring, a small amount of beet puree works well. Roasting vs boiling beets will affect flavor—roasted beets give a richer, sweeter flavor while boiled beets are milder. Use sparingly to avoid altering flavor significantly.
Q: Can I make these gluten-free?
A: Use a gluten-free red velvet cake mix labeled as GF. Texture may vary slightly; you may need to adjust moisture (a splash more oil or an extra egg yolk) for best results.
Conclusion
These Valentine’s Day Red Velvet Cookies are a wonderful blend of convenience and charm: the box-mix shortcut gives reliable structure while simple add-ins and a white chocolate dip let you customize flavor and presentation. They bring the comfort of from-scratch baking with the ease busy home cooks appreciate, and they’re versatile enough for gifting, parties, or a quiet evening dessert. If you want inspiration from other red velvet cookie takes or cake-mix cookie hacks, this Valentine’s Day Red Velvet Cookies Recipe – Something Swanky offers a lovely variation, and for a different approach check out Red Velvet Cookies- Cake Mix Hack – One Sweet Appetite to compare techniques and decoration ideas. For a simple sugar-cookie-style red velvet that’s perfect for two, see this Red Velvet Valentines Day Cookies | Dessert for Two. Give these cookies a try, share a batch with someone you love, and enjoy the warmth and sweetness they bring to your Valentine’s table.
8. Valentine’s Day Pizza Roses
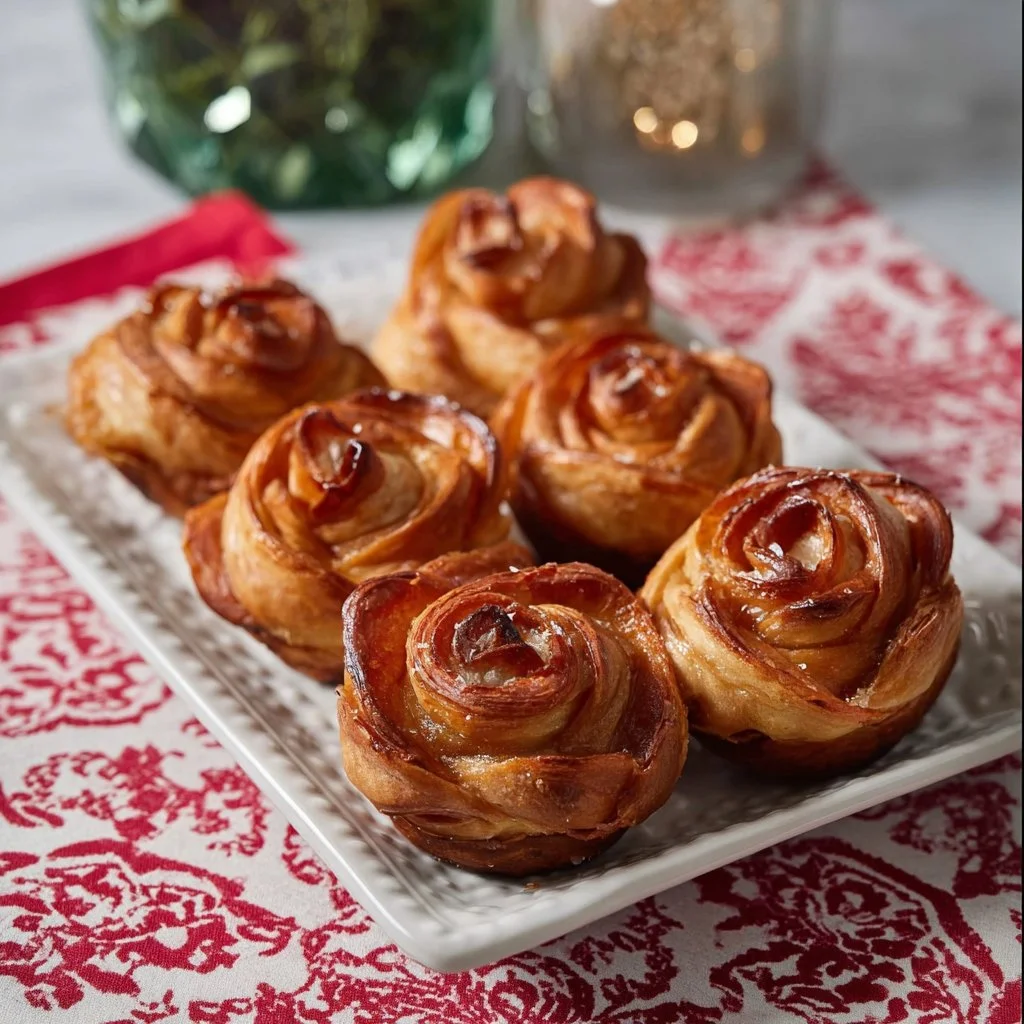
Valentine’s Day Pizza Roses are the kind of recipe that turns a simple dinner into a moment — warm, shareable, and impossibly charming. Imagine soft, golden pastry spirals filled with melty mozzarella and pepperoni, shaped like little roses you can pick up and eat. They’re perfect for a cozy date night at home, a family celebration, or a playful appetizer for a Galentine’s get-together. If you’re already planning a comfort-food spread, these pizza roses pair wonderfully with other crowd-pleasers like bangin breakfast potatoes for a brunch-to-dinner mashup that feels both festive and familiar. Whether you use store-bought pizza dough or roll your own, this recipe highlights seasonal warmth and the simple joy of sharing food made from scratch.
Ingredients & Equipment
Ingredients
- Pizza dough (store-bought or homemade)
- Pizza sauce (homemade or jarred)
- Mozzarella cheese (shredded or thinly sliced)
- Pepperoni slices
- Olive oil
- Italian seasoning (dried oregano/basil mix)
- Fresh basil (optional, for garnish)
Notes:
- Use a low-moisture mozzarella for less liquid while baking. Fresh mozzarella can be used, but slice it thinly and pat dry first.
- Pepperoni can be swapped for salami, prosciutto, cooked sausage, or roasted vegetables for a vegetarian version.
- If you like a bit of heat, add red pepper flakes or a drizzle of chili oil after baking.
Helpful equipment
- Rolling pin (or clean bottle if you don’t have one)
- Floured surface (wood or countertop)
- Sharp knife or pizza cutter (for cutting strips)
- Muffin tin or baking sheet (muffin tin helps keep roses upright)
- Pastry brush (for olive oil)
- Baking tray or sheet with parchment paper
- Oven thermometer (optional, to ensure accurate baking temp)
- Cooling rack
Small tools like a bench scraper and a pair of kitchen tongs can make handling the rolls easier. A blender isn’t necessary for this recipe unless you’re making a smooth homemade pizza sauce.
Step-by-Step Instructions (with tips)
-
Preheat your oven to 400°F (200°C).
- Tip: If you have an oven thermometer, place it in the center to verify temperature. Preheating fully ensures even browning.
-
Roll out the pizza dough on a floured surface and cut it into strips.
- Tip: Aim for strips about 1 to 1.5 inches wide and 8–10 inches long. If using cold dough, let it come to room temperature for 20–30 minutes so it’s easier to roll without springing back.
-
Spread a thin layer of pizza sauce over each strip.
- Tip: Use just enough sauce to flavor — too much will make the roses soggy. If your sauce is very watery, simmer it briefly to thicken or drain slightly in a sieve.
-
Place mozzarella cheese and pepperoni slices on top of the sauce.
- Tip: Overlap the pepperoni slightly along one long edge of the strip; cheese can be added sparingly between and over the pepperoni. If using fresh mozzarella, blot with a paper towel to remove excess moisture.
-
Starting from one end, roll the strip up to create a rose shape.
- Tip: Roll gently but firmly so the layers show like petals. If a strip feels too large, cut it shorter and make two smaller roses. For a tighter rose, start with the pepperoni side up so the pepperoni becomes the visible “petal.”
-
Place the pizza roses in a muffin tin or on a baking sheet.
- Tip: A greased muffin tin keeps the roses contained and upright; if using a baking sheet, place them close together so they support each other while baking.
-
Brush the tops with olive oil and sprinkle with Italian seasoning.
- Tip: A little olive oil encourages browning and keeps edges crisp. Finish with a pinch of flaky sea salt for the best flavor.
-
Bake for 15-20 minutes until golden brown and the cheese is bubbly.
- Tip: Oven times vary. Start checking at 12 minutes. If the edges brown too quickly, tent lightly with foil. For a crisper bottom, bake on a preheated baking stone or hot sheet.
-
Garnish with fresh basil if desired, and enjoy your Valentine’s Day pizza roses!
- Tip: Add basil just before serving to keep it bright and fresh. A drizzle of balsamic glaze can add a sweet-tangy contrast.
Variations and kitchen tips
- Vegetarian: Replace pepperoni with thinly sliced roasted zucchini, bell peppers, or sun-dried tomatoes. Add a sprinkle of grated Parmesan for umami.
- Meat-lover’s: Use a mix of pepperoni, cooked sausage crumbles, and chopped ham.
- Cheesy: Mix mozzarella with a touch of fontina or provolone for extra melt and flavor.
- Herb-forward: Fold finely chopped fresh basil or parsley into the cheese before assembling.
- Make them mini: Cut narrower strips and bake in a mini muffin tin for bite-sized party snacks.
- Avoid soggy centers: Par-bake the dough strips for 2–3 minutes before adding sauce and fillings if your dough is very thick or moist.
- Roasting vs boiling vegetables: If you’re adding veggies, roasting them first intensifies flavor and removes excess moisture (recommended); boiling is faster but can leave watery veg that affects texture.
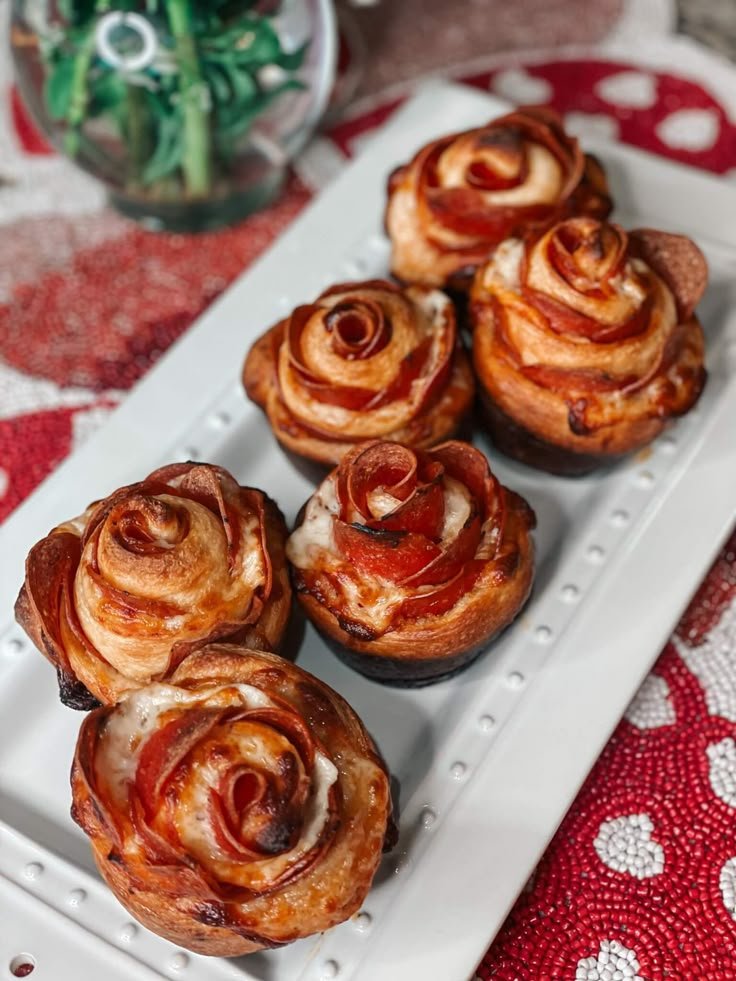
Storage, Freezing & Make-Ahead Tips
Storing leftovers
- Refrigerator: Place cooled pizza roses in an airtight container lined with paper towels to absorb moisture. They’ll keep well for up to 3 days. Reheat in a 350°F (175°C) oven for 10–12 minutes or in an air fryer for 4–6 minutes to crisp the edges.
- Freezing: For longer storage, freeze baked roses on a parchment-lined tray until solid (2–3 hours), then transfer to a freezer bag or airtight container. Freeze for up to 2 months.
- Reheating from frozen: Reheat frozen pizza roses in a preheated oven at 375°F (190°C) for 12–18 minutes, covered for the first 8 minutes to prevent over-browning, then uncovered to crisp.
Make-ahead methods
- Assemble and refrigerate: Make the roses up to 6 hours ahead, cover the muffin tin tightly with cling film, and bake right before serving. Let the dough rest in the fridge no longer than 6 hours to avoid overproofing.
- Par-bake option: Par-bake dough strips for a couple minutes, let cool, then assemble and bake later. This reduces total baking time when you’re ready to serve.
- Freeze unbaked: Assemble the roses, freeze them on a tray until solid, then store in a bag and bake from frozen. Add 4–6 minutes to the baking time and cover them for the first part to avoid over-browning.
Portioning advice
- Plan on 3–4 pizza roses per person as an appetizer or 6–8 as a main with sides.
- Mini roses (mini muffin tin) are ideal for parties — estimate 5–6 mini roses per person.
How to Use / Serve This Dish
Serving ideas
- Romantic dinner: Plate 4–6 larger roses with a simple arugula salad lightly dressed with lemon vinaigrette and shaved Parmesan.
- Sharing platter: Arrange a mix of savory roses (pepperoni, veggie, prosciutto) on a wooden board with dipping sauces: extra pizza sauce, garlic butter, or pesto aioli.
- Brunch twist: Serve pizza roses alongside sweet and savory brunch items to create a cozy buffet. They pair beautifully with egg dishes and a light fruit salad.
- Party appetizers: Serve mini pizza roses with cocktail sticks and several dipping sauces — marinara, ranch, and spicy honey.
Pairings
- Beverages: A light red wine (Chianti or Pinot Noir), a crisp rosé, or a citrusy beer like a pilsner complements the cheesy, tomato-forward flavors. For a non-alcoholic option, try sparkling water with a splash of pomegranate or a rosemary-lemon soda.
- Side dishes: Simple Caesar or mixed-green salad, roasted vegetables, or garlic knots keep the meal balanced without stealing the show.
- Sauces: Offer a herby pesto for freshness, a roasted garlic aioli for richness, or a balsamic reduction for a sweet contrast.
Creative variations for special occasions
- Heart-shaped pan: Arrange roses in the shape of a heart on a large baking sheet for a Valentine’s Day centerpiece.
- Dessert-style “roses”: Use sweet dough and jam with mascarpone to create a dessert pastry rose using the same rolling technique.
(Internal link example in the body) For another playful pizza idea with bold flavors, consider trying a tangy pickle-topped variation from our best pickle pizza recipe for creative contrast.
(Internal link example elsewhere in the body) If you’re planning a game-day menu, these pizza roses pair well with creamy dippers like our buffalo chicken dip for a cozy spread.
FAQ
Q: Can I use premade biscuit dough or crescent roll dough instead of pizza dough?
A: Yes — premade biscuit or crescent dough can work in a pinch and will give you a slightly different texture (fluffier and more buttery). The rolling technique is the same; just be gentle so the layers don’t tear. Baking time may be a bit shorter, so watch closely.
Q: How long do pizza roses last in the fridge, and can I reheat them safely?
A: Store in an airtight container for up to 3 days. Reheat in the oven (350°F / 175°C) until warmed through and crisp, about 10–12 minutes. Avoid microwaving if you want to keep the crust crisp.
Q: What if my roses fall apart or don’t hold their shape?
A: If a rose unravels, tuck the end underneath or place it in the muffin cup seam-side down before baking — the tin helps support them. Make sure the dough strips aren’t too thick or the fillings too heavy; use a light hand when rolling.
Q: Can I make these gluten-free or dairy-free?
A: Absolutely. Use a gluten-free pizza dough or crust alternative and dairy-free mozzarella. Keep in mind texture and baking times can differ; gluten-free dough may be more fragile and benefit from a par-bake.
Conclusion
Valentine’s Day Pizza Roses are a cozy, handmade way to celebrate a special evening with someone you love — or to bring a touch of romance to a family meal. They balance the familiarity of pizza with the whimsy of a rose, and they’re flexible enough to adapt to your favorite flavors or dietary needs. If you want more inspiration or slightly different techniques, I recommend checking a few other recipes like Pizza Roses ⋆ Sugar, Spice and Glitter, Easy Pepperoni Pizza Roses — Holoka Home, and Pepperoni Pizza Roses — Always & Whatever for variations and plating ideas. Give these pizza roses a try, share your photos, and let the simple act of baking bring a little extra warmth to your Valentine’s Day.
9. Easy Cherry Blossom Cookies
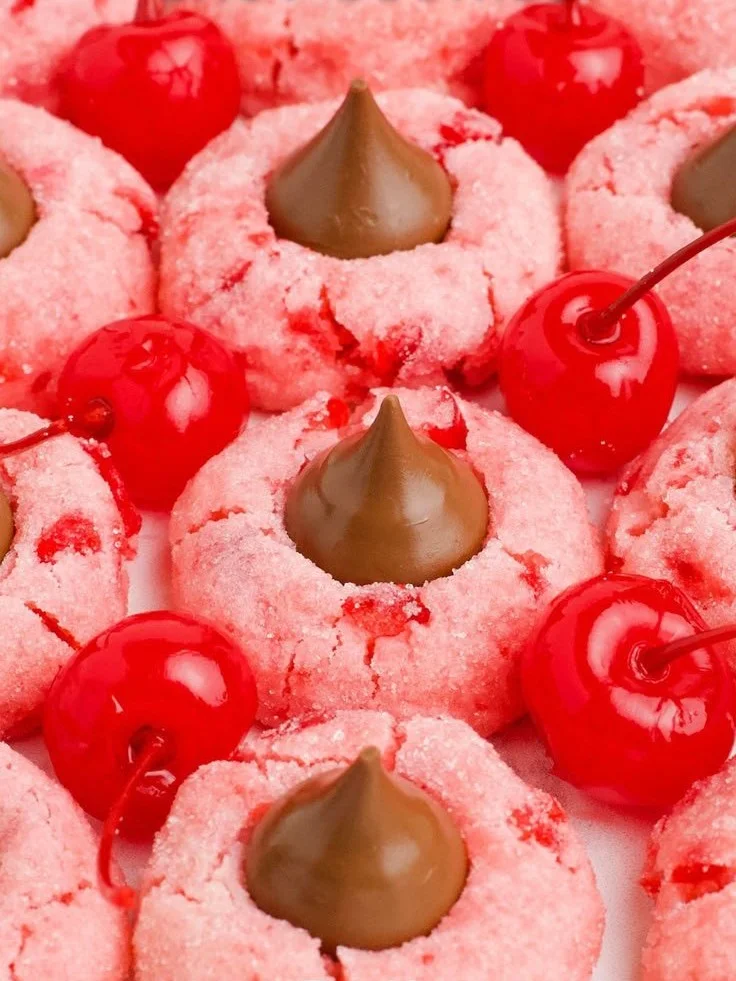
There’s something instantly cheerful about a batch of Easy Cherry Blossom Cookies — soft, buttery rounds studded with bright maraschino cherries, crowned with a glossy chocolate kiss. They’re the kind of seasonal treat that feels right for springtime gatherings, Mother’s Day brunches, or anytime you want a small, pretty cookie with a comforting homemade vibe. The main stars here are maraschino cherries and a whisper of almond extract (or your favorite substitute) that gives each bite a classic blossoms-cookie note. If you enjoy cozy baking projects like chewy pumpkin cookies, these cherry-topped beauties will fit straight into your repertoire — and they’re easier than they look.
Ingredients & Equipment
Ingredients
- 1 Cup unsalted butter (at room temperature)
- 1 Cup powdered sugar
- ¼ Teaspoon salt
- 1 Tablespoon maraschino cherry juice (liquid)
- ¼ Teaspoon almond extract (or vanilla or cherry)
- 2 Cups all-purpose flour (plus more if needed)
- 1 Cup maraschino cherries (chopped)
- ¼ Cup granulated sugar (for rolling)
- 24 Hershey Kisses
Notes on ingredients
- Use unsalted butter at room temperature for easy creaming — it helps trap air so cookies are light.
- Powdered (confectioners’) sugar keeps the texture tender; sift if it’s clumpy.
- Maraschino cherry juice adds color and a subtle cherry flavor; substitute a teaspoon of cherry syrup for extra sweetness if you like.
- Almond extract is traditional, but vanilla or cherry extract work well. Start with less, taste the dough, and adjust.
- If your chopped cherries have a lot of liquid after draining, blot them dry on paper towels so they don’t make the dough too wet.
Equipment & helpful tools
- Large mixing bowl and electric mixer (stand or handheld)
- Measuring cups and spoons
- Rubber spatula or wooden spoon
- Cookie scoop (tablespoon-size) or two spoons for rolling balls
- Baking sheet(s) lined with parchment paper or silicone baking mat
- Cooling rack
- Small bowl for granulated sugar
- Small knife and cutting board for chopping cherries (or use a food processor for quick pulsing)
- Optional: kitchen thermometer (to check oven temp), cookie scoop release, and an airtight container for storing
If you love pairing cookies with comforting sides or desserts, you might enjoy the homestyle comfort in this classic creamy corn casserole while your cookies bake.
Step-by-Step Instructions (with tips)
-
Prep your cherries and tools.
- Drain the maraschino cherries well in a colander. Pat them dry with paper towels to remove excess syrup. Chop into small pieces (about ¼-inch) so they distribute evenly in the dough. If you want smaller, more uniform pieces, pulse briefly in a food processor.
- Line baking sheets with parchment paper and set aside. Preheat the oven later as instructed.
-
Cream butter and powdered sugar.
- In a large bowl, use an electric mixer to combine the room-temperature unsalted butter and powdered sugar until light and fluffy, about 2–3 minutes on medium speed. Scrape down the sides of the bowl once or twice.
Tip: Don’t skimp on creaming. This introduces air and gives the cookie a tender crumb.
- In a large bowl, use an electric mixer to combine the room-temperature unsalted butter and powdered sugar until light and fluffy, about 2–3 minutes on medium speed. Scrape down the sides of the bowl once or twice.
-
Add cherry juice and extract.
- Add the tablespoon of maraschino cherry juice and ¼ teaspoon almond extract (or your choice) to the butter-sugar mixture. Continue mixing until smooth and evenly combined, about 30–45 seconds.
Tip: If you’re using vanilla instead of almond, the cookies will be milder and less “blossom” flavored. A tiny splash of cherry extract can boost cherry notes but use sparingly.
- Add the tablespoon of maraschino cherry juice and ¼ teaspoon almond extract (or your choice) to the butter-sugar mixture. Continue mixing until smooth and evenly combined, about 30–45 seconds.
-
Incorporate flour and salt.
- Add 2 cups of all-purpose flour and the ¼ teaspoon salt to the bowl. Mix on low until the flour is just incorporated. The recipe notes say: once the two cups are added, slowly add a couple of tablespoons at a time until the dough resembles a play-dough consistency and can be handled without sticking to your hands. That means you may need an extra 2–4 tablespoons of flour depending on humidity and cherry moisture.
Tip: Add flour a tablespoon at a time; it’s easier to fix slightly dry dough than sticky dough. If dough gets too stiff, add a teaspoon of cherry juice or milk.
- Add 2 cups of all-purpose flour and the ¼ teaspoon salt to the bowl. Mix on low until the flour is just incorporated. The recipe notes say: once the two cups are added, slowly add a couple of tablespoons at a time until the dough resembles a play-dough consistency and can be handled without sticking to your hands. That means you may need an extra 2–4 tablespoons of flour depending on humidity and cherry moisture.
-
Fold in chopped cherries.
- Carefully stir in the chopped maraschino cherries just until they’re evenly distributed. Overmixing can break up the cherries and release more syrup.
Tip: If cherries cause the dough to be a bit wet, chill the dough for a longer time before scooping.
- Carefully stir in the chopped maraschino cherries just until they’re evenly distributed. Overmixing can break up the cherries and release more syrup.
-
Form and sugar-coat the dough balls.
- Use a tablespoon-size cookie dough scoop to form small cookie dough balls (about 1 TB each). Roll each ball in the ¼ cup granulated sugar until coated. Place them on a plate or tray as you go.
Tip: Rolling the dough in sugar gives a nice outer crunch and a sparkly finish after baking.
- Use a tablespoon-size cookie dough scoop to form small cookie dough balls (about 1 TB each). Roll each ball in the ¼ cup granulated sugar until coated. Place them on a plate or tray as you go.
-
Chill the dough.
- Chill the sugar-coated dough balls for at least 20 minutes before baking. Chilling helps cookies hold their shape and lets the flavors meld. If you’re prepping ahead, you can chill up to 24 hours or freeze the dough balls (see storage notes).
Tip: If your kitchen is warm, chill for 30 minutes to be safe.
- Chill the sugar-coated dough balls for at least 20 minutes before baking. Chilling helps cookies hold their shape and lets the flavors meld. If you’re prepping ahead, you can chill up to 24 hours or freeze the dough balls (see storage notes).
-
Preheat oven and prepare sheet.
- While the dough is chilling, preheat the oven to 350°F (175°C) and make sure your baking sheets are lined with parchment.
-
Bake the cookies.
- Place cookies evenly apart (about 2 inches) on the prepared baking sheet and bake in the preheated oven for about 10 minutes, or until the edges are just set and the tops no longer look wet. They may still be slightly soft — that’s okay. Remove from the oven.
-
Add the Hershey Kisses.
- Immediately press one Hershey Kiss into the center of each cookie while still warm. The heat will create a small indentation that holds the chocolate. Be gentle so you don’t flatten the cookie too much. Let the cookies cool on the sheet for 5 minutes, then transfer to a cooling rack to finish cooling.
-
Cool and serve.
- Allow cookies to cool completely so the chocolate sets and flavors settle. These store well and make a delightful plate to share.
Variations and cooking tips
- Maraschino cherry substitutions: If you prefer less sweetness, use chopped dried cherries that have been briefly rehydrated in warm water or cherry juice and patted dry. Alternatively, try fresh cherries (pitted and finely chopped) when they’re in season; they’ll be less sweet and may require slightly more flour to adjust moisture.
- Roasting vs. boiling cherries: For a deeper flavor, try roasting fresh cherries tossed with a teaspoon of sugar at 375°F for 10–12 minutes, then chop and cool before adding. Boiling (or quickly simmering) dried cherries in cherry juice plumps them up but watch for extra liquid — drain and pat dry.
- Almond vs. vanilla vs. cherry extract: Almond extract gives the classic “blossom” flavor; vanilla makes it more cookie-like; cherry extract intensifies fruitiness. Use sparingly — extracts are potent.
- Texture control: If you want a softer cookie, remove at 9–10 minutes; for crisper edges, bake an extra minute or two. Altitude, oven variance, and pan material affect baking time — keep an eye on the first batch.
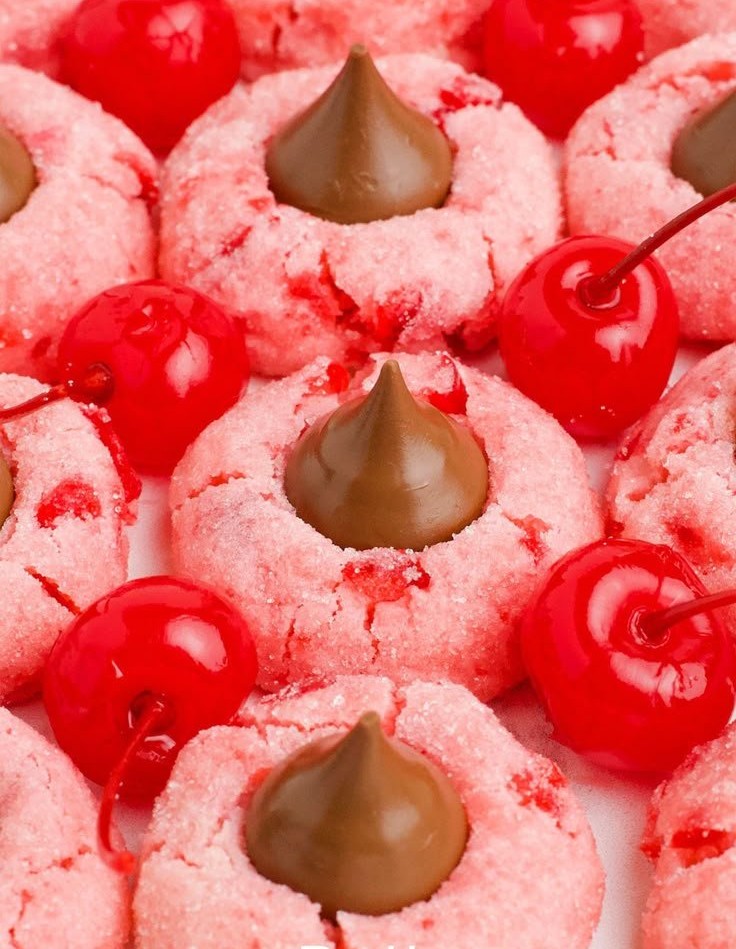
Storage, Freezing & Make-Ahead Tips
Storing
- Room temperature: Store cooled cookies in an airtight container at room temperature for up to 4 days. Place parchment between layers to prevent sticking.
- Refrigeration: If your kitchen is warm or you used fresh cherries, store in the refrigerator for up to 7 days to be safe. Bring to room temperature before serving for best flavor.
Freezing
- Dough: Scoop dough balls and freeze in a single layer on a tray for 1–2 hours until firm. Transfer to a freezer-safe bag or container and freeze for up to 3 months. When ready, bake from frozen — add 1–2 minutes to baking time and keep the initial temperature at 350°F.
- Baked cookies: Freeze baked and cooled cookies in a single layer on a tray, then transfer to airtight containers with parchment between layers. Freeze up to 3 months. Thaw at room temperature and the Hershey Kiss will soften pleasantly.
Make-ahead tips
- Bake ahead for events: You can bake these a day ahead and store them in airtight containers. If you’ll be transporting them, pack cookies in a single layer with parchment and keep cool to prevent chocolate from melting.
- Assemble day-of: Make the dough and freeze portioned balls. On the day of the event, bake straight from frozen and press the Hershey Kisses in after baking.
How to Use / Serve This Dish
Serving ideas
- Tea-time or brunch: Arrange on a pretty platter with a pot of tea or a coffee station. Their delicate look works beautifully for spring gatherings.
- Gift or cookie swap: Package 10–12 cookies in a cellophane bag with a ribbon for neighborly gifts or holiday cookie swaps. They’re seasonal, portable, and universally loved.
- Dessert platter: Combine with shortbread, lemon bars, and nutty biscotti for a balanced dessert tray.
Pairings
- Drinks: Pair with a mild coffee, almond-flavored latte, or a floral tea like chamomile or jasmine. A light prosecco is a fun pairing for celebrations.
- Other sweets: Add contrast with a tangy lemon curd or cream cheese frosting dip for those who like a sweet-and-tart combo.
Creative variations
- Swap Hershey Kisses for chocolate-covered cherries or colored candy for seasonal themes.
- Add a sprinkle of coarse sea salt on top of the chocolate after pressing it into the warm cookie for a sweet-salty contrast.
- Make mini sandwich cookies: Use a small cookie scoop and sandwich two cookies with cherry jam or buttercream.
If you’re inspired by blossoms-style cookies and want to compare textures or techniques, check out these classic peanut butter blossoms for ideas on how cookie centers and chocolate toppings change the final bite.
FAQ
Q: Can I substitute dried cherries for maraschino cherries?
A: Yes. Dried cherries can be used, but rehydrate them briefly in warm water or cherry juice for 5–10 minutes, then drain and pat dry. Because dried cherries are less sugary than maraschino cherries, your cookies will be less sweet and may need a touch more sugar or a dash of cherry syrup if you want the candy-like cherry flavor.
Q: How long will these cookies keep fresh?
A: Stored at room temperature in an airtight container, they stay fresh for about 3–4 days. Refrigerate up to 7 days if your kitchen is warm or you used fresh cherries. Frozen baked cookies keep well for up to 3 months.
Q: My dough was sticky. What did I do wrong?
A: Sticky dough often means the cherries added too much moisture or the butter was too soft/warm. To fix sticky dough, chill it for 20–30 minutes, or add flour a tablespoon at a time until you reach a manageable consistency. You can also scoop and freeze the dough balls to firm them before baking.
Q: Can I make these gluten-free or vegan?
A: For gluten-free, use a 1:1 gluten-free all-purpose flour blend that includes xanthan gum; texture may vary slightly. For a vegan version, replace butter with a vegan butter substitute and use a dairy-free chocolate kiss or half of a dairy-free chocolate candy. Note that maraschino cherry brands vary — check labels for non-vegan processing if that’s a concern.
Conclusion
Baking Easy Cherry Blossom Cookies is an invitation to brighten your kitchen with color and comfort. They’re approachable for home bakers, visually charming, and perfect for springtime or any celebration that calls for a small, nostalgic cookie. If you’d like to see another classic take on this cookie or compare techniques and ingredient proportions, this Cherry Blossom Cookie recipe – Flour On My Face offers a lovely variation, and these Cherry Blossom Cookies – My Incredible Recipes provide another perspective on flavors and assembly. Try a batch, share with friends, and let those small, cherry-topped treats become part of your seasonal baking repertoire.
Cherry Blossom Cookie recipe – Flour On My Face
Cherry Blossom Cookies – My Incredible Recipes
10. Easy Chocolate Raspberry Tart
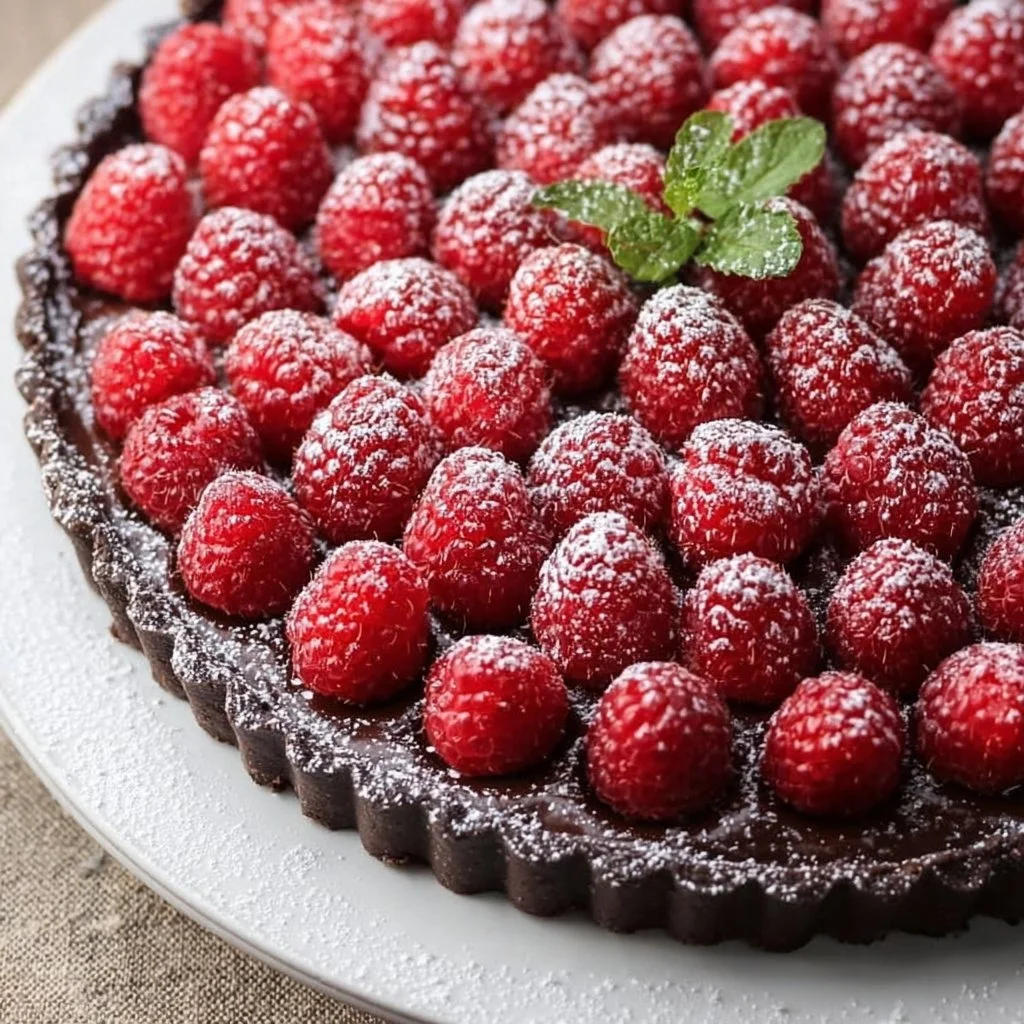
There’s something about the bright, tart pop of fresh raspberries paired with a silky chocolate filling that simply screams summer comfort. This Easy Chocolate Raspberry Tart is a one-pan wonder that balances rich bittersweet chocolate with the light, juicy brightness of seasonal raspberries — a dessert that looks elegant but comes together without fuss. Whether you’re celebrating a backyard dinner, treating yourself after a long week, or bringing something beautiful to a potluck, this tart delivers big on flavor with minimal stress. If you love quick chocolate desserts, you might also enjoy 4-Ingredient Chocolate Peanut Butter Balls for a no-bake snack that’s just as comforting.
Ingredients & Equipment
Ingredients
- 1 ½ cups Oreo crumbs (about 24 cookies)
- 6 Tablespoons (85 g) butter (melted)
- 1 ¼ cups (300 ml) heavy cream
- 2 cups (12 oz) good-quality bittersweet chocolate (chopped into similar size pieces)
- 1 teaspoon pure vanilla extract
- 2 pints (about 4 cups) fresh raspberries
- Confectioners’ sugar for dusting
Notes:
- Use plain Oreos (no filling adjustments necessary) for a simple, chocolate cookie crust. If you prefer less sweetness, substitute half the Oreos with graham cracker crumbs.
- Bittersweet chocolate around 60–70% cocoa gives the best flavor contrast with raspberries. Avoid low-quality chocolate bars; they affect texture and shine.
- Heavy cream should be cold for best ganache texture.
Equipment / Tools
- 9-inch tart pan with removable bottom (or a deep-dish pie plate)
- Food processor or a resealable bag + rolling pin (to crush cookies)
- Small saucepan
- Heatproof bowl (for the chocolate)
- Whisk and rubber spatula
- Measuring cups and spoons
- Baking tray (to place the tart on while setting)
- Fine-mesh sieve for dusting confectioners’ sugar
- Optional: digital thermometer (for optimal cream temperature), blender (if making any fillings/compotes), offset spatula
Helpful tools make the process easier but aren’t required. A food processor gives the smoothest cookie crumb crust; a thermometer helps you hit the ideal temperature for hot cream (about 185°F / 85°C) before pouring over chocolate.
Step-by-Step Instructions (with tips)
Crust
- Preheat the oven to 350°F (175°C). If you’re using a tart pan, set it on a baking tray for stability.
- Place Oreo cookies in a food processor and pulse until fine crumbs form. No processor? Put cookies in a large resealable plastic bag and crush with a rolling pin until crumbs are uniform.
- In a medium bowl, mix the Oreo crumbs with the melted butter until the texture resembles wet sand and holds together when pressed.
- Press the cookie mixture evenly into the bottom and up the sides of the tart pan. Use the bottom of a measuring cup or glass to pack the crust firmly and create clean edges.
- Bake the crust for 8–10 minutes to set it and bake off any raw cookie taste. Remove from oven and let cool slightly while you prepare the filling.
Filling (Chocolate Ganache)
- Place chopped bittersweet chocolate in a heatproof bowl and set aside.
- In a small saucepan, heat the heavy cream over medium heat until it just begins to simmer and you see small bubbles forming at the edges (about 185°F / 85°C); do not allow it to boil.
- Pour the hot cream over the chopped chocolate and let sit undisturbed for 1–2 minutes to soften the chocolate. Add the vanilla extract.
- Whisk gently from the center outward until the mixture is smooth, glossy, and fully combined. If the ganache seems grainy, let it rest for another minute then whisk again; a quick immersion blender on low can also smooth it.
- Pour the ganache into the prepared cooled Oreo crust, spreading evenly with an offset spatula. Leave a little space at the rim if you plan to pile raspberries high on top.
Assembling & Finishing
- Gently press fresh raspberries into the ganache while it’s still pourable. For a polished look, arrange the raspberries in concentric circles or a random rustic pattern — either looks beautiful.
- Refrigerate the tart for at least 2 hours (preferably 3–4) until the ganache sets firmly. For a quicker set, place it in the freezer for 30–45 minutes, but monitor closely to avoid freezing solid.
- Dust with confectioners’ sugar just before serving for a pretty, professional finish.
Variations & Kitchen Tips
- Roasted vs. fresh raspberries: roasting raspberries concentrates their sweetness. To roast, toss berries lightly with a teaspoon of sugar and roast at 375°F (190°C) for 8–10 minutes until they soften and slightly caramelize. Let cool before arranging. Alternatively, simmer raspberries with a tablespoon of sugar for 3–4 minutes to make a quick compote for spooning over the tart (this works well in cooler seasons).
- Add texture: sprinkle chopped toasted hazelnuts or pistachios around the edge for crunch.
- Flavor boosts: stir a tablespoon of raspberry liqueur or a pinch of instant espresso into the ganache for depth.
- Chocolate swap: if you prefer a milder filling, use semisweet instead of bittersweet; for a darker tart, use 70%+ chocolate and reduce any added sugar in roasted raspberries.
- If your ganache separates (rare with proper technique), whisk in a small splash more hot cream or briefly use an immersion blender to re-emulsify.
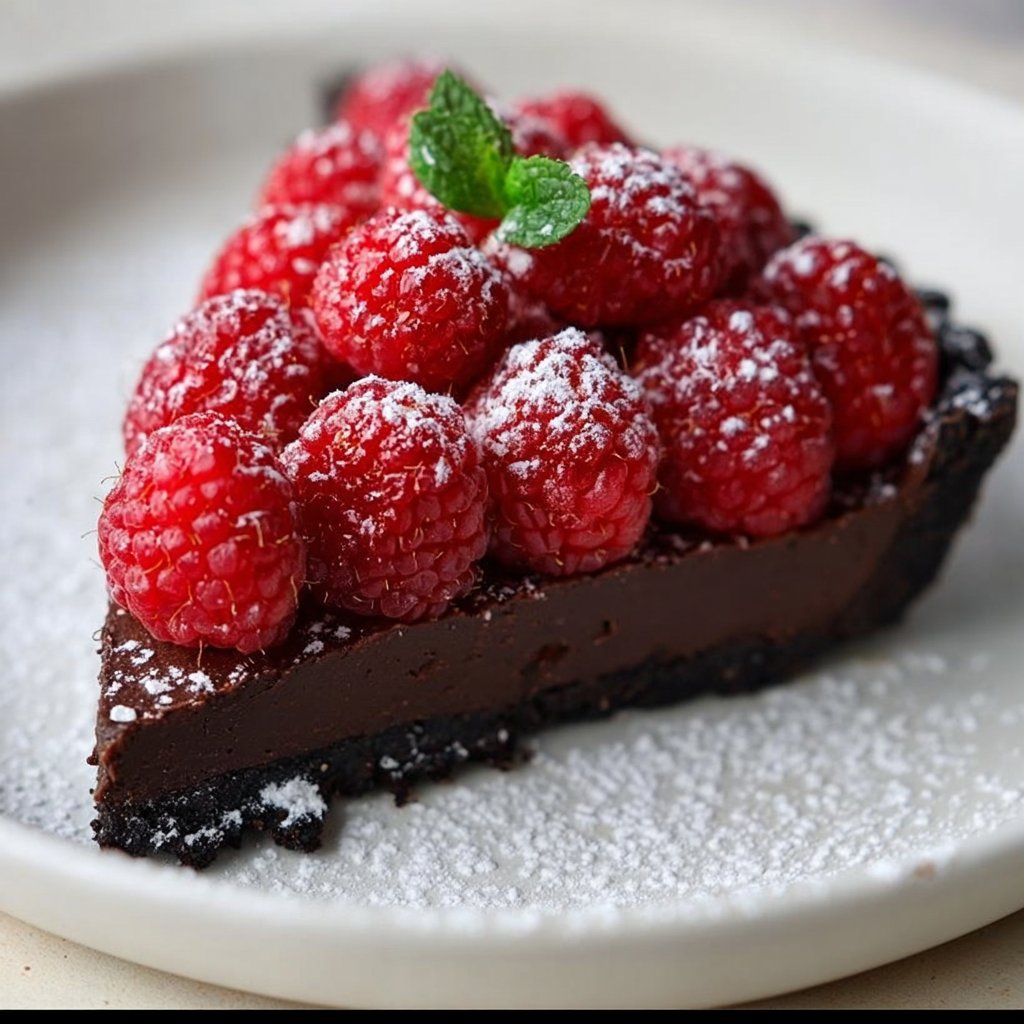
Storage, Freezing & Make-Ahead Tips
Storing Leftovers
- Refrigerate: Store the tart covered with plastic wrap or in a cake box in the refrigerator for up to 3–4 days. The crust stays crispest for the first day; after that, it will soften slightly from the ganache and raspberry moisture.
- Room temperature: If you plan to serve the tart within 2 hours, it’s fine to keep it at cool room temperature. Beyond that, refrigerate because of the fresh raspberries and cream-based ganache.
Freezing
- Whole tart: Wrap the tart well in plastic wrap and a layer of foil, then freeze for up to 1 month. Thaw in the refrigerator overnight before dusting with confectioners’ sugar and serving.
- Slices: For convenience, slice the tart and freeze individual slices on a baking sheet until firm (about 1–2 hours), then wrap each slice in plastic and place in a freezer bag. Thaw in the refrigerator when ready to enjoy.
- Note: Fresh raspberries can become mushy after freezing and thawing. If you intend to freeze, consider removing fresh fruit before freezing and topping with fresh raspberries after thawing.
Make-Ahead Ideas
- Make the crust and ganache a day ahead, pour the ganache, and refrigerate until set. Add fresh raspberries just before serving for best texture and color.
- If you want a saucier topping, prepare a raspberry compote ahead and spoon onto the tart just before plating.
If you’re planning a full summer menu, this tart pairs nicely with hearty sides like a Classic Creamy Corn Casserole for a comforting meal.
How to Use / Serve This Dish
Serving Ideas
- Celebration dessert: Serve the tart slightly chilled with a dollop of whipped cream or a scoop of vanilla bean ice cream for contrast.
- Afternoon tea: Slice thinly and present with delicate shortbread for a sophisticated tea spread.
- Casual gatherings: Offer a few forks and little squares — the Oreo crust makes every bite feel like a decadent treat.
Pairings
- Drinks: A bright, sparkling cocktail helps cut through the richness. Try pairing with a fruity spritz; for example, a raspberry-forward mocktail or cocktail such as a Citrus Margarita and Pomegranate Mint Raspberry Spritz complements the tart’s berry notes.
- Cheese: Pair a small piece with a mild, creamy cheese (like mascarpone on the side) for an indulgent palate experience.
Creative Uses
- Mini tarts: Make this recipe in a muffin tin for individual mini tarts — reduce baking time for the crust to 6–8 minutes and fill accordingly.
- Tartlets as gifts: Package individual slices in clear boxes with a ribbon for a homemade gift.
FAQ
Q: Can I use frozen raspberries instead of fresh?
A: Yes, but with caveats. Frozen raspberries release more juice when they thaw, which can make the ganache softer and the crust soggy. If using frozen berries, thaw them in a sieve and drain excess liquid, or simmer them briefly into a compote and cool before using. For the best texture and vibrant presentation, fresh raspberries are recommended.
Q: What can I use instead of Oreos for the crust?
A: You can substitute graham crackers, digestive biscuits, or even chocolate wafer cookies. If you want a nutty crust, pulse toasted almonds or hazelnuts with a bit of sugar and butter. Measure to match volume: 1 ½ cups cookie crumbs is roughly 150–180 g.
Q: How long does the tart keep at room temperature?
A: Because the tart contains a cream-based ganache and fresh fruit, it’s safest to not leave it out for more than 2 hours in a warm environment. Refrigerate any leftovers promptly.
Q: Can I make this tart dairy-free or vegan?
A: To make a dairy-free version, use a plant-based heavy cream alternative designed for whipping or cooking (full-fat coconut cream works best) and choose a vegan dark chocolate. The flavor will shift slightly (coconut notes may come through), but it’s a doable swap. Use a dairy-free butter substitute for the crust.
Conclusion
This Easy Chocolate Raspberry Tart is one of those recipes that feels special but is truly accessible — rich, silky ganache nestled in a crisp cookie crust, topped with the seasonal brightness of raspberries. It’s a dessert that celebrates fresh fruit without losing the indulgent chocolate element we all love. If you want inspiration for another elegant raspberry-chocolate combination, check out this classic Dark Chocolate Raspberry Tart or a fun take on the same idea at Easy Chocolate Raspberry Tart – If You Give a Blonde a Kitchen. Try this tart for your next gathering and share a photo — I’d love to hear how you made it your own!
Best 10 Valentine’s Day Dessert Recipes to Delight Your Loved Ones
Published: February 12, 2026 By Lina

Valentine’s Day is the perfect opportunity to whip up something sweet for the loved ones in your life, and I can’t wait to share my favorite dessert recipes that are sure to impress! From decadent chocolate treats to delightful strawberry creations, this list has everything you need to make the day extra special. With detailed recipes and easy-to-follow tutorials, I promise you’ll find inspiration for delicious desserts that will not only satisfy your sweet tooth but also warm hearts. So, let’s dive into these enchanting recipes that will transform your Valentine’s celebration into a memorable feast of love and sweetness!
1. Strawberry Jam Sheet Cake with Cream Cheese Frosting
Strawberry Jam Sheet Cake with Cream Cheese Frosting is the kind of recipe that brings a smile as soon as the oven door opens. This moist sheet cake, gently flavored with strawberry jam and finished with a tangy cream cheese frosting, is perfect for spring and summer gatherings when berries are at their best — but it’s comforting any time of year. The cake’s tender crumb, balanced sweetness, and bright pink hue (optional) make it a crowd-pleaser for potlucks, family dinners, and simple weekend baking. If you love a classic cream cheese finish, you might also enjoy my take on pumpkin bars with cream cheese frosting, which uses the same silky frosting technique in a seasonal fall context.
Ingredients & Equipment
Ingredients
- 3/4 cup unsalted butter, room temperature
- 1 cup white sugar
- 3 eggs
- 1/2 cup milk, whole
- 1/2 cup strawberry jam (*see notes)
- 1 1/2 tsp vanilla extract
- 3 tsp baking powder
- 2 1/4 cups all purpose flour
- 1/2 tsp salt
- Optional: Red Food Dye (or natural alternatives listed below)
For the frosting:
- 8 oz cream cheese, room temperature
- 1/2 cup unsalted butter, room temperature
- 1/3 cup + 1 tbsp strawberry jam
- 1/2 cup powdered sugar
- 1/2 tsp vanilla extract
Notes on ingredients
- Strawberry jam: Use a good-quality, seedless jam for a smooth texture. If your jam is very thick, warm it briefly (10–20 seconds in the microwave) and stir so it combines easily with milk or frosting.
- Milk: Whole milk gives the best texture, but 2% works in a pinch.
- Red food dye: Optional. If you prefer natural color, try 1–2 tbsp freeze-dried strawberry powder, or 1–2 tbsp beet powder for a muted pink tone.
- Cream cheese: Full-fat cream cheese gives the creamiest frosting. Light cream cheese will work but the frosting may be slightly less rich.
Helpful tools & equipment
- 9×13-inch baking pan (sheet pan)
- Stand mixer with paddle attachment or hand mixer
- Mixing bowls (large and medium)
- Whisk and rubber spatula
- Measuring cups and spoons
- Cooling rack
- Toothpicks or cake tester
- Offset spatula or bench scraper for frosting (optional)
- Parchment paper (optional, for lining the pan)
Tip: If you’re short on mixer attachments, a strong whisk and a bit more elbow grease will do for the cake batter — but the frosting is easiest with an electric mixer to avoid lumps.
Directions
- Preheat your oven to 350°F (175°C). Grease a 9×13-inch sheet pan, and optionally line it with parchment for easier removal and cleaner edges.
- In a large mixing bowl or the bowl of a stand mixer, add the 3/4 cup unsalted butter and 1 cup white sugar. Beat with an electric mixer or paddle attachment on medium speed until light, pale, and fluffy (about 2–3 minutes). Scrape down the bowl once. Tip: Properly creamed butter and sugar add air, giving a lighter crumb.
- Add the 3 eggs one at a time, beating until just combined after each addition. Avoid overbeating once the eggs are in.
- In a separate large bowl, whisk together the dry ingredients: 2 1/4 cups all purpose flour, 3 tsp baking powder, and 1/2 tsp salt. Set aside.
- In a medium bowl, combine 1/2 cup milk and 1/2 cup strawberry jam. Whisk until the jam is well dispersed in the milk. If the jam is thick, warming it briefly helps this step.
- Add the flour mixture and the strawberry milk to the butter-egg mixture alternately, beginning and ending with the flour mixture. Follow this sequence: Flour → Milk → Flour → Milk → Flour. Beat just until combined after each addition — stop as soon as you can’t see streaks of flour. Overmixing can make the cake dense.
- Optional: If you’d like a pinker cake, add a few drops of red food dye or 1–2 teaspoons of freeze-dried strawberry powder and fold gently until the color is even. Remember that color will deepen slightly when baked.
- Stir in 1 1/2 tsp vanilla extract until incorporated. Give the batter a final gentle stir with a spatula to ensure everything is evenly combined.
- Pour the batter into the prepared 9×13 sheet pan, spreading it evenly with an offset spatula or the back of a spoon. Smooth the top so it’s level.
- Bake for about 30 minutes at 350°F. Start checking at 25 minutes: a toothpick inserted into the center should come out with a few moist crumbs, not wet batter. Oven times can vary; if the top browns quickly, loosely tent with foil.
- While the cake bakes, make the frosting. In a large mixing bowl, beat 8 oz room-temperature cream cheese and 1/2 cup room-temperature unsalted butter until smooth and combined. Scrape down the sides as needed.
- Add 1/3 cup + 1 tbsp strawberry jam, 1/2 cup powdered sugar, and 1/2 tsp vanilla extract to the cream cheese mixture. Beat on low first to avoid powdered sugar puffing, then increase speed to medium and beat until silky and lump-free. Taste and adjust sweetness: add up to 2–3 tbsp more powdered sugar if you like a firmer or sweeter frosting.
- Remove the cake from the oven and let it cool completely in the pan on a wire rack. If you frost while the cake is warm the frosting will melt and slide off. Patience pays off for neat piping or spreading.
- Once cool, spread the cream cheese frosting evenly over the cake. For a decorative finish, add a few spoonfuls of extra strawberry jam in small dollops on top and swirl gently with a toothpick or drop fresh sliced strawberries across the cake. Chill briefly (15–30 minutes) if you prefer firmer frosting for slicing.
- Slice into squares and serve. Enjoy!
Tips and variations
- Jam vs. fresh berries: If you’d rather use fresh strawberries, macerate 2 cups chopped strawberries with 2–3 tbsp sugar for 15–30 minutes and stir a couple of tablespoons into the milk. Fresh berries add texture; jam adds concentrated flavor and color.
- Natural color: Use freeze-dried strawberry powder or a small amount of red-purple beet powder instead of food dye for a naturally tinted cake.
- Flavor boost: Fold in 1 tsp lemon zest to the batter for a bright lift that complements the strawberry notes.
- Gluten-free option: Substitute a 1:1 gluten-free flour blend formulated for baking; some blends require slightly more liquid, so check the batter’s consistency.
- Single-layer upgrade: If you’d like individual servings, bake the same batter in lined cupcakes for about 18–22 minutes.
Storage, Freezing & Make-Ahead Tips
Storing leftovers
- Room temperature: Store leftover cake covered in an airtight container or covered tightly with plastic wrap in the refrigerator for up to 3–4 days. Because the frosting contains cream cheese, refrigeration is recommended to keep it safe and fresh.
- Slicing: Cut the cake into individual portions before storing for easy grab-and-go snacks and portion control.
Freezing
- Whole cake: You can freeze the unfrosted cake (cool completely) tightly wrapped in plastic wrap and a layer of foil for up to 2 months. Thaw in the refrigerator overnight before frosting.
- Frosted cake: For best texture, freeze the cake without frosting. If you must freeze after frosting, place it in the freezer for 30–45 minutes to firm the frosting, then wrap gently with plastic wrap and foil. Thaw in the refrigerator to avoid condensation puddles.
- Frosting-only: You can freeze the cream cheese frosting in an airtight container for up to 1 month. Thaw in the refrigerator and re-whip briefly with a mixer before using.
Make-ahead
- Bake the cake a day ahead and keep it in the refrigerator un-frosted, or freeze it as described. The frosting can be made a day ahead and stored in the fridge; bring it to room temperature and re-whip before spreading.
- If you want a party-ready dessert with minimal prep, bake and cool the cake the day before, refrigerate overnight, and frost just before serving.
Portioning advice
- A 9×13 sheet yields about 12–15 generous squares or up to 24 smaller party portions. For neat slices, chill the cake briefly so the frosting firms, then use a sharp knife warmed under hot water and wiped dry between slices.
How to Use / Serve This Dish
Serving ideas
- Simple serving: A slice of this cake alongside a mug of tea, a glass of cold milk, or a hot cup of coffee makes a cozy treat. (Avoid pairing with any beverages that are not suited to your dietary preferences.)
- Picnic or potluck: The sheet format is easy to transport. Cut into squares and place on a platter for an effortless party dessert.
- Layered trifle: Crumble slices of the cake into a trifle bowl layered with whipped cream and fresh strawberries for a quick, showy dessert.
- Dessert bars: Top individual squares with a dollop of whipped cream and a fresh strawberry slice for elegant serving.
Creative variations
- Swirl: Gently swirl extra jam into the cake batter before baking for a marbled effect.
- Lemon-strawberry: Add lemon curd swirls and a squeeze of lemon zest into the frosting for a tart-sweet combination.
- Mini versions: Make cupcakes with this batter and pipe the frosting for single-serve treats that are perfect for birthdays or gatherings.
Pairing suggestions
- Light, non-alcoholic beverages such as herbal iced tea, lemonade, or flavored sparkling water pair beautifully.
- For a brunch spread, this cake complements fruit salads, yogurt bowls, and light egg dishes.
While you’re exploring comforting desserts and versatile cream cheese frostings, you might enjoy checking out an easy savory option like the easiest crockpot white chicken chili with cream cheese for a cozy meal contrast to your sweet baking.
FAQ
Q: Can I replace the eggs to make this egg-free?
A: Yes — for an egg-free version, use commercial egg replacers (follow package directions) or substitute each egg with 1/4 cup applesauce plus 1/2 tsp baking powder to help leavening. Texture will be slightly different — a touch denser — but still delicious.
Q: How long will the cake keep in the refrigerator?
A: With the cream cheese frosting, store covered in the fridge for 3–4 days. For the best texture, consume within that timeframe.
Q: Can I use low-fat cream cheese or Greek yogurt in the frosting?
A: Low-fat cream cheese works, though the frosting will be less rich and possibly thinner. Avoid substituting all the cream cheese with yogurt as it’s runnier; if you must use yogurt, strain it to thicken and combine with cream cheese to keep structure.
Q: What’s the best way to prevent the cake from sticking to the pan?
A: Grease the pan well and consider lining with parchment paper with a slight overhang so you can lift the cake out for slicing. Parchment also helps ensure even edges.
Conclusion
This Strawberry Jam Sheet Cake with Cream Cheese Frosting is a welcoming, from-scratch dessert that celebrates bright berry flavor and a comforting, tender crumb — perfect for seasonal gatherings, casual get-togethers, or a special treat at home. If you want to explore more takes on strawberry-infused frostings and cakes, the recipe inspiration here pairs well with resources like Strawberry Jam Sheet Cake with Cream Cheese Frosting for a similar sheet cake approach, or The Best Strawberry Cake with Cream Cheese Frosting – Fed & Fit for another full-layer cake idea. For specialized frosting techniques using jam, try Strawberry (Jam!) Cream Cheese Frosting Recipe – Allrecipes, and for a small-batch frosting adaptation, see Strawberry Cream Cheese Frosting – Dessert for Two. I hope this recipe brings a little seasonal sunshine to your kitchen — if you try it, please share how you decorated it or any personal twists you added. Happy baking!
2. Strawberry Shortcake Cookie Cups
Strawberry Shortcake Cookie Cups are a delightful seasonally-inspired treat that’s easy to make from scratch and perfect for sharing. Imagine a tender almond-cookie shell, lightly sweetened and coconut-kissed, cradling juicy chopped strawberries and a cloud of whipped cream — each bite is a balance of soft, crumbly cookie, bright fruit, and creamy topping. Whether you’re baking for a picnic, a family dessert, or a weekend afternoon tea, these cookie cups celebrate fresh strawberries and simple, from-scratch baking. If you love small-batch cookie projects (similar to how I adore a classic chewy pumpkin cookies recipe in cooler months), you’ll find these cups both comforting and refreshingly seasonal.
Why you’ll love these Strawberry Shortcake Cookie Cups
- Small, shareable, and charming — they’re practically giftable.
- Grain-forward almond flour gives them a naturally tender texture.
- Quick to assemble: one bowl wet, one bowl dry, a little shaping, and you’re ready to bake.
- Easily customized for dietary needs (gluten-free base, dairy-free whipped options).
- Great for using peak-season strawberries — you’ll appreciate the contrast of warm cookie and cold cream.
Ingredients & Equipment
Ingredients:
- 1/2 cup Purecane Baking Sweetener (or sugar)
- 1 egg
- 1/4 cup melted refined coconut oil
- 1 cup almond flour
- 1 tsp vanilla extract
- 1/2 tsp baking powder
- 1/8 tsp salt
- chopped strawberries (about 1 to 1 1/2 cups, depending on how full you like the cups)
- whipped cream (whipped heavy cream or coconut whipped cream for dairy-free)
Brief notes:
- Purecane Baking Sweetener can be swapped 1:1 with regular granulated sugar if you prefer.
- Refined coconut oil is neutral-tasting; if you prefer a coconut hint, use unrefined.
- Almond flour yields a tender, slightly nutty cookie base and keeps these naturally gluten-free.
- Use fresh, ripe strawberries for the best flavor; you can macerate them with a touch of sweetener if you want them juicier.
Helpful tools:
- Mixing bowls (one for wet, one for dry)
- Measuring cups and spoons
- Muffin tin (standard 12-cup works; recipe forms 8 larger cups)
- Nonstick spray or a pastry brush and a bit of oil for greasing
- Spatula and spoon
- Small cookie scoop or teaspoon for portioning dough
- Cooling rack
- Optional: blender or food processor if you want super-smooth almond flour or to blitz strawberries for a sauce
If you enjoy experimenting with other cookie-style desserts, you might also like the texture contrasts found in this crumbl pecan pie cookies recipe — a great inspiration for nut-forward flavors.
Step-by-Step Instructions (with tips)
-
Set the oven to 350 degrees. (If you prefer Celsius, set to 175°C.)
Tip: Preheating ensures even baking from the moment the tin goes in. -
In a mixing bowl combine the baking sweetener (or sugar), egg, melted coconut oil, and vanilla extract. Whisk until smooth and slightly glossy.
Tip: If your melted coconut oil is too hot, let it cool briefly so it doesn’t cook the egg. -
In a separate bowl combine the almond flour, baking powder, and salt. Whisk these dry ingredients to break up any lumps.
Tip: Measure almond flour by spooning it into the cup and leveling; packing can make dough too dense. -
Add the dry ingredients to the wet ingredients and combine. Use a spatula to fold gently until a uniform dough forms. It should be slightly sticky but workable.
Tip: If the dough is very wet, chill 10–15 minutes; if it’s crumbly, add a teaspoon of water or milk at a time until it holds together. -
Roll the dough into a little larger than tablespoon sized balls. It should make 8 cookies. Place the dough balls into a greased muffin tin and flatten each ball slightly with your fingers or the back of a spoon so there’s a compact mound that can be shaped into a cup.
Tip: A small cookie scoop helps make even cups. -
Bake for 18 minutes. The edges should be lightly golden and the tops set.
Tip: Oven temps vary; begin checking at 16 minutes. Almond flour browns quickly — don’t overbake. -
Remove from the oven and while still warm press the inside of each cookie with your fingers to form a cup shape. Be gentle so you don’t crack the shell.
Tip: Use the back of a small spoon or your knuckle if the cookie is too hot to touch. -
Bake again for 3 minutes to set the cup shape. This helps the inside hold better when filled.
Tip: If a cup got too thin, you can gently press the edges back up after the second bake while still warm. -
Remove from the oven and let cool completely in the tin, then transfer to a cooling rack. Cooling fully helps the cups firm up.
Tip: If you plan to fill immediately, letting them cool for 10–15 minutes will keep the whipped cream from melting. -
Fill with chopped strawberries, top with whipped cream, and enjoy! For a classic presentation, add a small strawberry slice or mint leaf on top.
Tip: Macerate strawberries with 1–2 teaspoons of sweetener for 10–20 minutes if you like them extra juicy and syrupy; skip macerating for a fresher, firmer bite.
Variations and kitchen tips:
- Dairy-free: Use coconut whipped cream and ensure any store-bought topping is labelled dairy-free.
- Berry swap: Try raspberries or a mix of berries for a different seasonal profile.
- Stabilized whipped cream (if making ahead): Whip heavy cream with a tablespoon of powdered sugar and a teaspoon of cornstarch or a small amount of cream cheese for longer hold.
- Texture twist: Fold 1/4 cup finely chopped toasted almonds into the dough for crunch.
- Roasted vs. fresh strawberries: Roasting strawberries (toss with a touch of sweetener and roast at 375°F for 12–15 minutes) concentrates flavor and is lovely in cooler months. Macerating (just tossing with sweetener and letting sit) brightens them and keeps them juicy — choose based on the season and desired texture.
Storage, Freezing & Make-Ahead Tips
Storing leftovers:
- Room temperature: Unfilled cookie cups can be stored in an airtight container at room temperature for up to 3 days. Keep them layered with parchment between layers to prevent sticking.
- Refrigerator: Once filled with strawberries and whipped cream, store in the fridge and consume within 24 hours for best texture. The moisture from the fruit will soften the cookie over time.
Freezing:
- Unfilled cups freeze best. Arrange cooled cookie cups on a baking sheet, freeze until solid (about 1–2 hours), then transfer to a freezer-safe container or bag for up to 2 months. Thaw at room temperature before filling.
- Filled cups don’t freeze well because the whipped cream and fruit change texture when frozen.
Make-ahead strategy:
- Make the cookie shells up to 3 days in advance and store at room temperature. Chop strawberries and store in the fridge; whip cream just before serving or use a stabilized whipped cream if you need a few extra hours of hold.
- For party prep: bake shells in the morning, fill just before guests arrive, and top with whipped cream moments before serving.
If you like prepping desserts ahead, you may enjoy adapting techniques from other cookie projects like this irresistible cowboy cookies recipe for large-batch make-ahead ideas.
How to Use / Serve This Dish
Serving ideas:
- Afternoon tea: Plate two cookie cups per person alongside a pot of tea or herbal infusion.
- Mini dessert course: Offer as a light palate-pleasing dessert after a bright salad or grilled main.
- Kids’ party: Let little ones decorate with sprinkles (choose halal-friendly sprinkles) and extra berries.
- Picnic: Pack shells and fruit separately and assemble just before serving so the cookies stay crisp.
Creative variations:
- Lemon zest: Add 1 teaspoon lemon zest to the dough for a citrus note that pairs beautifully with strawberries.
- Honey glaze: Drizzle a tiny bit of honey or agave over the strawberries for added sheen and sweet depth. (Use honey if it fits your taste and dietary preferences.)
- Chocolate dip: For a luxe twist, dip half the base of each cup in melted dark or milk chocolate (wait until cups are fully cooled). Be mindful: chocolate will add richness and pairs well with the almond base.
Pairings:
- Beverages: Serve with fruit-forward teas, chilled rose lemonade, or sparkling water with strawberry slices for an elegant, non-alcoholic pairing.
- Other desserts: Pair with a light sorbet or a small scoop of vanilla ice cream for an extra-treat option.
FAQ
Q: Can I make these gluten-free?
A: Yes — the recipe already uses almond flour, which is naturally gluten-free. Ensure your baking powder and any other packaged ingredients are certified gluten-free if you have a strict sensitivity.
Q: What can I use instead of almond flour?
A: Almond flour gives a tender crumb and slightly nutty flavor. You can try finely ground oat flour or a gluten-free flour blend, but textures will vary and you may need to adjust liquid. If using regular all-purpose flour (not gluten-free), the cookie texture will be denser; swap 1:1 but consider chilling the dough for 20–30 minutes.
Q: How long do the filled cups last?
A: Once filled with strawberries and whipped cream, eat within 24 hours. The fruit releases moisture that softens the cup, and whipped cream will lose volume and texture over time.
Q: Can I make the whipped cream from scratch?
A: Absolutely — whip chilled heavy cream with a tablespoon of powdered sugar and a teaspoon of vanilla extract until soft peaks form. For dairy-free options, chill a can of full-fat coconut milk, scoop the solid cream, and whip with a little powdered sugar and vanilla.
Conclusion
These Strawberry Shortcake Cookie Cups are a joyful celebration of seasonal strawberries and simple from-scratch baking — warm almond-cookie cups, bright chopped fruit, and a soft crown of whipped cream make an inviting dessert for any table. If you’re looking for recipe variations or inspiration from other cooks, check out this Mini Strawberry Shortcake Cookie Cups Recipe – Creations by Kara for a smaller bite-sized approach, or see a classic take at Strawberry Shortcake-Cookie Cups | Philadelphia – Kraft Heinz. For a semi-homemade shortcut version and helpful assembly tips, this Strawberry Shortcake Cookie Cups Recipe (Semi-homemade) is a useful reference, and for another home-cook perspective try Strawberry Shortcake Cookie Cups – – Cooking With Karli. I hope you’ll try these this strawberry season — if you do, I’d love to hear how you filled them or what variations you tried. Share the recipe with friends and enjoy the cozy, fresh flavors!
3. Strawberry Shortcake Cupcakes
Strawberry Shortcake Cupcakes
Strawberry Shortcake Cupcakes are a bright, seasonal treat that bring the sunny flavors of fresh strawberries into a tender, buttery cupcake topped with cloud-like whipped cream. These cupcakes highlight simple ingredients — ripe strawberries, vanilla, and a soft cake crumb — while offering a lovely contrast between the lightly sweet cake and juicy berry topping. If you love baking from scratch and celebrating the flavors of spring and summer, this recipe is worth trying: it’s approachable for weekday baking yet pretty enough for weekend gatherings and potlucks. For another strawberry-forward dessert idea, you might also enjoy a strawberry milkshake pound cake for a different twist on the same fruit-forward notes: strawberry milkshake pound cake recipe.
Ingredients & Equipment
Ingredients
- 1/2 cup salted butter, softened
- 1 cup sugar
- 2 eggs
- 1 1/2 cup all purpose flour
- 1/2 cup milk
- 1 tsp vanilla extract
- 2 tsp baking powder
- 1 1/2 cup heavy whipping cream
- 1/2 cup powdered sugar
- 1 cup chopped strawberries
- 1 tbsp sugar
Notes
- Use room-temperature butter and eggs for the best emulsion and volume in the cupcakes.
- If your strawberries are very sweet, reduce the 1 tbsp sugar for the chopped berries to 1/2 tbsp.
- Powdered sugar in the whipped cream helps stabilize it and adds sweetness without grittiness.
Helpful equipment
- Electric mixer (hand or stand mixer) — for creaming and whipping.
- Muffin tin and 12 cupcake liners.
- Ice cream scoop or large spoon for portioning batter evenly.
- Chilled metal mixing bowl (for whipping cream).
- Spatula and small bowl for macerating strawberries.
- Wire rack to cool cupcakes.
For another strawberry-saturated dessert idea that complements this style, consider trying a denser strawberry loaf for sipping with tea: strawberry milkshake pound cake guide.
Step-by-Step Instructions (with tips)
-
Preheat the oven.
- Set the oven to 350 degrees Fahrenheit and position a rack in the center.
-
Cream the butter and sugar.
- In a large mixing bowl add the butter and sugar. Beat with an electric mixer until light and fluffy, about 2–3 minutes. This step creates tiny air pockets that help the cupcakes rise.
-
Add the eggs.
- Next add the eggs one by one, beating after each egg. Scrape down the bowl as needed to keep everything evenly mixed.
-
Build the batter.
- Then alternately add the flour and milk into the cupcake batter until all is added. Beat until combined after each addition. Start and end with the flour for the smoothest texture.
-
Stir in flavoring.
- Stir in the vanilla extract. Avoid overmixing once the flour is fully incorporated to keep cupcakes tender.
-
Fill the tins.
- Next line a muffin tin with cupcake liners and add about ice cream scoop sized spoonfuls of the batter to each cupcake. You will be able to make 12 cupcakes. An ice cream scoop ensures uniform bake times.
-
Bake.
- Bake for 20 minutes, or until a toothpick inserted in the center comes out with a few moist crumbs. Ovens vary; check at 18 minutes the first time you make these.
-
Macerate the strawberries.
- While the cupcakes are baking combine the chopped strawberries and sugar. Place in the fridge until needed. Macerating draws out juices and softens the fruit, creating natural syrupy pockets.
-
Whip the cream.
- Then make the whipped cream frosting. Add the heavy whipping cream to a chilled bowl (just place in the freezer 30–60 minutes before needed!). Beat with an electric mixer until soft peaks form. This will take a few minutes.
- Next add in the powdered sugar. Beat again until the frosting forms. Be careful not to over mix — you want soft, stable peaks.
-
Assemble.
- Once the cupcakes have cooled, add whipped cream frosting to each cupcake and spread with a spoon or use a frosting bag and tip. Add a spoonful of the strawberries on top.
-
Enjoy!
- These cupcakes are best enjoyed the same day but can be stored (see storage tips below).
Baking tips and variations
- Even-sized cupcakes: Use an ice cream scoop to keep cupcakes uniform so they bake evenly.
- Roasted strawberry option: Instead of macerating, toss sliced strawberries with a touch of sugar and roast at 375°F for 10–15 minutes to deepen flavor and concentrate sweetness. Cool before topping.
- Fresh vs. cooked berry topping: Fresh macerated strawberries keep a bright, juicy flavor; roasted strawberries add caramelized depth. Both are delicious.
- Stabilizing whipped cream longer: Add 1 teaspoon of vanilla and 1 tablespoon of instant vanilla pudding mix to the whipped cream for a firmer frosting that holds up longer at room temperature.
- Dairy-free version: Use a plant-based whipping cream alternative and dairy-free butter substitute; results will vary but remain delicious.
- Gluten-free cupcakes: Substitute a 1:1 gluten-free flour blend for all-purpose flour, and test for doneness as gluten-free batters can behave differently.
For a companion strawberry recipe in your baking rotation, try this nostalgic loaf as a follow-up: strawberry milkshake pound cake.
Storage, Freezing & Make-Ahead Tips
Storing leftovers
- Short-term (same day): Keep cupcakes covered loosely with plastic wrap or in an airtight container in the refrigerator. The whipped cream topping is best chilled.
- Up to 3 days: Store assembled cupcakes in a single layer in an airtight container in the fridge. The whipped cream will soften over time, so consuming within 24–48 hours is ideal for texture.
Freezing
- Unfrosted cupcakes: Freeze cooled cupcakes in a single layer on a baking sheet until solid, then transfer to a freezer-safe bag or container. Freeze up to 2 months. Thaw overnight in the refrigerator before frosting.
- Frosted cupcakes: Whipped cream is delicate; freezing assembled cupcakes can cause texture changes. If you must freeze assembled cupcakes, flash-freeze on a tray, then wrap individually and freeze up to 1 month. Thaw in the fridge and note the whipped cream may weep slightly.
Make-ahead strategy
- Make the cupcakes and refrigerate unfrosted for up to 2 days; whip the cream and macerate strawberries the morning of serving for the freshest topping.
- For parties: Bake cupcakes a day ahead, refrigerate in an airtight container, and whip the cream the day of the event. Assemble shortly before guests arrive to keep toppings lively.
Portioning and transport
- For picnics: Place cupcakes in a cupcake carrier or a snug container with a layer of paper towels to absorb any excess moisture. Keep chilled until serving time.
- For sharing: Consider packaging unfrosted cupcakes with a small container of macerated strawberries and whipped cream so recipients assemble fresh at home.
How to Use / Serve This Dish
Serving ideas
- Afternoon tea: Present these cupcakes on a pretty platter with small forks; their delicate flavors pair beautifully with herbal or fruity teas.
- Brunch addition: Offer them as a sweet option alongside fresh fruit salads and light pastries for a seasonal brunch spread.
- Kid-friendly treat: These are easy to assemble with kids — let little hands spoon strawberries on top or pipe simple rosettes of whipped cream.
- Decoration ideas: Add a thin slice of strawberry fan, a small mint leaf, or a sprinkle of finely grated white chocolate for a refined finish.
Creative variations
- Layered mini shortcakes: Spoon a little jam or strawberry compote into the center of each cupcake before topping to create a filled surprise.
- Lemon-berry twist: Add 1 teaspoon of lemon zest to the batter for a bright citrus note that elevates the strawberry flavor.
- Crunchy contrast: Top with chopped toasted almonds or a few crushed graham cracker crumbs for a shortcake-inspired crunch.
Pairing suggestions (non-alcoholic)
- Hot beverages: Earl Grey, chamomile, or green tea complement the sweet tartness of the strawberries.
- Cold beverages: Sparkling water with a squeeze of citrus or chilled iced tea make light, refreshing companions.
FAQ
Q1: Can I use frozen strawberries for the topping?
A1: Yes, you can use frozen strawberries. Thaw them first and drain excess liquid, then gently macerate with the sugar. Keep in mind frozen berries tend to be softer and may be more syrupy than fresh when thawed.
Q2: How long does the whipped cream frosting hold up?
A2: Fresh whipped cream made with powdered sugar holds up well for a few hours at room temperature and up to 24–48 hours in the refrigerator. For longer stability (e.g., for a party), add a small stabilizer like 1 tablespoon of instant pudding mix or use cream stabilizer designed for whipped toppings.
Q3: Can I make mini cupcakes instead of standard size?
A3: Absolutely. Use a mini muffin tin and reduce baking time to about 10–12 minutes; check frequently with a toothpick. Yield will increase and they’re perfect for bite-sized servings at large gatherings.
Q4: What is a good egg substitute if I need to avoid eggs?
A4: For a vegan or egg-free option, try a commercial egg replacer or use flax “eggs” (1 tablespoon ground flaxseed + 3 tablespoons water per egg, mixed and rested). Texture may be slightly denser, so consider adding a touch more leavening (an extra 1/4 tsp baking powder) to compensate.
Conclusion
These Strawberry Shortcake Cupcakes are a simple, satisfying way to celebrate peak strawberry season — tender vanilla cupcakes, soft whipped cream, and sweet, bright strawberries make a comforting dessert that’s easy to share. If you’re inspired to explore more strawberry shortcake variations, Chocolate with Grace offers a lovely take on the classic, and Sally’s Baking Addiction has a tested guide with helpful tips. For science-forward tips on strawberry textures and baking outcomes, check Scientifically Sweet, and Girl Vs Dough shares a beautiful, photo-rich version if you want visual assembly ideas. For more inspiration, see these reliable takes on the strawberry shortcake cupcake: Chocolate with Grace’s Strawberry Shortcake Cupcakes, Sally’s Baking Addiction strawberry shortcake cupcakes, Scientifically Sweet’s strawberry shortcake cupcakes, and Girl Vs Dough’s Strawberry Shortcake Cupcakes Recipe.
I hope you bake a batch and enjoy them with friends or family — if you try this recipe, I’d love to hear how your cupcakes turned out or see a photo of your finished treats. Happy baking!
4. Cupid’s Vodka Spiked Raspberry Lemonade
Cupid’s Vodka Spiked Raspberry Lemonade
Cupid’s Vodka Spiked Raspberry Lemonade is the kind of seasonal cocktail that feels like a warm hug in a glass — bright, slightly fizzy, and dressed up for celebration. If you love raspberries and sunny citrus with a playful adult twist, this recipe brings together raspberry vodka, fresh berries, and tangy lemonade to make something both comforting and flirty. It works beautifully for Valentine’s gatherings, spring brunches, or any time you want a pretty, easy-to-make drink that tastes like summer is just around the corner. For a similar bright spritz idea and more citrus inspiration, check out this raspberry spritz twist I love: citrus margarita and pomegranate mint raspberry spritz recipe.
Why this recipe works (quick overview)
This vodka-spiked raspberry lemonade balances sweet and tart with a clean vodka backbone. The fresh raspberries add texture and real fruit flavor, while edible glitter makes it feel festive and elevated without any complicated bartending skills. It’s refreshing, visually appealing, and simple enough to whip up in minutes for a crowd or keep chilled for a cozy night with someone special.
Ingredients & Equipment
Ingredients
- 1 cup raspberry vodka
- 2 cups lemonade (homemade or high-quality store-bought)
- 1 cup fresh raspberries (plus extra for garnish)
- 1–2 tablespoons edible glitter (petal or pearl shimmer works nicely)
- Ice (large cubes or crushed)
- Lemon slices for garnish
Notes:
- If you prefer less alcohol, reduce vodka to 3/4 cup and top with sparkling water for extra fizz.
- Use organic lemons if making your own lemonade for the freshest flavor.
Helpful Equipment
- Pitcher (large enough for at least 4 cups)
- Blender or muddler (for crushing raspberries) — a blender makes a smoother drink; a muddler keeps more texture.
- Fine mesh sieve (optional, if you prefer seed-free lemonade)
- Long spoon for stirring
- Measuring cups and spoons
- Serving glasses (highball, mason jars, or coupe glasses for a more elegant look)
- Small bowl or baking tray (to dust rims with glitter if desired)
- Ice bucket (optional for parties)
Tip: If you want a super-smooth texture, blend the raspberries with a little lemonade and strain through a fine sieve to remove seeds before combining with vodka.
Step-by-Step Instructions (with tips)
1. Combine vodka and lemonade
In a large pitcher, pour 1 cup raspberry vodka and 2 cups lemonade. Stir gently to combine so the flavors marry without flattening the lemonade’s brightness.
Tip: For a lighter cocktail, use 1/2 cup vodka and 2 cups lemonade, then add 1 cup soda water. For a fizzy variation, replace half the lemonade with chilled sparkling lemonade or lemon-lime soda.
2. Stir in fresh raspberries
Add 1 cup fresh raspberries directly to the pitcher. Use a muddler or the back of a spoon to gently crush a few raspberries to release juices while leaving some whole for texture and garnish.
Variation: If you prefer a roasted flavor, toss the raspberries on a baking tray with a teaspoon of sugar and roast at 375°F for 8–10 minutes until softened and slightly caramelized. Cooling them slightly before adding will introduce a deeper, jammy note to the drink. Alternatively, for a brighter, fresher berry pop, bring raspberries to a quick boil with a tablespoon of sugar and simmer for 2 minutes; cool before adding — this makes a simple raspberry syrup.
3. Add ice to glasses and pour
Fill serving glasses with ice and pour the vodka lemonade mixture over the ice. If serving a crowd, keep the pitcher on ice or in a larger bowl filled with ice to maintain chill.
Tip: Use large ice cubes to reduce dilution, or crushed ice for a more slushy presentation. Pre-chill the pitcher and glasses for a bolder chill and cleaner taste.
4. Stir in edible glitter for a sparkling effect
Sprinkle 1–2 tablespoons of edible glitter into the pitcher or into each glass and stir gently so the shimmer disperses throughout the drink. Edible glitter is safe to consume — look for cosmetic-grade or food-grade glitter labeled as edible.
Kitchen tip: If you want the glitter to cling to the rim, dampen the rim of each glass with a lemon wedge and dip lightly into glitter on a shallow plate before pouring.
5. Garnish and serve
Top each glass with a lemon slice and a few fresh raspberries on a skewer or floating in the drink. Serve immediately while cold and sparkling.
Flavor suggestion: Add a sprig of fresh mint or a few basil leaves to each glass for a herbal lift. A tiny splash of elderflower liqueur (about 1 tablespoon per pitcher) brings a floral sweetness that pairs beautifully with raspberries.
Variations & Pro tips
- Mocktail version: Replace vodka with raspberry syrup or a splash of cranberry juice and top with sparkling water. Keep the edible glitter for the same festive look.
- Rosé twist: Swap vodka for a chilled rosé wine (about 2 cups) and reduce lemonade to taste for a lighter, wine-based spritz.
- Frosty slush: Freeze lemonade in ice cube trays; blend frozen cubes with vodka and raspberries for a blended frozen cocktail.
- Sugar rim or salted rim: Use sugar for a sweeter finish, or for a savory contrast, try a lemon-pepper or rosemary-salt blend for a sophisticated edge.
Storage, Freezing & Make-Ahead Tips
Storing leftovers:
- Refrigerate any leftover vodka lemonade in a sealed pitcher or bottle for up to 48 hours. Fresh raspberries will soften over time and may bleed color into the lemonade, which is fine but reduces texture. Give the pitcher a gentle stir before serving.
Freezing:
- Do not freeze the finished cocktail with vodka if you want the same texture later — alcohol lowers the freezing point and will make a slushy or partially frozen texture. If you’d like to prep ahead, freeze the lemonade (without vodka) in ice cube trays. When ready to serve, blend the frozen lemonade cubes with vodka and raspberries for an instant frozen cocktail.
- For longer-term storage, make a raspberry syrup (cook raspberries with sugar, strain, and freeze syrup in airtight containers). Thaw and combine with lemonade and vodka as needed.
Make-ahead:
- Make the raspberry component ahead by making a quick raspberry compote or syrup (equal parts raspberries and sugar simmered until thick, then cooled). Store in the refrigerator for up to a week. When serving, mix syrup with vodka and lemonade to taste, and add fresh raspberries for garnish.
Portioning advice:
- This recipe yields about 3–4 standard cocktail servings (depending on glass size). For a party, scale up maintaining roughly a 1:2 ratio of vodka to lemonade (1 part vodka to 2 parts lemonade) and adjust sweetness or fizz with soda water as needed.
How to Use / Serve This Drink
Serving ideas:
- Valentine’s Day or romantic dinners: Serve in coupe glasses with a raspberry and lemon twist perched on the rim, and soft music in the background. Edible glitter gives it an extra romantic sheen.
- Brunch or garden parties: Offer a non-alcoholic mocktail alongside by swapping vodka for sparkling water; place a tray with garnishes like mint, lemon wheels, and extra raspberries so guests can personalize their drinks.
- Pairings: This cocktail pairs beautifully with light bites — think goat cheese crostini with honey, smoked salmon canapés, lemon herb chicken skewers, or fresh summer salads with feta and berries. For desserts, serve with shortbread cookies, lemon bars, or a raspberry tart.
Creative presentations:
- Make a pitcher “bar”: provide a large pitcher of the vodka-lemonade base and small bowls of garnishes: roasted raspberries, mint, basil, edible flowers, and glitter. Guests can build their own glasses.
- Frozen pops: Freeze the lemonade (no vodka) in popsicle molds, insert a fresh raspberry or two in each mold for a pretty swirl. Serve to kids or as a non-alcoholic treat while adults enjoy the spiked version.
FAQ
Q: Can I substitute another spirit for vodka?
A: Yes. Gin adds herbal, floral notes that complement raspberries and lemon very well. Tequila blanco gives a brighter, slightly savory edge. For a lighter, wine-based option, try chilled rosé. Keep in mind the strength and flavor of the spirit when substituting — gin will change the profile more than tequila or wine.
Q: How long will this cocktail keep in the fridge?
A: If mixed with vodka, it will keep for about 24–48 hours refrigerated, though the texture of the fresh raspberries will change and drink may look cloudier. For best flavor and appearance, serve within the first day. If you’ve used sparkling components, they will lose fizz over time, so add bubbly at the last moment.
Q: Are there good alternatives to edible glitter?
A: Yes — you can use a splash of champagne or sparkling wine for shine and fizz, or a few drops of clear vanilla syrup or lemon simple syrup for a glossy finish. Edible flower petals also add visual charm without shimmer.
Q: Can I make this drink less sweet or more tart?
A: Absolutely. Use tart homemade lemonade or reduce the amount of store-bought lemonade and add fresh lemon juice to taste. You can also increase vodka slightly to counter sweetness, or add a splash of club soda for dilution and brightness.
Tips for hosting
- Prepare garnishes in advance: wash raspberries and slice lemons the morning of your event. Keep them chilled on a tray.
- Label an alcohol-free version clearly if you’re serving guests with varying preferences. A fun sign, chalkboard, or small tag helps.
- If serving for a big group, pre-batch multiple pitchers with vodka and lemonade separately and add raspberries, ice, glitter, and garnishes just before serving to keep things fresh.
Conclusion
There’s something effortlessly charming about Cupid’s Vodka Spiked Raspberry Lemonade — it’s bright, comforting, and celebratory, perfect for seasonal gatherings or cozy evenings when you want a drink that looks as good as it tastes. If you want to see festive drink specials for Valentine’s Day that capture a similar playful spirit, check out this round-up of Applebee’s Drink Specials – $6 Smoocho Valentine’s Day Cocktails. For cocktail makers who enjoy clever convenience, consider exploring Bartesian Cocktail Capsules | Bartesian Machine Drink Pods for inspiration on flavor pairings and easy serving ideas. And if you love seasonal cocktail menus and news about returning favorites, you might enjoy reading about Applebee’s® Tipsy Cupid & More Return for Valentines Day.
Try this recipe, make it your own, and share it with friends — whether you’re toasting a holiday, a small victory, or just a sunny afternoon, Cupid’s Vodka Spiked Raspberry Lemonade is a delightful way to celebrate.
5. How to Make Strawberry Hearts
There’s something wonderfully simple and joyful about turning fresh strawberries into little hand-held tokens of love. “How to Make Strawberry Hearts” is a seasonal, comforting project perfect for spring and summer when berries are at their peak — sweet, fragrant, and vibrant red. Whether you’re planning a cozy dessert for a family meal, a festive treat for Valentine’s Day, or a fun weekend activity with kids, these chocolate-dipped strawberry hearts deliver on flavor and charm. If you enjoy making from-scratch seasonal goodies, you might also like my guide to how to make homemade pumpkin puree for autumn baking and preserves.
Ingredients & Equipment
- 2 lbs fresh strawberries (medium to large)
- 2 cups dark or milk chocolate chips
Notes: Buy firm, ripe strawberries — they should be bright red with fresh green caps and no bruises. If you prefer a sweeter finish, choose milk chocolate chips; for a richer, slightly bitter contrast, use dark chocolate. You can also use high-quality chopped chocolate or couverture if you have it.
Helpful equipment:
- Small, sharp paring knife for carving
- Wooden skewers or popsicle sticks
- Microwave-safe bowl or a heatproof bowl for a double boiler
- Parchment paper or a silicone baking mat
- Baking tray or plate
- Small offset spatula or spoon for drizzling (optional)
- Kitchen thermometer (optional but helpful for tempering chocolate)
If you enjoy pairing sweets with savory brunch items, consider adding a fun contrast from a favorite recipe like Bangin’ Breakfast Potatoes to your spread.
Step-by-Step Instructions (with tips)
Preparation
- Rinse and gently pat dry fresh strawberries. Make sure strawberries are completely dry — any surface moisture can cause melted chocolate to seize or not adhere properly.
- With a small, sharp knife, in a circular motion, carve out the stem of the strawberry. Take your time; a gentle circular cut around the green cap removes the core while keeping the berry intact. See image above.
- Slice the strawberry in half. Use a steady hand and a sharp knife to get a clean, even cut so both halves look symmetrical.
- At the top center of each berry half, cut a small V-shape. This creates the notch that forms the “heart” at the top. A tiny V, about 1/4 inch deep, is usually enough for a medium strawberry.
- Gently insert a wooden stick at the bottom of the heart shape. Push the skewer up just far enough to secure the half without splitting it — this makes dipping easier and gives you a cute handheld presentation.
- Heat chocolate chips in the microwave for 30 seconds. Repeat in 30-second intervals, stirring in between, until chocolate is melted and smooth. Alternatively, melt chocolate using a double boiler over gently simmering water, stirring until silky. If using a thermometer, aim to keep melted chocolate around 88–90°F for dark chocolate and a few degrees lower for milk. Overheating can make the chocolate grainy.
- Dip strawberries in melted chocolate. Hold the skewer and tilt the bowl or spoon the chocolate to coat as much of the heart as you’d like. You can fully coat, half-coat, or just dip the tip for a decorative look.
- Let dry on parchment paper until chocolate firms. Place dipped strawberries on parchment-lined trays with the chocolate side up and allow to set at room temperature. For faster setting, chill briefly in the fridge (6–10 minutes), but avoid long refrigeration which can create condensation and dull the chocolate’s sheen.
Tips while you work:
- If chocolate thickens as you work, add a teaspoon of neutral oil (coconut or vegetable) or a small amount of melted cocoa butter to loosen it. Stir gently.
- For a glossy finish, consider tempering the chocolate by cooling and re-warming it to the correct temperature ranges; this gives the chocolate a snap and shine. If you’re not tempering, keep the chocolate smooth and avoid getting water in it.
- Decorations: before chocolate fully sets, sprinkle crushed nuts, toasted coconut, crushed cookies, or edible glitter. Drizzle white chocolate for contrast after the first layer sets.
- Work in a single layer without crowding the tray so strawberries don’t touch and stick together.
- To troubleshoot: if chocolate seizes (becomes grainy), add a small amount of warm cream or oil and whisk until smooth; this may change the texture but often salvages it.
Variations
There are a few lovely ways to mix up this basic technique:
- Oven-roasted strawberry hearts: Halve and cut hearts as directed, place on a baking sheet with a sprinkle of sugar, and roast at 350°F for 8–12 minutes for intensified flavor and a slightly jammy texture. Cool before dipping.
- Fresh macerated version: Toss cut strawberries in a tablespoon of sugar and a squeeze of lemon for 10–15 minutes to bring out juices; pat dry before dipping for a sweeter, juicier bite.
- White chocolate or ruby chocolate: Swap the dark/milk chips for white or ruby chocolate for a different flavor and color palette. Remember white chocolate melts differently and can be more temperamental.
- Nutty or boozy finish: Dip in chopped pistachios or hazelnuts, or brush with a light rum- or Grand Marnier-infused glaze before serving for an adult twist.
Storage, Freezing & Make-Ahead Tips
Best practices for keeping your strawberry hearts fresh and beautiful:
- Short-term storage: Store dipped strawberries in a single layer in an airtight container lined with parchment. Keep them in the coolest part of the refrigerator, but not in the crisper drawer where humidity can cause sweating. Use within 24–48 hours for best texture.
- Avoid stacking: If you must stack layers, place parchment between layers to prevent sticking and smudging.
- Freezing: Freezing fresh strawberries dipped in chocolate is possible but tricky. Chocolate can develop a white film (bloom) from moisture changes. If you plan to freeze, flash-freeze the plain, halved hearts on a tray first for 1 hour, then dip in tempered chocolate and freeze in a single layer. Thaw slowly in the fridge to minimize condensation. Note: texture may change slightly; frozen-thawed berries will be softer.
- Make-ahead: You can prepare the cut heart-shaped strawberries a few hours ahead and keep them uncoated in the fridge on a paper towel-lined tray. Dry them thoroughly and bring them to room temperature before dipping to avoid moisture issues.
- Portioning: For parties, arrange on tiered platters or pre-stick the skewers into a block of floral foam (covered in parchment) for a cute display. Individual servings on dessert plates with a dollop of whipped cream are elegant and simple.
For a richer dessert table idea, pair these treats with something sticky-sweet like my burnt honey pie for an unforgettable contrast.
How to Use / Serve This Dish
Strawberry hearts are wonderfully versatile. Here are serving ideas and pairing suggestions to make them shine:
- Classic dessert: Serve 2–3 strawberry hearts per person alongside a scoop of vanilla bean ice cream and a drizzle of balsamic reduction for a restaurant-style finish.
- Party platter: Arrange on a platter with other dipped fruits (pineapple wedges, banana slices) and small cookies for a colorful dessert board.
- Breakfast or brunch accent: Add one or two to waffles, pancakes, or a stack of French toast for a romantic brunch touch; they pair surprisingly well with savory dishes like crispy breakfast potatoes or omelettes — try them with Bangin’ Breakfast Potatoes for a sweet-savory spread.
- Drinks pairing: Champagne, Prosecco, or even a sparkling rosé complements the chocolate and strawberry combination beautifully. For non-alcoholic options, serve with sparkling elderflower soda or a chilled hibiscus iced tea.
- Gift idea: Pack chilled strawberry hearts in small boxes with parchment and a cooling pack for a thoughtful edible gift (deliver the same day to avoid melting).
Frequently Asked Questions
1. Can I use frozen strawberries for this recipe?
It’s not ideal. Frozen strawberries release moisture as they thaw, which can cause the chocolate to seize and create soggy fruit. If you must use frozen berries, thaw completely, pat very dry, and use right away. Consider flash-freezing fresh halves before dipping for a longer shelf life instead.
2. How long will chocolate-dipped strawberry hearts keep?
Stored properly in a single layer in an airtight container in the fridge, they’re best eaten within 24–48 hours. After that, strawberries can soften and release juice that affects the chocolate texture and flavor.
3. What’s the best chocolate to use — chips, bars, or couverture?
All can work. Chocolate chips are convenient and designed to hold shape, but they sometimes contain stabilizers that affect gloss. High-quality chopped chocolate or couverture melts more smoothly and gives a superior texture and shine if you’re comfortable tempering; milk or dark chocolate choice depends on your preferred balance of sweet vs. bitter.
4. How do I prevent the chocolate from sliding off the strawberry?
Make sure strawberries are completely dry before dipping and don’t overfill the chocolate coating. Let the chocolate set upright on parchment at room temperature. If you chill immediately for too long, condensation can form and cause sliding or dullness — a quick chill (6–10 minutes) is fine but avoid long refrigeration.
Conclusion
Creating “How to Make Strawberry Hearts” is an easy, heartfelt way to celebrate the season and make simple ingredients feel special. The combination of ripe, juicy strawberries and glossy chocolate is comforting and festive — perfect for sharing, gifting, or enjoying quietly at home. If you’d like to see a different visual approach, check out this helpful tutorial from The BakerMama for step-by-step photos. For another professional take, California Strawberries offers a clear, illustrated guide at How to Make Strawberry Hearts | California Strawberries. If you want alternate cutting techniques to refine your hearts, Glamorosi Cooks has a great visual walkthrough: How to Cut Strawberries into Hearts – Glamorosi Cooks.
Give this recipe a try this season — take your time carving, enjoy the little imperfections, and share a photo of your strawberry hearts with someone you love. Happy dipping!
6. Valentine’s Day Chocolate Strawberries
Valentine’s Day Chocolate Strawberries are one of those simple, elegant treats that say “I love you” without much fuss — just sweet, juicy strawberries cloaked in silky chocolate and sprinkles. Whether you’re baking for a loved one, hosting a Galentine’s night, or making a seasonal gift, these chocolate-dipped strawberries bring color, flavor, and a homemade touch to the celebration. The seasonality of fresh strawberries and the cheerful red, white, and pink candy melts make this recipe a natural pick for February. If you love easy holiday projects, you might also enjoy more seasonal ideas on this Valentine’s Day inspiration page to pair with your strawberries.
Why these chocolate strawberries are worth trying
Homemade chocolate-covered strawberries are faster and more personal than store-bought arrangements, and they let you control the sweetness, chocolate quality, and decoration style. They’re customizable — dip, drizzle, sprinkle, or leave plain — and they make a lovely plate for an at-home date night or as part of a dessert spread. Best of all, they’re fun to make: this recipe is forgiving, craft-like, and perfect for cooks of all skill levels.
Ingredients & Equipment
Ingredients
- 16 strawberries (large, fresh, firm)
- Red candy melts
- White candy melts
- Pink candy melts
- Valentine assorted sprinkles
Notes:
- Choose fresh strawberries with green tops intact — the stem makes dipping easier and looks pretty on the finished berry.
- Candy melts are easier to work with than tempered chocolate; if you prefer dark or milk chocolate, see substitutions in the FAQ.
Equipment & helpful tools
- Baking tray or sheet
- Parchment paper or silicone baking mat
- 3 microwave-safe bowls (one for each color)
- Rubber spatula or spoon
- Toothpicks or forks (for poking holes in candy melts if needed)
- Small piping bag or resealable plastic bag (for drizzling)
- Double boiler (optional, if you prefer stovetop melting)
- Candy thermometer (optional, only needed if tempering chocolate)
- Paper towels and a plate for rinsing strawberries
Helpful tip: Use a baking tray that fits in your fridge so you can chill dipped berries quickly. If you expect to make a lot, a cooling rack set over parchment lets excess chocolate drip evenly.
Step-by-Step Instructions (with tips)
-
Rinse and dry strawberries.
- Gently rinse each strawberry under cool water and pat completely dry with paper towels. Drying is essential — water will make the chocolate seize or prevent it from sticking well.
- Leave the green tops intact for easy dipping and to add a decorative finish.
-
Prepare your workspace.
- Line a baking sheet with parchment paper or a silicone mat. Place bowls of candy melts nearby with a spoon or spatula for each.
- Have your sprinkles in shallow bowls for quick access.
-
Melt the chocolate according to the package directions.
- Important: Melt each chocolate one at a time in the microwave, not all three bowls together. This prevents overheating and makes it easier to control consistency.
- Microwave method: Heat candy melts in 20–30 second bursts, stirring between each burst until smooth. If you overheat, add a teaspoon of vegetable oil or coconut oil to smooth the mixture.
- Double-boiler alternative: Place candy melts in a heatproof bowl over simmering water and stir until fully melted.
-
Dip each strawberry into the different colors of chocolate.
- Hold the strawberry by the green stem and dip about two-thirds of the fruit into the chocolate, swirling to coat evenly.
- For a playful tray, dip some entirely in red, some in white, and some in pink. Vary the dipped height for visual interest.
-
Place on a parchment-lined baking sheet and immediately add the sprinkles.
- After dipping, set each berry on the prepared tray and quickly sprinkle while the coating is still wet so sprinkles adhere.
- Use assorted sprinkles to create hearts, pearls, or nonpareils for a festive Valentine’s look.
-
Create extra designs (optional).
- You can also dip some strawberries plain in one color and then drizzle a different color of chocolate over them once the base has set slightly.
- For drizzling: transfer melted chocolate to a small piping bag or a resealable bag with a tiny corner snipped off and drizzle back and forth.
-
Have fun and create different looks.
- Try half-dipped berries (dip half the fruit), polka dots made by dotting with a contrasting color, or marbled berries by lightly swirling two colors while wet.
- Use edible glitter or small candy pearls for sophistication.
-
Let it dry and enjoy!!
- Allow dipped strawberries to set at room temperature for about 30–60 minutes, or place them in the refrigerator for 10–20 minutes to firm up more quickly.
- Serve chilled or at cool room temperature.
Kitchen tips:
- Avoid chocolate flowers: If your candy melts become grainy, reheat gently and stir; add a small amount of oil if needed.
- For a glossier finish with real chocolate, tempering is best, but candy melts are more forgiving for home cooks.
- If you want a firmer shell that won’t bloom or soften at room temperature, chill briefly after dipping.
Variations:
- Use dark, semi-sweet, or milk chocolate instead of candy melts for a richer flavor. See the FAQ for tips on melting and tempering real chocolate.
- Add a sprinkle of sea salt to dark chocolate-dipped berries for a sophisticated sweet-salty contrast.
- For adult parties, dust one color with a drop of liqueur (e.g., Grand Marnier) before dipping for a grown-up twist.
Storage, Freezing & Make-Ahead Tips
Short-term storage:
- Store chocolate-covered strawberries in a single layer on parchment paper inside an airtight container. Place a paper towel under the lid to absorb any excess moisture.
- Keep them refrigerated and eat within 24–48 hours for best texture. Strawberries release moisture over time, which can soften the chocolate coating.
Freezing:
- Freezing dipped strawberries is possible but not ideal for texture. If you must freeze them, place the tray with strawberries in the freezer until fully firm (about 20–30 minutes). Then transfer to an airtight, freezer-safe container with parchment layers between berries.
- Thaw in the fridge before serving. Expect slightly softer berries and potential moisture separation after thawing.
Make-ahead advice:
- For the freshest presentation, dip strawberries the same day you plan to serve them.
- If you need to prepare in advance, wash and thoroughly dry strawberries up to 1 day ahead, but don’t dip until serving day. Uncoated fresh strawberries keep best at room temperature for a few hours or refrigerated for up to 24 hours.
- Make the melted chocolate decorations (drizzles or dipped pieces) a few hours ahead and store in a cool place; reheat briefly if needed.
Portioning suggestions:
- This recipe makes 16 strawberries, which is a lovely tray for two people as a dessert or for a small gathering of 4–6 as part of a dessert selection.
- Double or triple the recipe for larger parties and use multiple baking sheets and bowls to keep colors separate and easy.
How to Use / Serve This Dish
Serving ideas:
- Present the strawberries on a pretty platter with a few fresh mint sprigs and a small dish of extra sprinkles for guests to add.
- Pair with a cheese board: mild cheeses (ricotta, mascarpone) and a few salty crackers balance the sweetness.
- For a brunch twist, serve alongside warm pastries and a pot of fresh coffee or sparkling wine.
Pairings:
- Sparkling wine or Champagne complements the berries and chocolate beautifully — the bubbles cut through richness.
- A light rosé or a fruity Pinot Noir is also a lovely red wine match.
- For non-alcoholic pairings, chilled hibiscus tea or sparkling water with a lemon twist brightens the palate.
Creative uses:
- Turn these into a centerpiece: arrange dipped strawberries around the base of a cake or atop a small tart.
- Gift idea: pack 6–8 strawberries in a small box with tissue paper and a ribbon for a homemade Valentine’s gift.
- Brunch add-on: For a special Valentine morning, add a platter of chocolate strawberries to waffles or pancakes.
For a sweet-and-salty board, you might also include other easy homemade treats like these 4-ingredient chocolate peanut butter bites from this simple recipe idea. If you’re building a full brunch menu, think about complementing the strawberries with something savory like these brunch potatoes — see this brunch potatoes recipe for inspiration.
FAQ
Q: Can I use fresh dark or milk chocolate instead of candy melts?
A: Yes. Use couverture chocolate or chocolate chips and melt gently. If using raw chocolate, you can melt in the microwave in short bursts (20–30 seconds) stirring frequently, or use a double boiler. For the best shine and snap, temper the chocolate — but if you want simplicity, adding a teaspoon of neutral oil (vegetable or coconut) can smooth melted chocolate and make it easier to dip.
Q: How long do chocolate-covered strawberries last?
A: Best eaten within 24–48 hours when stored in the refrigerator. Beyond that, strawberries will begin to release moisture that softens the fruit and can make the chocolate coating look dull or soggy.
Q: Can I freeze dipped strawberries for later?
A: You can freeze them, but texture will suffer. If freezing is necessary, freeze solid on a tray first and store airtight. Thaw in the fridge before serving. Expect some moisture loss and possible chocolate separation.
Q: Any tips for preventing chocolate from seizing or looking grainy?
A: Make sure strawberries are completely dry before dipping. If the chocolate gets a little thick or grainy, add a small amount (1/2–1 teaspoon) of neutral oil and stir until smooth. Avoid overheating; melt in short bursts and stir thoroughly.
Conclusion
Valentine’s Day Chocolate Strawberries are a warm, simple way to celebrate — they’re colorful, customizable, and offer a homemade charm that’s hard to beat. Whether you keep them classic with rich chocolate or play with candy melts and sprinkles, these berries bring joy to the table and a smile to the face of anyone lucky enough to receive them. If you’re looking for inspiration for arrangements or ready-made options, check out this guide to Valentine’s Chocolate Covered Strawberries from a popular gift company for presentation ideas. For gift-wrapping tips and delivery options if you prefer ordering rather than making, see this helpful page on Valentine’s Day gift deliveries and chocolate strawberries. If you’d like a step-by-step video-style walkthrough and more decorating ideas, this video-backed recipe complements the tips above beautifully. Try this recipe and share your unique designs — I’d love to hear how your tray turns out!
7. Valentine’s Day Red Velvet Cookies
Valentine’s Day Red Velvet Cookies are the kind of recipe that promises warmth, nostalgia, and a little bit of sparkle — all in a single, tender bite. These cookies take the beloved red velvet cake flavor and turn it into a quick, crowd-pleasing cookie that’s perfect for gifting, school parties, or a cozy night in with someone special. With a base of red velvet cake mix and a few pantry staples, you can whip these up in under an hour and still look like you spent all afternoon in the kitchen. If you enjoy simple, satisfying desserts that pack a lot of flavor with minimal fuss, you might also love this 4-ingredient chocolate peanut butter balls as another easy homemade treat to pair alongside.
Ingredients & Equipment
Ingredients
- 1 (15 oz.) box red velvet cake mix
- 1/3 cup vegetable oil
- 2 large eggs
- 1 teaspoon vanilla extract
- 11 oz white chocolate chips
- Sprinkles (red, pink, or mixed — use as much as you like)
Notes on ingredients
- The boxed red velvet cake mix is the shortcut that gives these cookies great structure and the signature flavor quickly. You can use any brand you prefer.
- Vegetable oil keeps the cookies soft and tender; melted butter will work but will change the texture slightly (a little more richness and chew).
- White chocolate chips provide a beautiful contrast to the red cookies; if you can’t find white chips, use chopped white chocolate or a cream cheese frosting dip.
- Sprinkles add a festive Valentine’s touch — use jimmies, nonpareils, or heart-shaped sprinkles.
Helpful equipment
- Mixing bowl and spatula (or a stand mixer paddle)
- Baking tray(s)
- Parchment paper or silicone baking mat
- Oven thermometer (optional, but helpful for oven accuracy)
- Small cookie scoop or tablespoon
- Microwave-safe bowl or double boiler for melting chocolate
- Cooling rack
Tip: If you want super-uniform cookies, chill the dough in a piping bag or shape with a scoop and chill on a tray before baking. For easy cleanup, line trays with parchment.
Step-by-Step Instructions (with tips)
- Prep the baking sheet
- Preheat your oven to 350°F (177°C). Line a baking sheet with parchment paper or a silicone mat so cookies don’t stick and cleanup is easy.
- Place racks in the middle of the oven for even heat.
- Mix cake mix, oil, eggs, and vanilla; chill for 20 minutes
- In a medium mixing bowl, add the red velvet cake mix. Stir in 1/3 cup vegetable oil, 2 large eggs, and 1 teaspoon vanilla until a soft dough forms. The dough will be slightly sticky but should hold together when scooped.
- Cover the bowl (or transfer dough to a bowl covered with plastic wrap) and chill for 20 minutes. Chilling helps the cookies hold their shape and yields a tender, cakey center.
Kitchen tip: If your dough seems too wet, chill longer or add a tablespoon of extra cake mix. If it’s too dry, add a teaspoon of milk or a little more oil.
- Scoop and bake at 350°F for 8–10 minutes
- Use a small cookie scoop or tablespoon to portion dough into even balls (about 1.5 tablespoons each). Place them about 2 inches apart on the prepared baking sheet.
- Bake in the preheated oven at 350°F for 8–10 minutes. The cookies should look set on top but still slightly soft in the centers; they continue to set as they cool.
Baking tip: For chewy edges with soft centers, bake closer to the lower end of the time range. For a cakier, fully set cookie, bake a minute or two longer. If you’re using a convection oven, reduce temperature by 25°F and start checking earlier.
- Dip cookies in melted chocolate and add sprinkles
- While cookies cool slightly on the baking sheet for 2–3 minutes, melt the white chocolate chips in a microwave-safe bowl in 20–30 second bursts, stirring between each burst until smooth. Alternatively, use a double boiler for more control.
- Dip the tops of each cookie into the melted white chocolate or drizzle the chocolate over the cookies with a spoon. While the chocolate is still wet, sprinkle on the sprinkles so they stick.
Chocolate tip: For a shinier finish and to avoid streaking, temper the white chocolate or add a small amount of coconut oil (1 teaspoon) to help smooth it out. If you want a pink-tinged dip, stir in a drop of oil-based red food coloring into the chocolate — avoid water-based coloring, which can seize white chocolate.
- Set for 10 minutes
- Transfer dipped cookies to a cooling rack or back onto parchment and let the chocolate set for about 10 minutes. If you’re short on time, chill them briefly in the refrigerator (3–5 minutes) but don’t leave them too long or condensation can form.
- Once set, store or plate for serving.
Variations and flavor suggestions
- Natural red: If you prefer natural color, make a small beet puree (roast or boil a beet, then blend) and add 1–2 teaspoons to the dough. Roasting vs boiling beets gives different flavor profiles — roasting concentrates sweetness and deepens the color, while boiling is milder. Test a small batch before changing the whole dough.
- Swap chips: Use dark chocolate chips, milk chocolate, or chopped white chocolate instead of chips for different flavor balances.
- Frosting-dipped: Skip the melted chocolate and top with a quick cream cheese glaze (mix 4 oz cream cheese, 1/2 cup powdered sugar, and 1–2 tbsp milk).
- Sandwich cookies: Spread cream cheese frosting between two cookies for a red velvet cookie sandwich.
Kitchen safety & troubleshooting
- If white chocolate seizes (becomes grainy) in the microwave, try adding a teaspoon of vegetable oil and gently stirring to smooth it. If that fails, discard and melt a new batch carefully at lower power.
- Uneven baking? Rotate your tray halfway through baking or check your oven temperature with an oven thermometer.
Storage, Freezing & Make-Ahead Tips
Short-term storage
- Store cooled cookies in an airtight container at room temperature for up to 3 days. Place a sheet of parchment between layers to prevent sticking and preserve appearance.
- For a slightly softer result, add a slice of bread to the container; it releases moisture that keeps cookies tender.
Long-term freezing
- Freeze baked cookies: Arrange cooled cookies in a single layer on a baking sheet and flash-freeze for 1–2 hours. Once firm, transfer to a freezer-safe bag or container with layers separated by parchment. Freeze for up to 3 months.
- Freeze dough balls: Portion the cookie dough into balls and freeze on a tray until firm, then transfer to a bag. Bake from frozen — add 1–2 minutes to the bake time.
Thawing and reheating - Thaw frozen baked cookies at room temperature for 20–30 minutes. Warm briefly in a 300°F oven for 3–5 minutes if you prefer a fresh-baked feel.
Make-ahead ideas - You can bake these a day ahead and decorate the day-of for fresher chocolate shine; after dipping, allow them to set and store in a cool spot.
- Prepare the dough and refrigerate up to 24 hours before scooping and baking to deepen the flavor.
Portioning advice
- This recipe yields roughly 24 small cookies (depending on scoop size). For larger cookie batches for parties, double the recipe and bake on multiple trays, rotating for even baking.
How to Use / Serve This Dish
Serving ideas
- Gift-ready: Arrange cookies in a decorative box or cellophane bag with tissue paper and add a handwritten tag for Valentine’s gifts.
- Dessert platter: Serve these cookies alongside small scoops of vanilla bean ice cream, chocolate-covered strawberries, and mini brownies for a romantic dessert board.
- Brunch sweet: Pair a plate of warm red velvet cookies with coffee, cappuccino, or a pink-hued hot chocolate for a themed brunch; they also go well with fresh berries.
Pairings and creative variations
- Cheese and cookies: For a playful pairing, serve with a mild cream cheese dip or whipped mascarpone; the tang balances the cookie sweetness.
- Cocktail pairing: Pair with a sparkling rosé, a coffee liqueur cocktail, or a milky lavender latte.
- Make them decorative: Use heart-shaped sprinkles or pipe tiny cream cheese roses on top for an elevated look.
If you’re assembling a sweet table for a Valentine’s gathering or pairing these cookies with savory brunch items, consider complementing them with a crowd-pleasing savory side like these bangin’ breakfast potatoes to balance sweet and savory on your spread.
FAQ
Q: Can I use a different cake mix flavor instead of red velvet?
A: Yes — you can swap the red velvet box for chocolate, yellow, or even spice cake mix for different flavors. Keep in mind the signature red color and slight cocoa of red velvet will change, so adjust decorations if desired.
Q: How long will these cookies stay fresh?
A: At room temperature in an airtight container, cookies remain tender for about 2–3 days. Refrigerating extends the life to about 5 days, but refrigeration can firm the texture; bring to room temperature before serving.
Q: Can I substitute the white chocolate chips?
A: Absolutely. Use milk or semisweet chocolate chips, chopped chocolate, or even candy melts. If you use a darker chocolate, the flavor will be richer and contrast nicely with the sweet red cookie base.
Q: My white chocolate seized — what can I do?
A: If the chocolate becomes grainy, try stirring in a teaspoon of vegetable oil or coconut oil to loosen it. If that doesn’t help, start with a fresh batch and melt at a lower power in short bursts or use a double boiler for better temperature control.
Q: Any tips for making the color more vibrant naturally?
A: For natural coloring, a small amount of beet puree works well. Roasting vs boiling beets will affect flavor—roasted beets give a richer, sweeter flavor while boiled beets are milder. Use sparingly to avoid altering flavor significantly.
Q: Can I make these gluten-free?
A: Use a gluten-free red velvet cake mix labeled as GF. Texture may vary slightly; you may need to adjust moisture (a splash more oil or an extra egg yolk) for best results.
Conclusion
These Valentine’s Day Red Velvet Cookies are a wonderful blend of convenience and charm: the box-mix shortcut gives reliable structure while simple add-ins and a white chocolate dip let you customize flavor and presentation. They bring the comfort of from-scratch baking with the ease busy home cooks appreciate, and they’re versatile enough for gifting, parties, or a quiet evening dessert. If you want inspiration from other red velvet cookie takes or cake-mix cookie hacks, this Valentine’s Day Red Velvet Cookies Recipe – Something Swanky offers a lovely variation, and for a different approach check out Red Velvet Cookies- Cake Mix Hack – One Sweet Appetite to compare techniques and decoration ideas. For a simple sugar-cookie-style red velvet that’s perfect for two, see this Red Velvet Valentines Day Cookies | Dessert for Two. Give these cookies a try, share a batch with someone you love, and enjoy the warmth and sweetness they bring to your Valentine’s table.
8. Valentine’s Day Pizza Roses
Valentine’s Day Pizza Roses are the kind of recipe that turns a simple dinner into a moment — warm, shareable, and impossibly charming. Imagine soft, golden pastry spirals filled with melty mozzarella and pepperoni, shaped like little roses you can pick up and eat. They’re perfect for a cozy date night at home, a family celebration, or a playful appetizer for a Galentine’s get-together. If you’re already planning a comfort-food spread, these pizza roses pair wonderfully with other crowd-pleasers like bangin breakfast potatoes for a brunch-to-dinner mashup that feels both festive and familiar. Whether you use store-bought pizza dough or roll your own, this recipe highlights seasonal warmth and the simple joy of sharing food made from scratch.
Ingredients & Equipment
Ingredients
- Pizza dough (store-bought or homemade)
- Pizza sauce (homemade or jarred)
- Mozzarella cheese (shredded or thinly sliced)
- Pepperoni slices
- Olive oil
- Italian seasoning (dried oregano/basil mix)
- Fresh basil (optional, for garnish)
Notes:
- Use a low-moisture mozzarella for less liquid while baking. Fresh mozzarella can be used, but slice it thinly and pat dry first.
- Pepperoni can be swapped for salami, prosciutto, cooked sausage, or roasted vegetables for a vegetarian version.
- If you like a bit of heat, add red pepper flakes or a drizzle of chili oil after baking.
Helpful equipment
- Rolling pin (or clean bottle if you don’t have one)
- Floured surface (wood or countertop)
- Sharp knife or pizza cutter (for cutting strips)
- Muffin tin or baking sheet (muffin tin helps keep roses upright)
- Pastry brush (for olive oil)
- Baking tray or sheet with parchment paper
- Oven thermometer (optional, to ensure accurate baking temp)
- Cooling rack
Small tools like a bench scraper and a pair of kitchen tongs can make handling the rolls easier. A blender isn’t necessary for this recipe unless you’re making a smooth homemade pizza sauce.
Step-by-Step Instructions (with tips)
-
Preheat your oven to 400°F (200°C).
- Tip: If you have an oven thermometer, place it in the center to verify temperature. Preheating fully ensures even browning.
-
Roll out the pizza dough on a floured surface and cut it into strips.
- Tip: Aim for strips about 1 to 1.5 inches wide and 8–10 inches long. If using cold dough, let it come to room temperature for 20–30 minutes so it’s easier to roll without springing back.
-
Spread a thin layer of pizza sauce over each strip.
- Tip: Use just enough sauce to flavor — too much will make the roses soggy. If your sauce is very watery, simmer it briefly to thicken or drain slightly in a sieve.
-
Place mozzarella cheese and pepperoni slices on top of the sauce.
- Tip: Overlap the pepperoni slightly along one long edge of the strip; cheese can be added sparingly between and over the pepperoni. If using fresh mozzarella, blot with a paper towel to remove excess moisture.
-
Starting from one end, roll the strip up to create a rose shape.
- Tip: Roll gently but firmly so the layers show like petals. If a strip feels too large, cut it shorter and make two smaller roses. For a tighter rose, start with the pepperoni side up so the pepperoni becomes the visible “petal.”
-
Place the pizza roses in a muffin tin or on a baking sheet.
- Tip: A greased muffin tin keeps the roses contained and upright; if using a baking sheet, place them close together so they support each other while baking.
-
Brush the tops with olive oil and sprinkle with Italian seasoning.
- Tip: A little olive oil encourages browning and keeps edges crisp. Finish with a pinch of flaky sea salt for the best flavor.
-
Bake for 15-20 minutes until golden brown and the cheese is bubbly.
- Tip: Oven times vary. Start checking at 12 minutes. If the edges brown too quickly, tent lightly with foil. For a crisper bottom, bake on a preheated baking stone or hot sheet.
-
Garnish with fresh basil if desired, and enjoy your Valentine’s Day pizza roses!
- Tip: Add basil just before serving to keep it bright and fresh. A drizzle of balsamic glaze can add a sweet-tangy contrast.
Variations and kitchen tips
- Vegetarian: Replace pepperoni with thinly sliced roasted zucchini, bell peppers, or sun-dried tomatoes. Add a sprinkle of grated Parmesan for umami.
- Meat-lover’s: Use a mix of pepperoni, cooked sausage crumbles, and chopped ham.
- Cheesy: Mix mozzarella with a touch of fontina or provolone for extra melt and flavor.
- Herb-forward: Fold finely chopped fresh basil or parsley into the cheese before assembling.
- Make them mini: Cut narrower strips and bake in a mini muffin tin for bite-sized party snacks.
- Avoid soggy centers: Par-bake the dough strips for 2–3 minutes before adding sauce and fillings if your dough is very thick or moist.
- Roasting vs boiling vegetables: If you’re adding veggies, roasting them first intensifies flavor and removes excess moisture (recommended); boiling is faster but can leave watery veg that affects texture.
Storage, Freezing & Make-Ahead Tips
Storing leftovers
- Refrigerator: Place cooled pizza roses in an airtight container lined with paper towels to absorb moisture. They’ll keep well for up to 3 days. Reheat in a 350°F (175°C) oven for 10–12 minutes or in an air fryer for 4–6 minutes to crisp the edges.
- Freezing: For longer storage, freeze baked roses on a parchment-lined tray until solid (2–3 hours), then transfer to a freezer bag or airtight container. Freeze for up to 2 months.
- Reheating from frozen: Reheat frozen pizza roses in a preheated oven at 375°F (190°C) for 12–18 minutes, covered for the first 8 minutes to prevent over-browning, then uncovered to crisp.
Make-ahead methods
- Assemble and refrigerate: Make the roses up to 6 hours ahead, cover the muffin tin tightly with cling film, and bake right before serving. Let the dough rest in the fridge no longer than 6 hours to avoid overproofing.
- Par-bake option: Par-bake dough strips for a couple minutes, let cool, then assemble and bake later. This reduces total baking time when you’re ready to serve.
- Freeze unbaked: Assemble the roses, freeze them on a tray until solid, then store in a bag and bake from frozen. Add 4–6 minutes to the baking time and cover them for the first part to avoid over-browning.
Portioning advice
- Plan on 3–4 pizza roses per person as an appetizer or 6–8 as a main with sides.
- Mini roses (mini muffin tin) are ideal for parties — estimate 5–6 mini roses per person.
How to Use / Serve This Dish
Serving ideas
- Romantic dinner: Plate 4–6 larger roses with a simple arugula salad lightly dressed with lemon vinaigrette and shaved Parmesan.
- Sharing platter: Arrange a mix of savory roses (pepperoni, veggie, prosciutto) on a wooden board with dipping sauces: extra pizza sauce, garlic butter, or pesto aioli.
- Brunch twist: Serve pizza roses alongside sweet and savory brunch items to create a cozy buffet. They pair beautifully with egg dishes and a light fruit salad.
- Party appetizers: Serve mini pizza roses with cocktail sticks and several dipping sauces — marinara, ranch, and spicy honey.
Pairings
- Beverages: A light red wine (Chianti or Pinot Noir), a crisp rosé, or a citrusy beer like a pilsner complements the cheesy, tomato-forward flavors. For a non-alcoholic option, try sparkling water with a splash of pomegranate or a rosemary-lemon soda.
- Side dishes: Simple Caesar or mixed-green salad, roasted vegetables, or garlic knots keep the meal balanced without stealing the show.
- Sauces: Offer a herby pesto for freshness, a roasted garlic aioli for richness, or a balsamic reduction for a sweet contrast.
Creative variations for special occasions
- Heart-shaped pan: Arrange roses in the shape of a heart on a large baking sheet for a Valentine’s Day centerpiece.
- Dessert-style “roses”: Use sweet dough and jam with mascarpone to create a dessert pastry rose using the same rolling technique.
(Internal link example in the body) For another playful pizza idea with bold flavors, consider trying a tangy pickle-topped variation from our best pickle pizza recipe for creative contrast.
(Internal link example elsewhere in the body) If you’re planning a game-day menu, these pizza roses pair well with creamy dippers like our buffalo chicken dip for a cozy spread.
FAQ
Q: Can I use premade biscuit dough or crescent roll dough instead of pizza dough?
A: Yes — premade biscuit or crescent dough can work in a pinch and will give you a slightly different texture (fluffier and more buttery). The rolling technique is the same; just be gentle so the layers don’t tear. Baking time may be a bit shorter, so watch closely.
Q: How long do pizza roses last in the fridge, and can I reheat them safely?
A: Store in an airtight container for up to 3 days. Reheat in the oven (350°F / 175°C) until warmed through and crisp, about 10–12 minutes. Avoid microwaving if you want to keep the crust crisp.
Q: What if my roses fall apart or don’t hold their shape?
A: If a rose unravels, tuck the end underneath or place it in the muffin cup seam-side down before baking — the tin helps support them. Make sure the dough strips aren’t too thick or the fillings too heavy; use a light hand when rolling.
Q: Can I make these gluten-free or dairy-free?
A: Absolutely. Use a gluten-free pizza dough or crust alternative and dairy-free mozzarella. Keep in mind texture and baking times can differ; gluten-free dough may be more fragile and benefit from a par-bake.
Conclusion
Valentine’s Day Pizza Roses are a cozy, handmade way to celebrate a special evening with someone you love — or to bring a touch of romance to a family meal. They balance the familiarity of pizza with the whimsy of a rose, and they’re flexible enough to adapt to your favorite flavors or dietary needs. If you want more inspiration or slightly different techniques, I recommend checking a few other recipes like Pizza Roses ⋆ Sugar, Spice and Glitter, Easy Pepperoni Pizza Roses — Holoka Home, and Pepperoni Pizza Roses — Always & Whatever for variations and plating ideas. Give these pizza roses a try, share your photos, and let the simple act of baking bring a little extra warmth to your Valentine’s Day.
9. Easy Cherry Blossom Cookies
There’s something instantly cheerful about a batch of Easy Cherry Blossom Cookies — soft, buttery rounds studded with bright maraschino cherries, crowned with a glossy chocolate kiss. They’re the kind of seasonal treat that feels right for springtime gatherings, Mother’s Day brunches, or anytime you want a small, pretty cookie with a comforting homemade vibe. The main stars here are maraschino cherries and a whisper of almond extract (or your favorite substitute) that gives each bite a classic blossoms-cookie note. If you enjoy cozy baking projects like chewy pumpkin cookies, these cherry-topped beauties will fit straight into your repertoire — and they’re easier than they look.
Ingredients & Equipment
Ingredients
- 1 Cup unsalted butter (at room temperature)
- 1 Cup powdered sugar
- ¼ Teaspoon salt
- 1 Tablespoon maraschino cherry juice (liquid)
- ¼ Teaspoon almond extract (or vanilla or cherry)
- 2 Cups all-purpose flour (plus more if needed)
- 1 Cup maraschino cherries (chopped)
- ¼ Cup granulated sugar (for rolling)
- 24 Hershey Kisses
Notes on ingredients
- Use unsalted butter at room temperature for easy creaming — it helps trap air so cookies are light.
- Powdered (confectioners’) sugar keeps the texture tender; sift if it’s clumpy.
- Maraschino cherry juice adds color and a subtle cherry flavor; substitute a teaspoon of cherry syrup for extra sweetness if you like.
- Almond extract is traditional, but vanilla or cherry extract work well. Start with less, taste the dough, and adjust.
- If your chopped cherries have a lot of liquid after draining, blot them dry on paper towels so they don’t make the dough too wet.
Equipment & helpful tools
- Large mixing bowl and electric mixer (stand or handheld)
- Measuring cups and spoons
- Rubber spatula or wooden spoon
- Cookie scoop (tablespoon-size) or two spoons for rolling balls
- Baking sheet(s) lined with parchment paper or silicone baking mat
- Cooling rack
- Small bowl for granulated sugar
- Small knife and cutting board for chopping cherries (or use a food processor for quick pulsing)
- Optional: kitchen thermometer (to check oven temp), cookie scoop release, and an airtight container for storing
If you love pairing cookies with comforting sides or desserts, you might enjoy the homestyle comfort in this classic creamy corn casserole while your cookies bake.
Step-by-Step Instructions (with tips)
-
Prep your cherries and tools.
- Drain the maraschino cherries well in a colander. Pat them dry with paper towels to remove excess syrup. Chop into small pieces (about ¼-inch) so they distribute evenly in the dough. If you want smaller, more uniform pieces, pulse briefly in a food processor.
- Line baking sheets with parchment paper and set aside. Preheat the oven later as instructed.
-
Cream butter and powdered sugar.
- In a large bowl, use an electric mixer to combine the room-temperature unsalted butter and powdered sugar until light and fluffy, about 2–3 minutes on medium speed. Scrape down the sides of the bowl once or twice.
Tip: Don’t skimp on creaming. This introduces air and gives the cookie a tender crumb.
- In a large bowl, use an electric mixer to combine the room-temperature unsalted butter and powdered sugar until light and fluffy, about 2–3 minutes on medium speed. Scrape down the sides of the bowl once or twice.
-
Add cherry juice and extract.
- Add the tablespoon of maraschino cherry juice and ¼ teaspoon almond extract (or your choice) to the butter-sugar mixture. Continue mixing until smooth and evenly combined, about 30–45 seconds.
Tip: If you’re using vanilla instead of almond, the cookies will be milder and less “blossom” flavored. A tiny splash of cherry extract can boost cherry notes but use sparingly.
- Add the tablespoon of maraschino cherry juice and ¼ teaspoon almond extract (or your choice) to the butter-sugar mixture. Continue mixing until smooth and evenly combined, about 30–45 seconds.
-
Incorporate flour and salt.
- Add 2 cups of all-purpose flour and the ¼ teaspoon salt to the bowl. Mix on low until the flour is just incorporated. The recipe notes say: once the two cups are added, slowly add a couple of tablespoons at a time until the dough resembles a play-dough consistency and can be handled without sticking to your hands. That means you may need an extra 2–4 tablespoons of flour depending on humidity and cherry moisture.
Tip: Add flour a tablespoon at a time; it’s easier to fix slightly dry dough than sticky dough. If dough gets too stiff, add a teaspoon of cherry juice or milk.
- Add 2 cups of all-purpose flour and the ¼ teaspoon salt to the bowl. Mix on low until the flour is just incorporated. The recipe notes say: once the two cups are added, slowly add a couple of tablespoons at a time until the dough resembles a play-dough consistency and can be handled without sticking to your hands. That means you may need an extra 2–4 tablespoons of flour depending on humidity and cherry moisture.
-
Fold in chopped cherries.
- Carefully stir in the chopped maraschino cherries just until they’re evenly distributed. Overmixing can break up the cherries and release more syrup.
Tip: If cherries cause the dough to be a bit wet, chill the dough for a longer time before scooping.
- Carefully stir in the chopped maraschino cherries just until they’re evenly distributed. Overmixing can break up the cherries and release more syrup.
-
Form and sugar-coat the dough balls.
- Use a tablespoon-size cookie dough scoop to form small cookie dough balls (about 1 TB each). Roll each ball in the ¼ cup granulated sugar until coated. Place them on a plate or tray as you go.
Tip: Rolling the dough in sugar gives a nice outer crunch and a sparkly finish after baking.
- Use a tablespoon-size cookie dough scoop to form small cookie dough balls (about 1 TB each). Roll each ball in the ¼ cup granulated sugar until coated. Place them on a plate or tray as you go.
-
Chill the dough.
- Chill the sugar-coated dough balls for at least 20 minutes before baking. Chilling helps cookies hold their shape and lets the flavors meld. If you’re prepping ahead, you can chill up to 24 hours or freeze the dough balls (see storage notes).
Tip: If your kitchen is warm, chill for 30 minutes to be safe.
- Chill the sugar-coated dough balls for at least 20 minutes before baking. Chilling helps cookies hold their shape and lets the flavors meld. If you’re prepping ahead, you can chill up to 24 hours or freeze the dough balls (see storage notes).
-
Preheat oven and prepare sheet.
- While the dough is chilling, preheat the oven to 350°F (175°C) and make sure your baking sheets are lined with parchment.
-
Bake the cookies.
- Place cookies evenly apart (about 2 inches) on the prepared baking sheet and bake in the preheated oven for about 10 minutes, or until the edges are just set and the tops no longer look wet. They may still be slightly soft — that’s okay. Remove from the oven.
-
Add the Hershey Kisses.
- Immediately press one Hershey Kiss into the center of each cookie while still warm. The heat will create a small indentation that holds the chocolate. Be gentle so you don’t flatten the cookie too much. Let the cookies cool on the sheet for 5 minutes, then transfer to a cooling rack to finish cooling.
-
Cool and serve.
- Allow cookies to cool completely so the chocolate sets and flavors settle. These store well and make a delightful plate to share.
Variations and cooking tips
- Maraschino cherry substitutions: If you prefer less sweetness, use chopped dried cherries that have been briefly rehydrated in warm water or cherry juice and patted dry. Alternatively, try fresh cherries (pitted and finely chopped) when they’re in season; they’ll be less sweet and may require slightly more flour to adjust moisture.
- Roasting vs. boiling cherries: For a deeper flavor, try roasting fresh cherries tossed with a teaspoon of sugar at 375°F for 10–12 minutes, then chop and cool before adding. Boiling (or quickly simmering) dried cherries in cherry juice plumps them up but watch for extra liquid — drain and pat dry.
- Almond vs. vanilla vs. cherry extract: Almond extract gives the classic “blossom” flavor; vanilla makes it more cookie-like; cherry extract intensifies fruitiness. Use sparingly — extracts are potent.
- Texture control: If you want a softer cookie, remove at 9–10 minutes; for crisper edges, bake an extra minute or two. Altitude, oven variance, and pan material affect baking time — keep an eye on the first batch.
Storage, Freezing & Make-Ahead Tips
Storing
- Room temperature: Store cooled cookies in an airtight container at room temperature for up to 4 days. Place parchment between layers to prevent sticking.
- Refrigeration: If your kitchen is warm or you used fresh cherries, store in the refrigerator for up to 7 days to be safe. Bring to room temperature before serving for best flavor.
Freezing
- Dough: Scoop dough balls and freeze in a single layer on a tray for 1–2 hours until firm. Transfer to a freezer-safe bag or container and freeze for up to 3 months. When ready, bake from frozen — add 1–2 minutes to baking time and keep the initial temperature at 350°F.
- Baked cookies: Freeze baked and cooled cookies in a single layer on a tray, then transfer to airtight containers with parchment between layers. Freeze up to 3 months. Thaw at room temperature and the Hershey Kiss will soften pleasantly.
Make-ahead tips
- Bake ahead for events: You can bake these a day ahead and store them in airtight containers. If you’ll be transporting them, pack cookies in a single layer with parchment and keep cool to prevent chocolate from melting.
- Assemble day-of: Make the dough and freeze portioned balls. On the day of the event, bake straight from frozen and press the Hershey Kisses in after baking.
How to Use / Serve This Dish
Serving ideas
- Tea-time or brunch: Arrange on a pretty platter with a pot of tea or a coffee station. Their delicate look works beautifully for spring gatherings.
- Gift or cookie swap: Package 10–12 cookies in a cellophane bag with a ribbon for neighborly gifts or holiday cookie swaps. They’re seasonal, portable, and universally loved.
- Dessert platter: Combine with shortbread, lemon bars, and nutty biscotti for a balanced dessert tray.
Pairings
- Drinks: Pair with a mild coffee, almond-flavored latte, or a floral tea like chamomile or jasmine. A light prosecco is a fun pairing for celebrations.
- Other sweets: Add contrast with a tangy lemon curd or cream cheese frosting dip for those who like a sweet-and-tart combo.
Creative variations
- Swap Hershey Kisses for chocolate-covered cherries or colored candy for seasonal themes.
- Add a sprinkle of coarse sea salt on top of the chocolate after pressing it into the warm cookie for a sweet-salty contrast.
- Make mini sandwich cookies: Use a small cookie scoop and sandwich two cookies with cherry jam or buttercream.
If you’re inspired by blossoms-style cookies and want to compare textures or techniques, check out these classic peanut butter blossoms for ideas on how cookie centers and chocolate toppings change the final bite.
FAQ
Q: Can I substitute dried cherries for maraschino cherries?
A: Yes. Dried cherries can be used, but rehydrate them briefly in warm water or cherry juice for 5–10 minutes, then drain and pat dry. Because dried cherries are less sugary than maraschino cherries, your cookies will be less sweet and may need a touch more sugar or a dash of cherry syrup if you want the candy-like cherry flavor.
Q: How long will these cookies keep fresh?
A: Stored at room temperature in an airtight container, they stay fresh for about 3–4 days. Refrigerate up to 7 days if your kitchen is warm or you used fresh cherries. Frozen baked cookies keep well for up to 3 months.
Q: My dough was sticky. What did I do wrong?
A: Sticky dough often means the cherries added too much moisture or the butter was too soft/warm. To fix sticky dough, chill it for 20–30 minutes, or add flour a tablespoon at a time until you reach a manageable consistency. You can also scoop and freeze the dough balls to firm them before baking.
Q: Can I make these gluten-free or vegan?
A: For gluten-free, use a 1:1 gluten-free all-purpose flour blend that includes xanthan gum; texture may vary slightly. For a vegan version, replace butter with a vegan butter substitute and use a dairy-free chocolate kiss or half of a dairy-free chocolate candy. Note that maraschino cherry brands vary — check labels for non-vegan processing if that’s a concern.
Conclusion
Baking Easy Cherry Blossom Cookies is an invitation to brighten your kitchen with color and comfort. They’re approachable for home bakers, visually charming, and perfect for springtime or any celebration that calls for a small, nostalgic cookie. If you’d like to see another classic take on this cookie or compare techniques and ingredient proportions, this Cherry Blossom Cookie recipe – Flour On My Face offers a lovely variation, and these Cherry Blossom Cookies – My Incredible Recipes provide another perspective on flavors and assembly. Try a batch, share with friends, and let those small, cherry-topped treats become part of your seasonal baking repertoire.
Cherry Blossom Cookie recipe – Flour On My Face
Cherry Blossom Cookies – My Incredible Recipes
10. Easy Chocolate Raspberry Tart
There’s something about the bright, tart pop of fresh raspberries paired with a silky chocolate filling that simply screams summer comfort. This Easy Chocolate Raspberry Tart is a one-pan wonder that balances rich bittersweet chocolate with the light, juicy brightness of seasonal raspberries — a dessert that looks elegant but comes together without fuss. Whether you’re celebrating a backyard dinner, treating yourself after a long week, or bringing something beautiful to a potluck, this tart delivers big on flavor with minimal stress. If you love quick chocolate desserts, you might also enjoy 4-Ingredient Chocolate Peanut Butter Balls for a no-bake snack that’s just as comforting.
Ingredients & Equipment
Ingredients
- 1 ½ cups Oreo crumbs (about 24 cookies)
- 6 Tablespoons (85 g) butter (melted)
- 1 ¼ cups (300 ml) heavy cream
- 2 cups (12 oz) good-quality bittersweet chocolate (chopped into similar size pieces)
- 1 teaspoon pure vanilla extract
- 2 pints (about 4 cups) fresh raspberries
- Confectioners’ sugar for dusting
Notes:
- Use plain Oreos (no filling adjustments necessary) for a simple, chocolate cookie crust. If you prefer less sweetness, substitute half the Oreos with graham cracker crumbs.
- Bittersweet chocolate around 60–70% cocoa gives the best flavor contrast with raspberries. Avoid low-quality chocolate bars; they affect texture and shine.
- Heavy cream should be cold for best ganache texture.
Equipment / Tools
- 9-inch tart pan with removable bottom (or a deep-dish pie plate)
- Food processor or a resealable bag + rolling pin (to crush cookies)
- Small saucepan
- Heatproof bowl (for the chocolate)
- Whisk and rubber spatula
- Measuring cups and spoons
- Baking tray (to place the tart on while setting)
- Fine-mesh sieve for dusting confectioners’ sugar
- Optional: digital thermometer (for optimal cream temperature), blender (if making any fillings/compotes), offset spatula
Helpful tools make the process easier but aren’t required. A food processor gives the smoothest cookie crumb crust; a thermometer helps you hit the ideal temperature for hot cream (about 185°F / 85°C) before pouring over chocolate.
Step-by-Step Instructions (with tips)
Crust
- Preheat the oven to 350°F (175°C). If you’re using a tart pan, set it on a baking tray for stability.
- Place Oreo cookies in a food processor and pulse until fine crumbs form. No processor? Put cookies in a large resealable plastic bag and crush with a rolling pin until crumbs are uniform.
- In a medium bowl, mix the Oreo crumbs with the melted butter until the texture resembles wet sand and holds together when pressed.
- Press the cookie mixture evenly into the bottom and up the sides of the tart pan. Use the bottom of a measuring cup or glass to pack the crust firmly and create clean edges.
- Bake the crust for 8–10 minutes to set it and bake off any raw cookie taste. Remove from oven and let cool slightly while you prepare the filling.
Filling (Chocolate Ganache)
- Place chopped bittersweet chocolate in a heatproof bowl and set aside.
- In a small saucepan, heat the heavy cream over medium heat until it just begins to simmer and you see small bubbles forming at the edges (about 185°F / 85°C); do not allow it to boil.
- Pour the hot cream over the chopped chocolate and let sit undisturbed for 1–2 minutes to soften the chocolate. Add the vanilla extract.
- Whisk gently from the center outward until the mixture is smooth, glossy, and fully combined. If the ganache seems grainy, let it rest for another minute then whisk again; a quick immersion blender on low can also smooth it.
- Pour the ganache into the prepared cooled Oreo crust, spreading evenly with an offset spatula. Leave a little space at the rim if you plan to pile raspberries high on top.
Assembling & Finishing
- Gently press fresh raspberries into the ganache while it’s still pourable. For a polished look, arrange the raspberries in concentric circles or a random rustic pattern — either looks beautiful.
- Refrigerate the tart for at least 2 hours (preferably 3–4) until the ganache sets firmly. For a quicker set, place it in the freezer for 30–45 minutes, but monitor closely to avoid freezing solid.
- Dust with confectioners’ sugar just before serving for a pretty, professional finish.
Variations & Kitchen Tips
- Roasted vs. fresh raspberries: roasting raspberries concentrates their sweetness. To roast, toss berries lightly with a teaspoon of sugar and roast at 375°F (190°C) for 8–10 minutes until they soften and slightly caramelize. Let cool before arranging. Alternatively, simmer raspberries with a tablespoon of sugar for 3–4 minutes to make a quick compote for spooning over the tart (this works well in cooler seasons).
- Add texture: sprinkle chopped toasted hazelnuts or pistachios around the edge for crunch.
- Flavor boosts: stir a tablespoon of raspberry liqueur or a pinch of instant espresso into the ganache for depth.
- Chocolate swap: if you prefer a milder filling, use semisweet instead of bittersweet; for a darker tart, use 70%+ chocolate and reduce any added sugar in roasted raspberries.
- If your ganache separates (rare with proper technique), whisk in a small splash more hot cream or briefly use an immersion blender to re-emulsify.
Storage, Freezing & Make-Ahead Tips
Storing Leftovers
- Refrigerate: Store the tart covered with plastic wrap or in a cake box in the refrigerator for up to 3–4 days. The crust stays crispest for the first day; after that, it will soften slightly from the ganache and raspberry moisture.
- Room temperature: If you plan to serve the tart within 2 hours, it’s fine to keep it at cool room temperature. Beyond that, refrigerate because of the fresh raspberries and cream-based ganache.
Freezing
- Whole tart: Wrap the tart well in plastic wrap and a layer of foil, then freeze for up to 1 month. Thaw in the refrigerator overnight before dusting with confectioners’ sugar and serving.
- Slices: For convenience, slice the tart and freeze individual slices on a baking sheet until firm (about 1–2 hours), then wrap each slice in plastic and place in a freezer bag. Thaw in the refrigerator when ready to enjoy.
- Note: Fresh raspberries can become mushy after freezing and thawing. If you intend to freeze, consider removing fresh fruit before freezing and topping with fresh raspberries after thawing.
Make-Ahead Ideas
- Make the crust and ganache a day ahead, pour the ganache, and refrigerate until set. Add fresh raspberries just before serving for best texture and color.
- If you want a saucier topping, prepare a raspberry compote ahead and spoon onto the tart just before plating.
If you’re planning a full summer menu, this tart pairs nicely with hearty sides like a Classic Creamy Corn Casserole for a comforting meal.
How to Use / Serve This Dish
Serving Ideas
- Celebration dessert: Serve the tart slightly chilled with a dollop of whipped cream or a scoop of vanilla bean ice cream for contrast.
- Afternoon tea: Slice thinly and present with delicate shortbread for a sophisticated tea spread.
- Casual gatherings: Offer a few forks and little squares — the Oreo crust makes every bite feel like a decadent treat.
Pairings
- Drinks: A bright, sparkling cocktail helps cut through the richness. Try pairing with a fruity spritz; for example, a raspberry-forward mocktail or cocktail such as a Citrus Margarita and Pomegranate Mint Raspberry Spritz complements the tart’s berry notes.
- Cheese: Pair a small piece with a mild, creamy cheese (like mascarpone on the side) for an indulgent palate experience.
Creative Uses
- Mini tarts: Make this recipe in a muffin tin for individual mini tarts — reduce baking time for the crust to 6–8 minutes and fill accordingly.
- Tartlets as gifts: Package individual slices in clear boxes with a ribbon for a homemade gift.
FAQ
Q: Can I use frozen raspberries instead of fresh?
A: Yes, but with caveats. Frozen raspberries release more juice when they thaw, which can make the ganache softer and the crust soggy. If using frozen berries, thaw them in a sieve and drain excess liquid, or simmer them briefly into a compote and cool before using. For the best texture and vibrant presentation, fresh raspberries are recommended.
Q: What can I use instead of Oreos for the crust?
A: You can substitute graham crackers, digestive biscuits, or even chocolate wafer cookies. If you want a nutty crust, pulse toasted almonds or hazelnuts with a bit of sugar and butter. Measure to match volume: 1 ½ cups cookie crumbs is roughly 150–180 g.
Q: How long does the tart keep at room temperature?
A: Because the tart contains a cream-based ganache and fresh fruit, it’s safest to not leave it out for more than 2 hours in a warm environment. Refrigerate any leftovers promptly.
Q: Can I make this tart dairy-free or vegan?
A: To make a dairy-free version, use a plant-based heavy cream alternative designed for whipping or cooking (full-fat coconut cream works best) and choose a vegan dark chocolate. The flavor will shift slightly (coconut notes may come through), but it’s a doable swap. Use a dairy-free butter substitute for the crust.
Conclusion
This Easy Chocolate Raspberry Tart is one of those recipes that feels special but is truly accessible — rich, silky ganache nestled in a crisp cookie crust, topped with the seasonal brightness of raspberries. It’s a dessert that celebrates fresh fruit without losing the indulgent chocolate element we all love. If you want inspiration for another elegant raspberry-chocolate combination, check out this classic Dark Chocolate Raspberry Tart or a fun take on the same idea at Easy Chocolate Raspberry Tart – If You Give a Blonde a Kitchen. Try this tart for your next gathering and share a photo — I’d love to hear how you made it your own!
Popular Meals

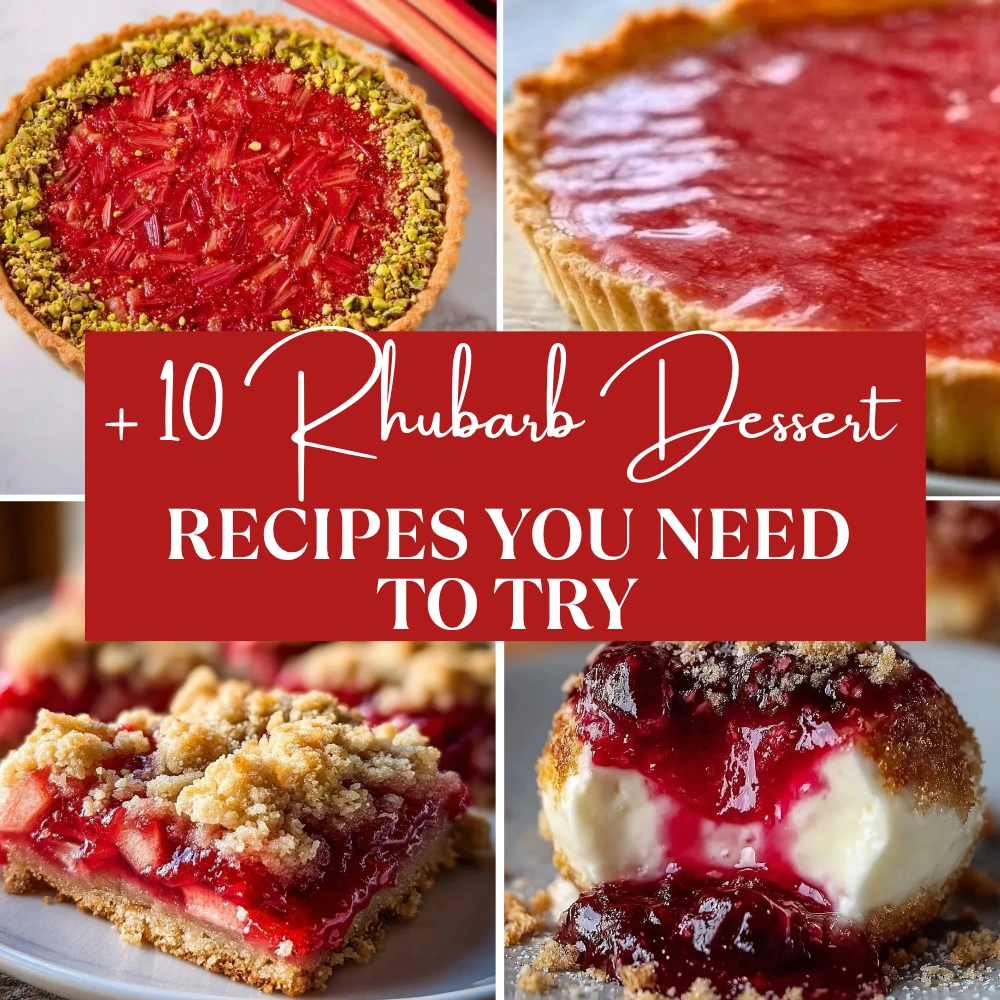


About me
Hi, I’m Lina , a busy mom and food lover who believes cooking should be simple, joyful, and full of flavor. On simplymealstodo.com, I share quick recipes, weekly meal plans, and fun ideas to make your kitchen feel cozy and stress-free. Let’s bring joy back to the table, one meal at a time.
Let's Connect
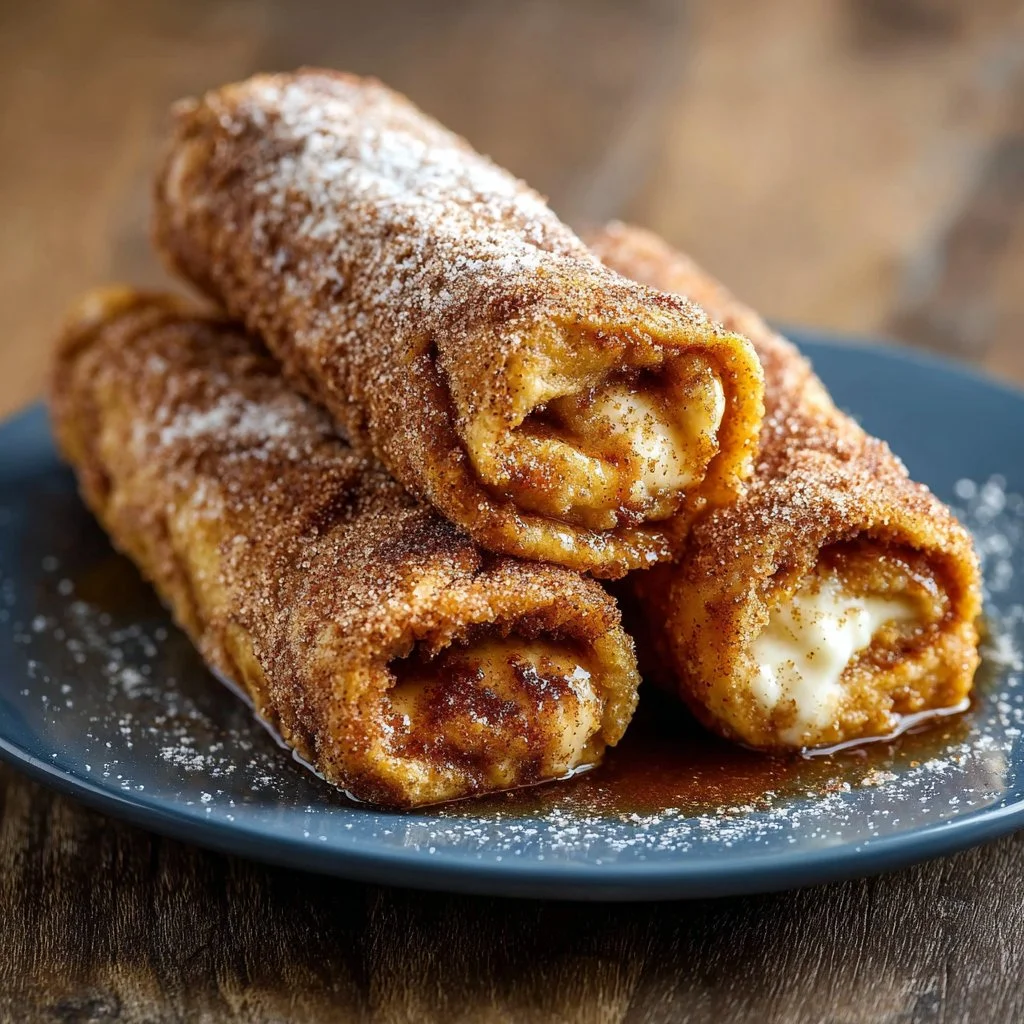
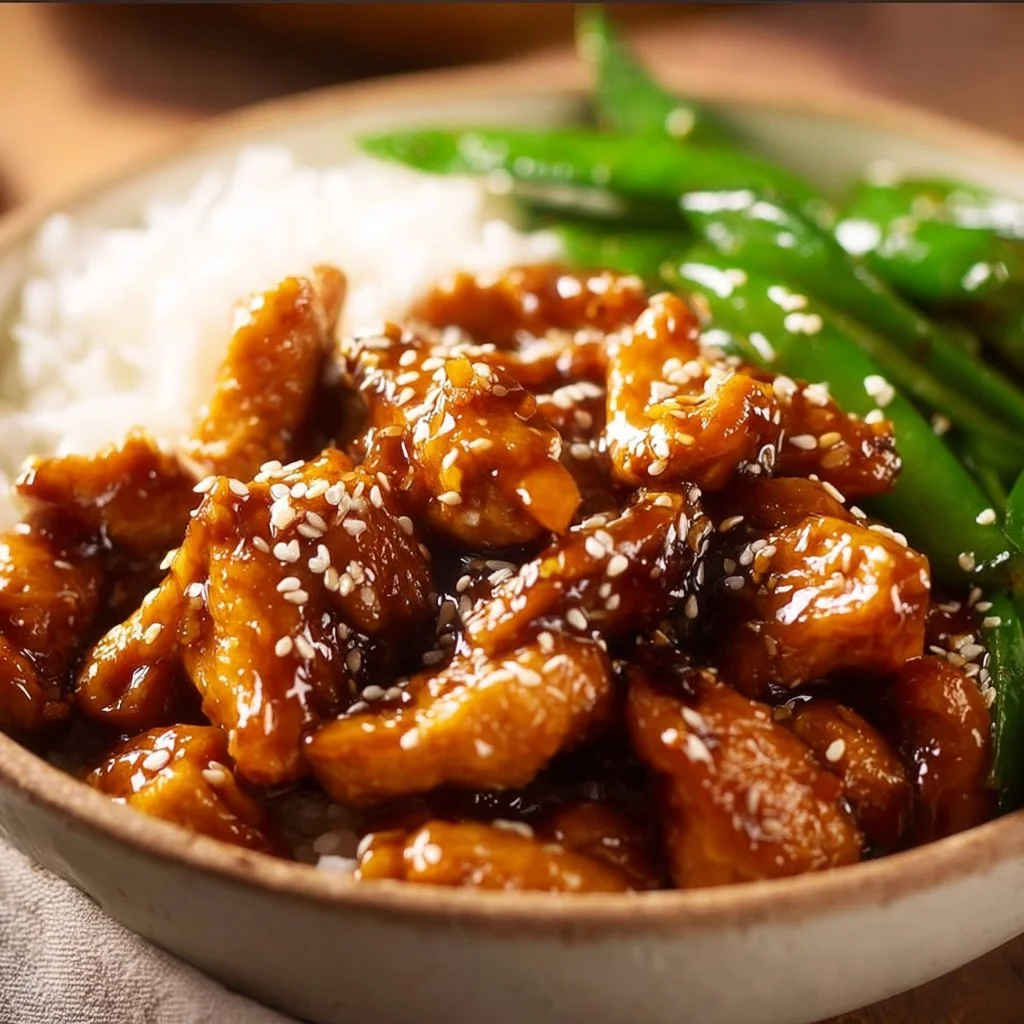

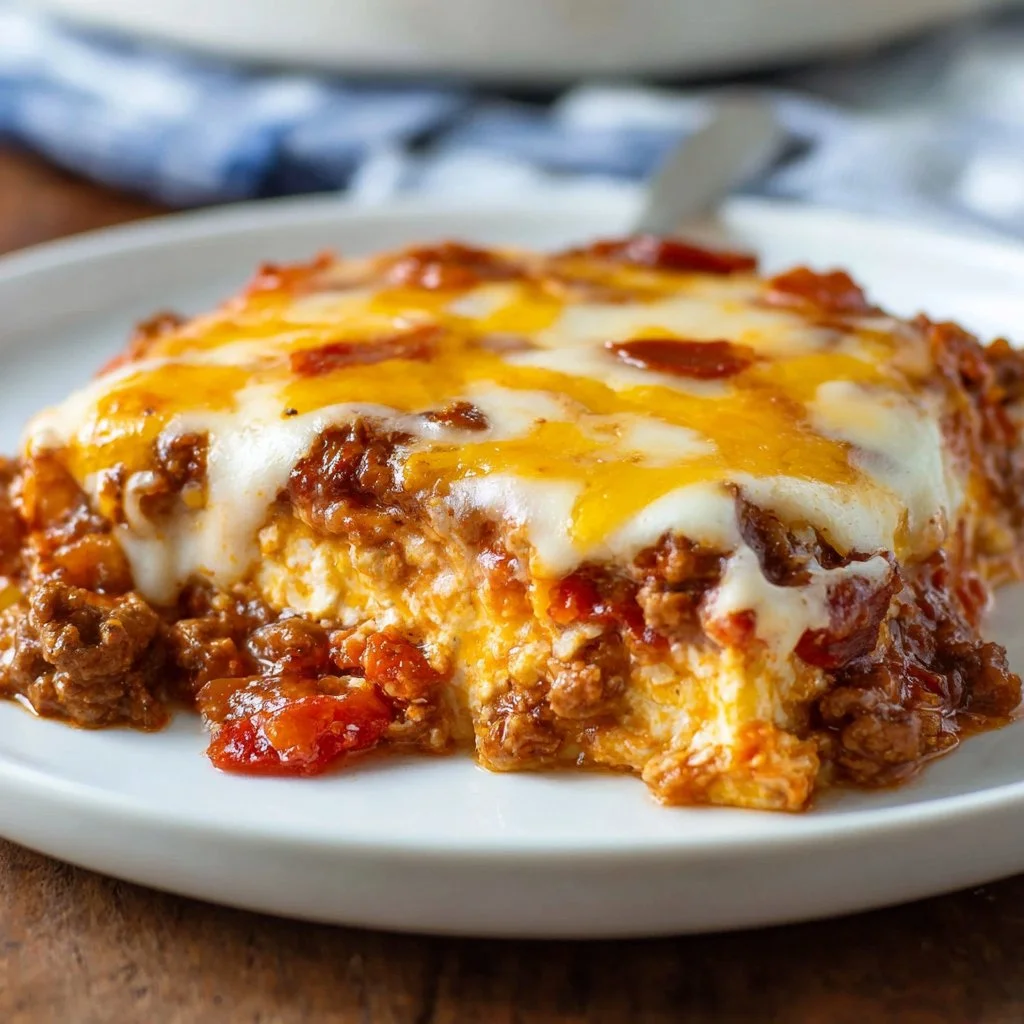
1 thought on “Best 10 Valentine’s Day Dessert Recipes to Delight Your Loved Ones”