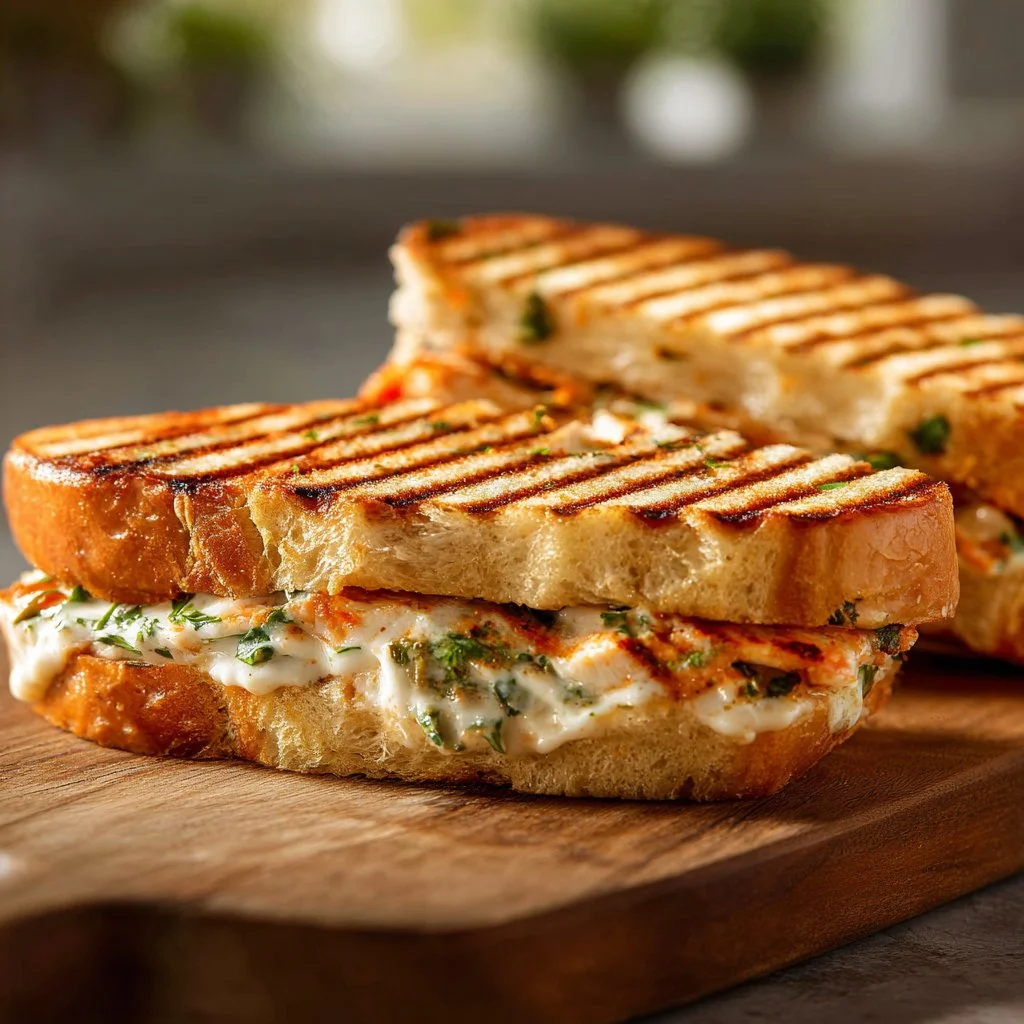
Panini are the kind of sandwich that feels like a warm hug on a chilly day — crisp on the outside, gooey and flavorful inside. If you love simple, comforting meals that you can customize for the season, a homemade Panini is worth trying: it highlights fresh bread, melty cheese, savory protein, and bright vegetables in one handheld, satisfying bite. Whether you choose seasonal tomatoes and basil in summer, roasted peppers and spinach in autumn, or spiced roasted chicken in winter, the Panini’s contrast of textures — crunchy crust and soft, stretched cheese — makes it an all-purpose favorite for quick lunches, cozy dinners, and relaxed weekend cooking.
Ingredients & Equipment
Ingredients
- Bread: ciabatta, focaccia, sourdough, or your favorite sturdy loaf (slices thick enough to hold fillings)
- Cheese: mozzarella, cheddar, provolone, or a melting cheese of your choice
- Meats / Proteins: turkey, chicken, beef (halal), or plant-based alternatives like grilled tofu or tempeh
- Vegetables: fresh spinach, sliced tomatoes, roasted peppers, caramelized onions, arugula, cucumber (thinly sliced)
- Condiments: pesto, hummus, whole grain mustard, mayonnaise (use halal-certified if desired)
- Olive oil or butter for grilling
Equipment
- Skillet or grill pan (cast iron is ideal)
- Optional: panini press (for convenience and even grilling)
- Cutting board and sharp knife
- Small brush for oil or melted butter
- Baking tray (for roasting vegetables)
- Blender or food processor (for homemade pesto or hummus)
- Instant-read thermometer (helpful for checking cooked poultry or beef before shredding)
Notes
- Choose a sturdy bread that can handle heat and weight without getting soggy.
- If you prefer dairy-free, use plant-based cheeses and butter alternatives.
- Keep extra olive oil or nonstick spray handy to prevent sticking.
Step-by-Step Instructions (with tips)
Preheat a skillet or grill pan over medium heat. If using a panini press, preheat that as well.
- Tip: Let the skillet come to temperature slowly over medium heat so the bread browns evenly without burning. If your pan gets too hot, lower the heat slightly; too-high heat will brown the outside before the cheese melts.
Assemble your panini by layering your chosen ingredients between two slices of bread.
- Tip: Start with a thin layer of condiment (pesto or hummus) on both slices to create a moisture barrier, which helps prevent sogginess. Layer cheese next to the bread so it melts well and acts as a glue for the fillings. Add protein and then vegetables. For juicy ingredients like tomato, pat them dry to avoid extra moisture.
Brush the outside of the bread with olive oil or butter.
- Tip: Use a light hand on oil or butter — enough to achieve golden browning but not so much that the sandwich becomes greasy. If you like an extra-crispy finish, brush one side, grill it, and then brush the other side before flipping.
Place the sandwich in the skillet or panini press and cook until the bread is golden brown and the cheese is melted, about 3–5 minutes per side if using a skillet.
- If using a skillet: Place a heavy pan or a foil-wrapped brick on top to press the sandwich for more authentic panini compression. Flip once halfway through and check the color frequently.
- If using a panini press: Close and press firmly; cook until the press indicates done or the bread reaches a deep golden color. Total time varies with thickness.
- Tip: For extra-even melting, cover the skillet briefly with a lid for 30–60 seconds after the first side is toasted to trap heat.
Remove from heat, slice, and serve warm.
- Tip: Let the sandwich rest for 1 minute before slicing to avoid all the cheese escaping; use a serrated knife to get clean cuts without squashing the panini.
Variations and tips
- Roasted vs. sautéed vegetables: Roasting peppers, onions, or eggplant in the oven concentrates sweetness and reduces moisture, making them excellent panini fillings. Sautéing is quicker and works well for mushrooms, spinach, or onions.
- Cold vs. hot proteins: Use pre-cooked, sliced roasted chicken or turkey for speed. For a warm sandwich, reheat slices briefly in a skillet before assembling so they don’t cool the interior.
- Herb and spice ideas: Add fresh basil, chopped cilantro, or za’atar for different regional flavors. A squeeze of lemon or a drizzle of high-quality olive oil after grilling brightens the sandwich.
- Cheese swaps: Mix a melting cheese (mozzarella) with a sharper one (cheddar) for complex flavor and texture.
- Crunch factor: Add thinly sliced cucumber or apple for a refreshing crunch contrast to the warm, melty interior.
Storage, Freezing & Make-Ahead Tips
Storing leftovers
- Short-term: Store leftover panini in an airtight container in the refrigerator for up to 2 days. Reheat gently in a skillet or toaster oven to restore crispness. Microwaving will make the bread soggy, so avoid unless you plan to crisp it afterward in a pan.
- Room temperature: If your panini contains cooked meat, do not keep it at room temperature for more than 2 hours.
Freezing
- For best results, assemble panini without toasting and wrap each sandwich tightly in parchment and then foil before freezing. Freeze up to 1–2 months.
- To reheat from frozen: Remove wrapping, place the sandwich in a preheated oven at 350°F (175°C) for 20–25 minutes or until heated through and cheese melts; finish in a skillet or press for extra crispness.
Make-ahead strategies
- Prep fillings ahead: Roast peppers, caramelize onions, or shred cooked chicken and store them in airtight containers for up to 3–4 days. This makes assembly quick on busy days.
- Pre-mix condiments: Homemade pesto or seasoned hummus can be made in advance and stored for a week in the fridge.
- Partial assembly: Build sandwiches (ungrilled) and keep them refrigerated for up to a day. Brush with oil and grill right before serving.
Portioning advice
- For big appetites, use two slices of cheese and a generous portion of protein per sandwich. For lighter meals, halve the sandwich and serve with a salad or soup.
- If serving a crowd, cut panini into halves or quarters for a party platter.
How to Use / Serve This Dish
Serving ideas
- Soup pairing: Serve a warm Panini with a bowl of seasonal soup — think roasted tomato, lentil, or butternut squash — for a comforting combo that’s perfect for cooler months.
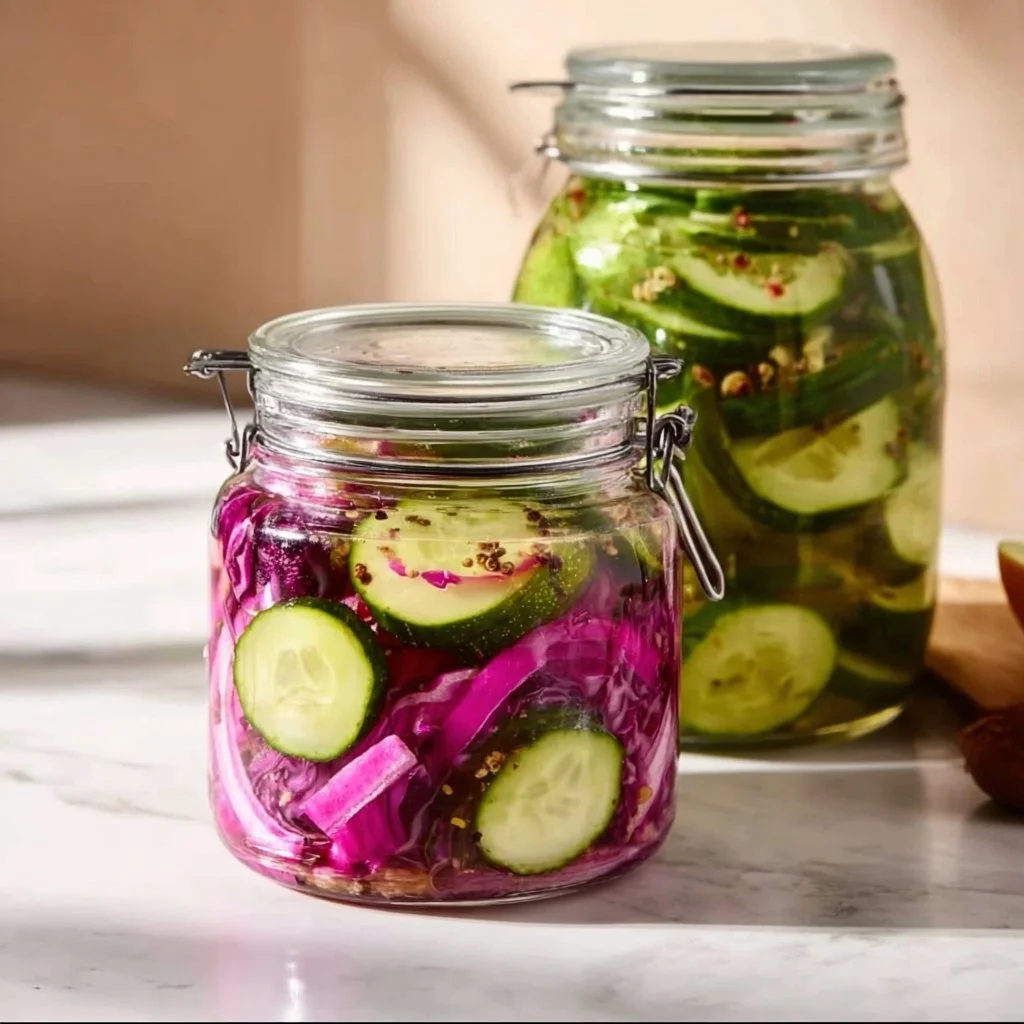
- Light sides: Fresh green salad with a lemon-olive oil dressing, pickled vegetables, or a simple arugula and pear salad balance the richness of melted cheese.
- Snack platter: Cut panini into small triangles, and place on a platter alongside olives, pickles, and fresh fruit for casual gatherings.
- Brunch twist: Add a soft-poached egg and arugula for a brunch-friendly version, making sure to keep flavors balanced and not too runny so the bread won’t get soggy.
Creative variations
- Mediterranean panini: Hummus, grilled halal chicken, roasted red peppers, spinach, and a sprinkle of feta or a dairy-free tangy cheese.
- Herby pesto panini: Basil pesto, fresh mozzarella, sliced tomatoes, and baby spinach on ciabatta.
- Spiced roasted vegetable panini: Roasted eggplant, zucchini, and red onion with a smear of labneh or yogurt-based spread (use halal-certified dairy) and fresh herbs.
- Breakfast panini: Sliced halal turkey sausage, scrambled egg, and cheddar for a hearty morning option.
Beverage pairings (non-alcoholic)
- Mint tea, black tea with lemon, or a bright sparkling water with citrus.
- A cooling ayran (yogurt-based drink) or a fresh fruit iced tea pairs especially well with savory herbs and spices.
FAQ
Q: Can I make a Panini without a panini press?
A: Absolutely. Use a heavy skillet or grill pan. Press the sandwich with another weighted pan or a foil-wrapped brick to compress it. Flip once and press again to achieve an even crust. A cast-iron skillet plus a heavy object mimics the press’s effect well.
Q: What’s the best bread for a Panini?
A: Choose a sturdy, crusty bread like ciabatta, focaccia, or a dense sourdough that won’t collapse under weight or absorb too much moisture. Thin, soft sandwich bread will get soggy quickly, while thin baguette slices can be too crunchy without enough interior to hold fillings.
Q: How long will a panini keep in the fridge?
A: A fully cooked panini with meat should be eaten within 2 days when refrigerated. If you’ve only assembled it cold without cooking, eat within 24 hours for best texture. Store in airtight containers and reheat in a skillet or oven for best results.
Q: Can I make Panini that are dairy-free?
A: Yes. Use plant-based cheeses that melt well or rely on flavorful spreads like hummus or baba ganoush and roasted vegetables for moisture and richness. Add avocado for creaminess and herbs for brightness.
Conclusion
Panini capture the cozy feeling of seasonal comfort food while remaining endlessly customizable — from summer’s ripe tomatoes and basil to autumn’s roasted vegetables and warm-spiced chicken. If you enjoyed learning these simple tricks, you might also like to explore more about the Panini tradition or shop for specialty items and equipment with a closer look at the Panini (sandwich) history and commercial offerings. For background on the sandwich’s origins, check this article on Panini (sandwich) – Wikipedia. If you’re browsing for collectible or branded items unrelated to cooking, you may find offerings at the Panini America Online Store, and for stickers or trading cards you can see the selection at the Panini Store. Try this recipe, make it your own, and share your favorite Panini combination with friends — I’d love to hear what you create!

Panini
Ingredients
Bread
- 4 slices ciabatta, focaccia, sourdough, or your favorite sturdy loaf Choose thick slices that can hold fillings.
Cheese
- 4 slices mozzarella, cheddar, provolone, or a melting cheese of your choice
Proteins
- 6 ounces turkey, chicken, beef, or plant-based alternatives like grilled tofu or tempeh
Vegetables
- 1 cup fresh spinach, sliced tomatoes, roasted peppers, caramelized onions, arugula, cucumber (thinly sliced)
Condiments
- 2 tablespoons pesto, hummus, whole grain mustard, mayonnaise Use halal-certified if desired.
For Grilling
- 2 tablespoons olive oil or butter For brushing on the outside of the bread.
Instructions
Preparation
- Preheat a skillet or grill pan over medium heat. If using a panini press, preheat that as well.
- Assemble your panini by layering your chosen ingredients between two slices of bread.
- Brush the outside of the bread with olive oil or butter.
Cooking
- Place the sandwich in the skillet or panini press and cook until the bread is golden brown and the cheese is melted, about 3–5 minutes per side if using a skillet.
- Use a heavy pan or a foil-wrapped brick to press the sandwich for more authentic panini compression.
- Remove from heat, slice, and serve warm.