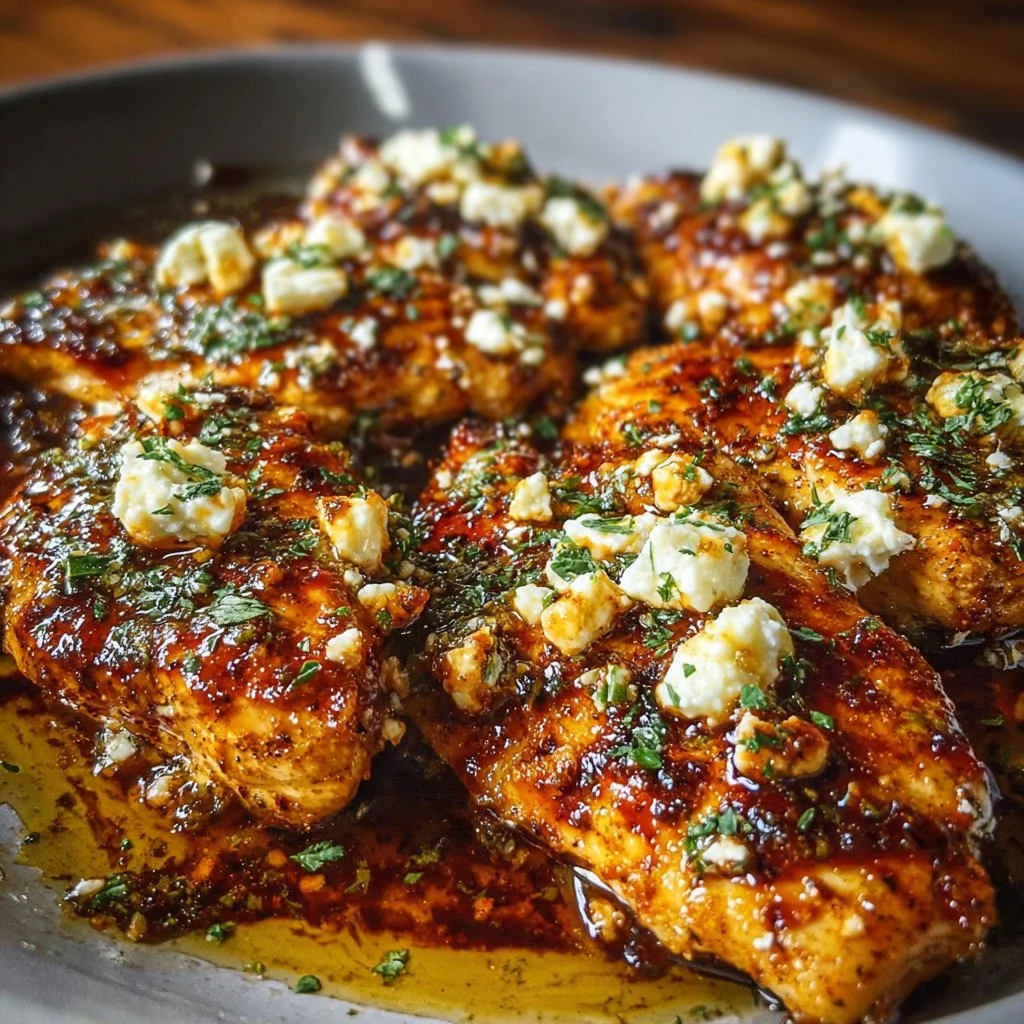
Cheesy Chicken Garlic Wraps
Introduction
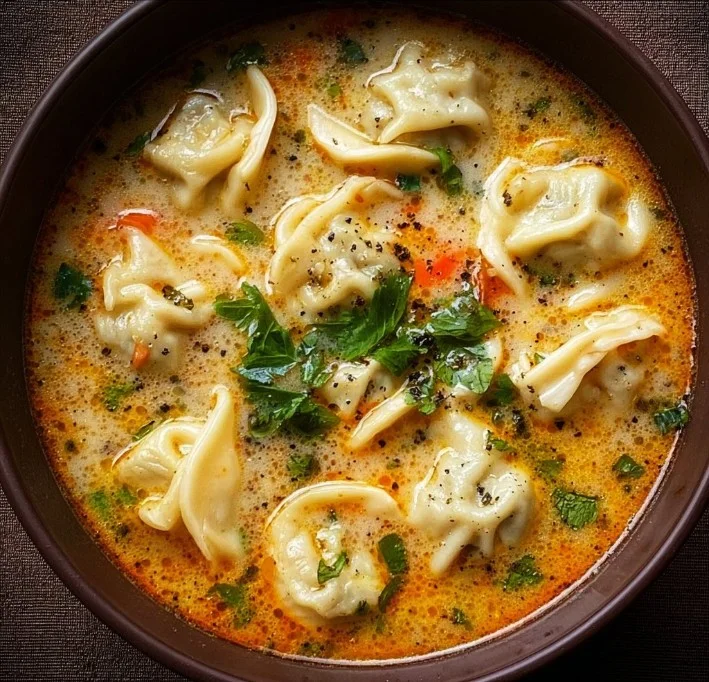
There’s something instantly cozy about a warm, cheesy wrap fresh off the griddle — and these Cheesy Chicken Garlic Wraps give you that homey comfort with a bright garlicky twist. Made with diced, seasoned chicken, a creamy garlic sauce, and melty cheddar-mozzarella, they’re perfect for crisp evenings, casual weeknight dinners, or weekend gatherings when you want something satisfying but simple. If you love dishes that balance savory, creamy, and slightly smoky notes, this recipe will become a go-to. For another garlic-forward, homey chicken idea that’s great with soup season, try this aromatic ginger garlic chicken noodle soup for a cozy pairing.
Ingredients & Equipment
Ingredients
- 2 large chicken breasts, diced
- 4 large flour tortillas
- 1 tablespoon olive oil
- 2 teaspoons garlic powder
- 1 teaspoon onion powder
- 1 teaspoon paprika
- Salt and pepper, to taste
- 1 cup shredded cheddar cheese
- 1/2 cup shredded mozzarella cheese
- 1/2 cup creamy garlic sauce (store-bought or homemade)
- Fresh parsley, chopped (for garnish)
Notes on ingredients
- Use boneless, skinless chicken breasts for quick, even cooking. You can substitute chicken thighs for more juiciness (reduce cook time slightly if they are smaller pieces).
- The creamy garlic sauce can be a simple mix of mayonnaise, sour cream, lemon juice, and minced garlic or a jarred garlic sauce you love.
- If you want a sharper flavor, swap half the cheddar for smoked gouda or Pepper Jack for a little heat.
Equipment
- Non-stick frying pan or cast-iron skillet (for cooking chicken and grilling wraps)
- Mixing bowl (to toss chicken with spices)
- Spatula or wooden spoon
- Measuring spoons and cups
- Grater (if shredding cheese from a block)
- Baking tray (if you prefer to warm finished wraps in the oven)
- Instant-read thermometer (helpful to confirm chicken reaches 165°F / 74°C)
- Optional: blender or food processor (if making homemade garlic sauce)
Helpful tools like an instant-read thermometer and a good non-stick pan really make the process smoother, and a baking tray is useful if you want to keep finished wraps warm while you finish the batch. For a hands-off approach to the filling, check this cozy cheesy crock pot buffalo chicken dip for inspiration on slow-cooked shreddable chicken.
Step-by-Step Instructions (with tips)
Prep the chicken and seasonings
In a medium bowl, combine the diced chicken with 1 tablespoon olive oil, 2 teaspoons garlic powder, 1 teaspoon onion powder, 1 teaspoon paprika, and salt and pepper to taste. Toss until each piece is evenly coated. This step infuses the chicken with flavor right from the start — for a fresher garlic punch, add 1 teaspoon minced fresh garlic to the mix.Cook the chicken
Heat a non-stick pan or skillet over medium heat. Once hot, add the seasoned chicken in a single layer (don’t overcrowd the pan). Cook for about 6–8 minutes, stirring occasionally, until the chicken is golden and cooked through. Use an instant-read thermometer to check for 165°F (74°C). If you have larger pieces, give them a couple more minutes. Remove from heat and let cool slightly.Tip: For smoky depth, finish the chicken with a quick splash of lemon juice or a sprinkle of smoked paprika right after cooking.
Assemble the tortillas
Lay the 4 large flour tortillas on a flat surface. Spread about 2 tablespoons (or to taste) of creamy garlic sauce over each tortilla, leaving a small border. Evenly distribute the cooked chicken on top of each tortilla, then sprinkle with shredded cheddar and mozzarella cheese.Fold and grill the wraps
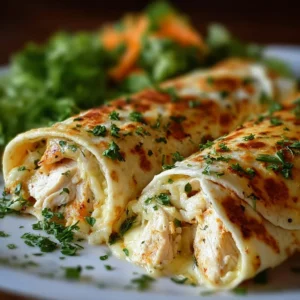
Fold each tortilla over the filling to create a compact wrap (you can fold like a burrito or fold two sides in and roll). Heat the same non-stick pan over medium-low heat and place the folded wraps seam-side down. Grill for 2–3 minutes on each side, or until the cheese is melted and tortillas are golden and crispy. Press lightly with a spatula to get even browning.Tip: Use a lid for 30–60 seconds while grilling to help the cheese melt fully without over-browning the tortilla.
Serve
Remove from the pan, allow to rest for a minute, then cut each wrap in half on a diagonal. Garnish with freshly chopped parsley and serve immediately.
Variations and alternative cooking methods
- Oven method: Preheat oven to 375°F (190°C). Assemble wraps on a baking tray, brush lightly with oil or melted butter, and bake for 10–12 minutes (flip halfway) until golden and cheese is melted. Great when making a larger batch.
- Roasted chicken option: Roast whole breasts at 400°F for 18–22 minutes, cool, and dice or shred before seasoning. Roasting adds deeper flavor and is perfect for meal prep.
- Poached (boiled) chicken: For a very tender, mild filling, poach the breasts in salted simmering water or broth for 12–15 minutes, then dice and toss with the seasoning mix. This keeps chicken moist but less browned.
- Air-fryer finish: After assembling, place wraps seam-side down in the air fryer at 370°F for 4–6 minutes to crisp the outside and melt the cheese quickly.
- Vegetarian: Swap chicken for seasoned, roasted cauliflower or pan-seared tofu and keep the garlic sauce and cheese (or use vegan cheese).
Always add 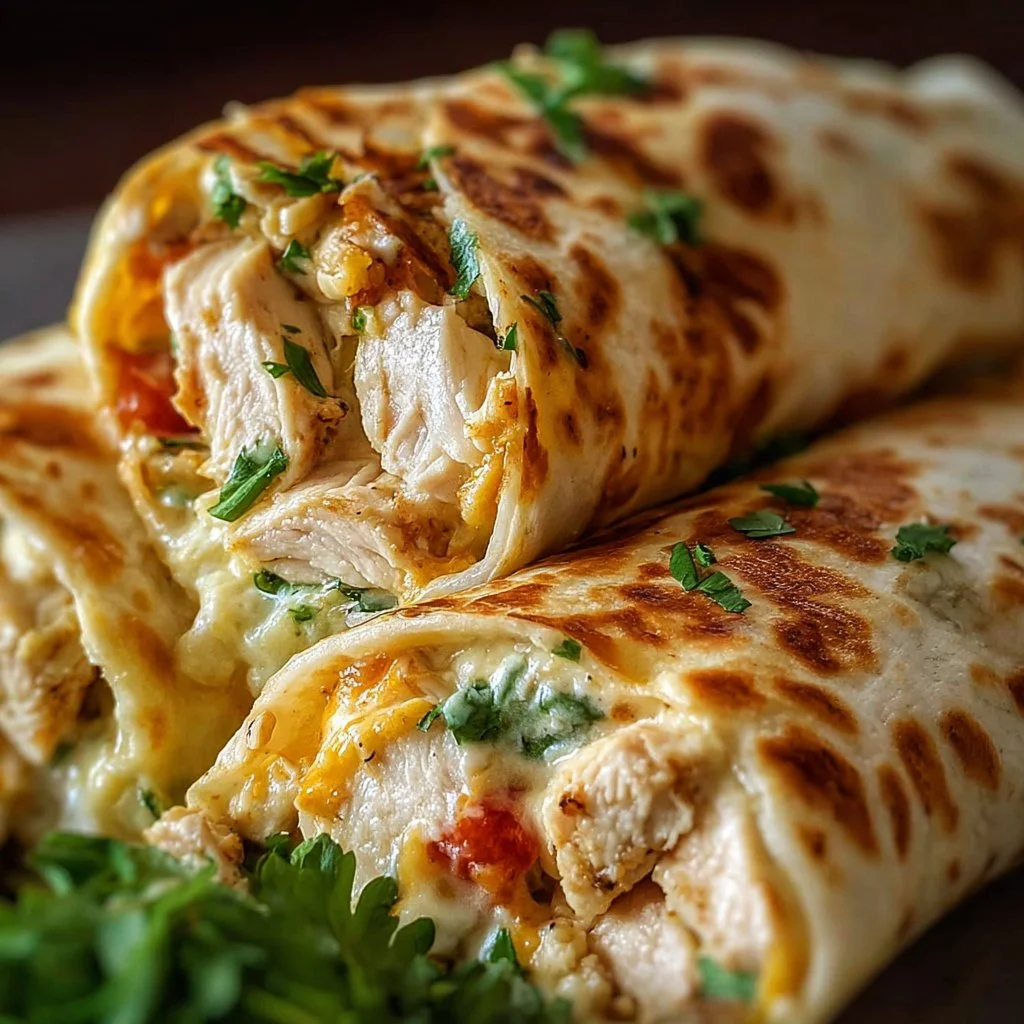
tag after Directions.
Storage, Freezing & Make-Ahead Tips
Storing leftovers
- Refrigerator: Store cooled wraps in an airtight container or tightly wrapped in foil for up to 3 days. For best texture, reheat in a skillet or oven to keep the tortilla crisp. Microwaving works but can make the tortilla soft.
Freezing
- Individual wraps freeze well. Wrap each cooled wrap tightly in plastic wrap, then foil, and place in a labeled freezer bag. Freeze for up to 2 months. To reheat, thaw overnight in the refrigerator or reheat from frozen in a 350°F oven for 20–25 minutes (wrapped in foil initially, then unwrap for the last 5 minutes to crisp). An air fryer or skillet is excellent for reheating single portions.
Make-ahead tips
- Prepare the chicken filling up to 2 days ahead and store in the refrigerator. Assembly and grilling can be done just before serving for fresh, crisp wraps.
- If serving for a group, assemble wraps and keep them on a baking tray in a warm oven (200°F/90°C) for up to 20–30 minutes; avoid leaving them too long or they’ll dry out.
Portioning advice
- One large wrap (cut into halves) is typically a satisfying main for one adult. For a lighter meal or to serve as part of a spread, cut each wrap into thirds and serve as handheld appetizers for a crowd.
How to Use / Serve This Dish
Pairing ideas
- Fresh sides: Serve with a crisp green salad dressed with lemon vinaigrette to cut through the richness. A simple coleslaw (vinegar-based) or cucumber-tomato salad brightens the plate.
- Dipping sauces: Offer extra creamy garlic sauce, a tangy yogurt-cilantro sauce, or a smoky chipotle mayo on the side.
- Soups: These wraps pair wonderfully with lighter brothy soups while the season calls for warmth; they’re a crowd-pleasing partner to vegetable or tomato soup. For a roasted-potato comfort combo, try pairing with garlic-parmesan sides like this garlic parmesan crockpot chicken and potatoes for a fully savory feast.
Creative serving variations
- Breakfast wrap: Add scrambled eggs and a handful of spinach for a morning twist.
- Picnic-friendly: Wrap each fully cooled wrap in parchment and store chilled for an easy picnic or lunchbox meal.
- Party platter: Cut wraps into bite-sized pinwheels, secure with a toothpick, and arrange on a board with olives, roasted peppers, and pickles.
Flavor suggestions
- Herbs: Fold in some chopped cilantro or chives into the garlic sauce for a fresh herb lift.
- Heat: Sprinkle red pepper flakes into the filling or switch to pepper jack cheese.
- Crunch: Add some thinly sliced roasted red peppers or pickled onions for texture contrast.
Frequently Asked Questions
Q: Can I use leftover cooked chicken for this recipe?
A: Absolutely. Leftover roasted, grilled, or poached chicken works great — just dice or shred it and toss with the spices and a little olive oil before assembling. Adjust the seasoning to taste since leftovers might already be seasoned.
Q: How long will prepared wraps keep in the fridge?
A: Stored in an airtight container, these wraps will keep for up to 3 days. Reheat in a skillet or oven to restore crispness. If you plan to store for longer, freeze them as described above.
Q: What can I substitute for the creamy garlic sauce?
A: Use plain Greek yogurt mixed with minced garlic and lemon juice, a garlic aioli, or a ranch-style dressing if you prefer a tangier option. For a dairy-free version, try a vegan mayo-based garlic sauce or a tahini-lemon dressing.
Q: Can I use whole wheat or gluten-free tortillas?
A: Yes — whole wheat or gluten-free tortillas are great substitutes. Note that gluten-free tortillas can be more delicate, so handle them gently when filling and consider warming them briefly to make them more pliable.
Recipe Notes & Flavor Boosters
- For deeper flavor, marinate the diced chicken for 30 minutes in the olive oil and spices before cooking.
- Toast the tortillas lightly on both sides before assembling for extra crispness.
- Add a squeeze of fresh lemon over the assembled filling before folding to brighten the flavors.
- If you like a cheesier pull, add an extra 1/4 cup of mozzarella. For a smoky note, include a few tablespoons of crumbled smoked cheddar.
Conclusion
These Cheesy Chicken Garlic Wraps are the perfect combination of comfort and convenience — melty cheese, savory seasoned chicken, and that satisfying garlic creaminess in a golden, crisp tortilla. They work beautifully for cozy seasonal dinners, casual entertaining, or quick make-ahead lunches. If you enjoy exploring similar crowd-pleasing recipes, you might like this Cheesy Garlic Chicken Wraps for another take, or this comforting take on the dish for easy weeknight meals at Cheesy Garlic Chicken Wraps: A Deliciously Easy Meal. When you try the recipe, I’d love to hear how you personalized it — and if you’re sharing photos, tag a friend and spread the comfort; here’s one more variation to browse for inspiration: Cheesy Chicken Wraps | Spicedblog. Give this recipe a go tonight — warm, cheesy comfort awaits.
Cheesy Chicken Garlic Wraps
Ingredients
Chicken Preparation
- 2 large chicken breasts, diced Use boneless, skinless chicken breasts for quick cooking.
- 1 tablespoon olive oil
- 2 teaspoons garlic powder
- 1 teaspoon onion powder
- 1 teaspoon paprika
- Salt and pepper to taste
Wrap Assembly
- 4 large flour tortillas
- 1 cup shredded cheddar cheese Can substitute with smoked gouda.
- ½ cup shredded mozzarella cheese
- ½ cup creamy garlic sauce Store-bought or homemade.
- 1 tablespoon fresh parsley, chopped For garnish.
Instructions
Preparation
- In a medium bowl, combine the diced chicken with olive oil, garlic powder, onion powder, paprika, salt, and pepper. Toss until each piece is evenly coated.
Cooking Chicken
- Heat a non-stick pan over medium heat. Add the seasoned chicken in a single layer. Cook for 6-8 minutes, stirring occasionally, until golden and cooked through.
- Remove from heat and let cool slightly.
Assembling Wraps
- Lay the flour tortillas on a flat surface. Spread creamy garlic sauce over each tortilla, leaving a small border.
- Evenly distribute the cooked chicken on top of each tortilla and sprinkle with shredded cheddar and mozzarella.
Grilling Wraps
- Fold each tortilla to create a compact wrap and grill in the same pan over medium-low heat for 2-3 minutes on each side, until the cheese is melted and tortillas are crispy.
Serving
- Remove from pan, allow to rest for a minute, then cut each wrap in half. Garnish with fresh parsley and serve immediately.