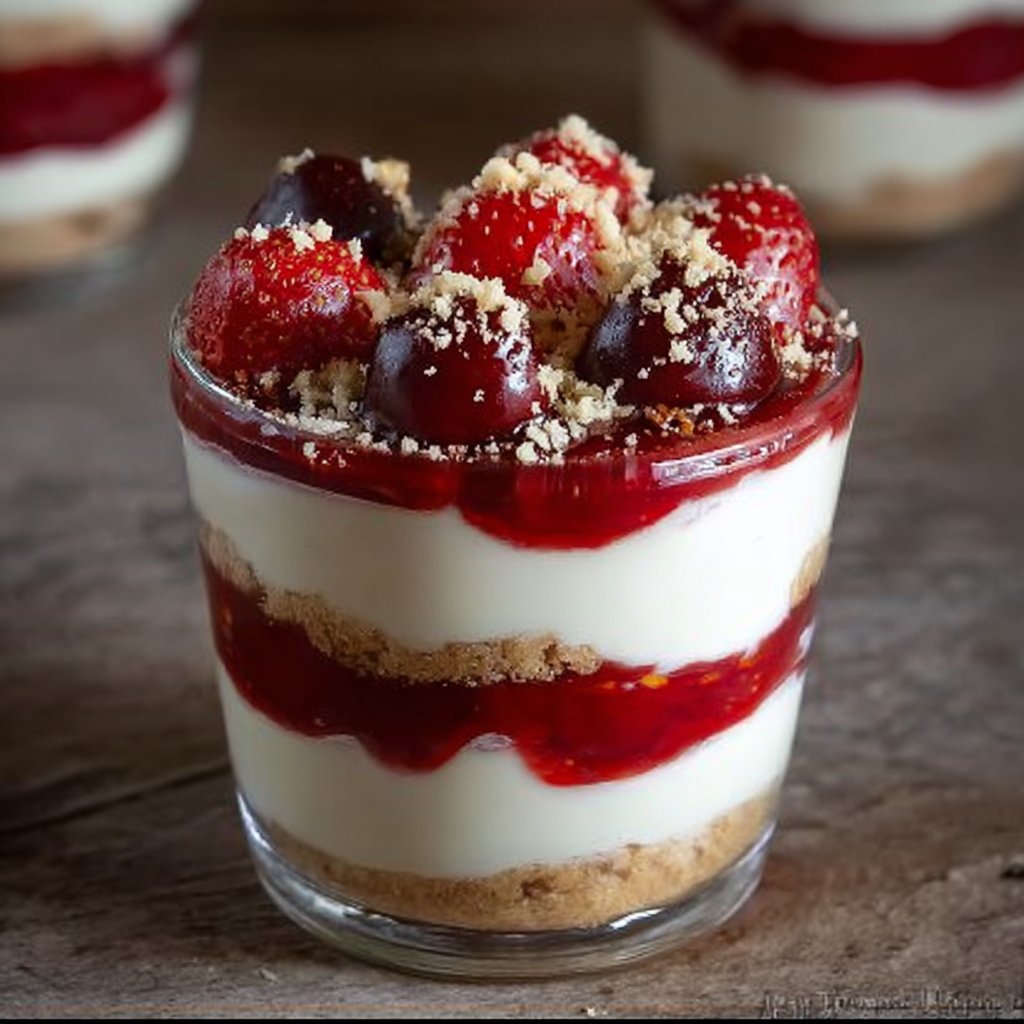
There’s something magically simple and utterly comforting about a dessert you can pull together without turning on the oven — enter the No-Bake Cheesecake Parfait. This layered treat blends a buttery graham cracker base with a tangy, creamy cheesecake filling and bright cherry topping that’s especially welcome in spring and summer when fresh fruit feels at its best. Whether you’re feeding a crowd at a picnic or making single-serve treats for a cozy night in, these parfaits are quick, satisfying, and impressive. If you love desserts that feel homemade but don’t demand a full day in the kitchen, this no-bake delight is worth trying. For another easy individual dessert idea, try this No-Bake Twix Cheesecake for a candy-bar twist.
Ingredients & Equipment
Ingredients
- 1 1/2 cups finely crushed graham cracker crumbs
- 3 tablespoons granulated sugar
- 7 tablespoons butter (melted)
- 1 8 ounce package cream cheese, softened
- 1 14 ounce can sweetened condense milk
- 1/3 cup freshly squeezed lemon juice
- 1 teaspoon vanilla extract
- 1 21 ounce can cherry pie filling
Notes:
- Make sure the cream cheese is softened at room temperature for the creamiest texture. If you’re short on time, 10–15 seconds in the microwave (on low power) can help soften it gently.
- Freshly squeezed lemon juice brightens the filling and helps it set without gelatin; bottled lemon juice will work in a pinch but fresh is best for flavor.
Equipment
- Electric mixer (handheld or stand mixer) — for a silky cheesecake filling
- Medium and small mixing bowls
- Measuring cups and spoons
- Rubber spatula or spoon for folding and scraping
- 6 plastic 9-ounce punch cups (or similar clear single-serve glasses) — you can also use mason jars or dessert glasses
- Cookie sheet or tray (to set the cups on while assembling)
- Optional: food processor or resealable bag and rolling pin for crushing graham crackers more finely
Helpful tools: A piping bag or zip-top bag (snipped corner) makes layering neater, and a small offset spatula helps spread even layers. If you prefer a smoother crumb layer, a blender or food processor will make ultra-fine graham crumbs.
For a fun twist, try making the crust with crushed shortbread or chocolate cookies instead of graham crackers.
Step-by-Step Instructions (with tips)
In a small mixing bowl, combine the graham cracker crumbs, granulated sugar, and melted butter; set aside.
Tip: Press a small amount together between your fingers — it should hold loosely. If it’s too dry, add another 1/2 teaspoon of melted butter.In a medium mixing bowl, beat the cream cheese with an electric mixer on medium speed until smooth. Beat in the sweetened condense milk until combined.
Tip: Start the mixer on low and gradually increase speed to avoid splattering. Scrape the bowl down with a spatula so no lumps remain.Add the freshly squeezed lemon juice and vanilla extract and stir well.
Tip: The lemon juice will slightly thicken and set the mixture; stir until it looks velvety and pourable.Set 6 plastic, 9 ounce punch cups on the counter or a cookie sheet. Scoop 2 tablespoons of the graham cracker crumb mixture into the bottom of each cup and press down lightly.
Tip: A small measuring cup or the bottom of a shot glass is perfect for pressing crumbs evenly into each cup.Add 3 tablespoons of the cheesecake mixture to each cup and spread out evenly.
Tip: Use a piping bag or zip-top bag with a corner snipped to pipe the filling neatly; it speeds up assembly and keeps layers tidy.Next, evenly distribute half of the cherry pie filling between the 6 cups, reserving the other half of the pie filling for another layer.
Tip: Spoon the pie filling gently — the cherry juices will naturally fill gaps and create a gorgeous red layer.Sprinkle 2 tablespoons of the graham crack crumb mixture over the cherry layer.
Tip: Keep this crumb layer light so it doesn’t overpower the cheesecake; it adds a nice crunch and contrast.Divide the remaining cheesecake mixture between the 6 cups and spread out evenly.
Tip: Smooth the top of each layer with the back of a spoon or a small offset spatula for a polished look.Divide the reserved cherry pie filling evenly between the 6 cups, then sprinkle the top with a little graham cracker crumb mixture.
Tip: For a fresh finish, add a few fresh cherries or a mint leaf on top just before serving.Serve immediately or chill for up to 24 hours before serving.
Tip: If chilling, cover the tray loosely with plastic wrap or a lid to prevent condensation from dripping into the parfaits. Chilling for 1–2 hours lets flavors marry and the texture become firmer.
Variations and extra tips:
- Swap the cherry pie filling for strawberry, blueberry, or peach pie filling for seasonal variation, or use fresh macerated berries for a brighter, less sweet option.
- For a nutty crunch, sprinkle chopped toasted almonds or pecans between layers.
- If you prefer a lighter filling, fold in 1/2 cup whipped cream or whipped topping into the cheesecake mixture before layering.
- Gluten-free option: use gluten-free graham crackers or a nut/seed crust.
- If you want mini parfaits for a party, halve the portions and use 4–5 ounce cups.
Storage, Freezing & Make-Ahead Tips
Storing:
- Refrigerate parfaits in an airtight container or covered tightly with plastic wrap for up to 3 days. Single-serve cups with lids are ideal for keeping flavors fresh and making transport easy.
- If the cups don’t have lids, place the entire cookie sheet in the fridge and cover gently with plastic wrap — just be careful not to touch the tops.
Freezing:
- You can freeze these parfaits, but the texture of the cherry filling and the crumb layers will change slightly upon thawing. If you plan to freeze:
- Assemble parfaits but skip the final cherry topping (reserve the final topping to add after thawing if you want a fresh appearance).
- Freeze uncovered on a tray until solid (flash freeze), then cover each cup tightly with plastic wrap or place in a freezer-safe container. Freeze up to 1 month.
- Thaw in the refrigerator overnight before adding reserved topping and serving.
Make-ahead tips:
- Prepare the crumb mixture and cheesecake filling up to 24 hours in advance and refrigerate separately. You’ll save time during assembly and keep crumbs from becoming soggy.
- If you plan to serve the parfaits at a party, assemble them most of the way and add the final cherry layer and crumb sprinkle just before serving to maintain a fresh look and crisp texture.
Portioning advice:
- The recipe is sized for six 9-ounce parfaits. If you need more servings, double the ingredients, or use smaller cups for bite-sized portions ideal for large gatherings.
How to Use / Serve This Dish
Serving ideas:
- Serve chilled as a light dessert after a garden dinner or barbecue. Its bright lemon-cheesecake flavor and cherry topping are a lovely contrast to richer mains like grilled meats or creamy pasta.
- Make it a breakfast-for-dessert treat by swapping the cherry pie filling for poached pears or macerated berries and serving with coffee or chai.
Pairings:
- Coffee, espresso, or a citrusy iced tea highlight the lemon notes in the cheesecake filling. For adult gatherings, try pairing with a slightly sweet Riesling or a sparkling rosé.
- For brunch, place parfaits on a dessert table alongside scones and fresh fruit.
Creative variations:
- Layer crushed chocolate cookies instead of graham crumbs and use cherry pie filling for a “Black Forest” vibe. If you enjoy snacks with a peanut-butter twist, explore this simple No-Bake Peanut Butter Energy Bites for a complementary treat.
- Turn these into parfait bars: assemble layers in an 8×8-inch pan, chill until set, then cut into squares for easy serving.
- For a seasonal autumn spin, swap the cherry pie filling for spiced apple pie filling and sprinkle a hint of cinnamon into the graham crumbs. If you enjoy pumpkin desserts, you might also like these Pumpkin Cheesecake Cookies for a fall menu.
Temperature and presentation tips:
- Parfaits should be served cold. If you’re taking them outdoors on a warm day, pack them in a cooler with ice packs until you’re ready to serve.
- For elegant presentation, use clear glasses so the layers show, and garnish with a fresh herb (like mint) or a dusting of lemon zest.
FAQ
Q: Can I use fresh cherries instead of cherry pie filling?
A: Yes. Use about 1 1/2 to 2 cups of pitted, halved, macerated cherries (tossed with 1–2 tablespoons sugar and a splash of lemon juice) as a fresher, less-sweet option. Fresh fruit will release more juice, so add it just before serving to keep layers from becoming soggy.
Q: How long will these parfaits stay fresh in the refrigerator?
A: Properly covered, parfaits will keep for up to 3 days in the fridge. After that, the graham crumb texture will soften and the flavors may change. For the best taste and appearance, enjoy within 48–72 hours.
Q: Can I make the cheesecake filling without an electric mixer?
A: Yes, but an electric mixer makes the texture smoother and quicker. If you don’t have one, use a sturdy whisk and beat the cream cheese vigorously, then whisk in the sweetened condensed milk until smooth. A food processor can also be used for a silky result.
Q: Is there a substitute for sweetened condensed milk?
A: Sweetened condensed milk provides both sweetness and a creamy texture that helps the filling set. A possible substitute is a combination of heavy cream whipped with powdered sugar folded into the cream cheese, or using sweetened condensed coconut milk for a dairy-free twist (note the flavor difference). Adjust sweetness to taste.
Conclusion
No-Bake Cheesecake Parfait is the kind of dessert that feels homemade, fuss-free, and seasonally adaptable — a comforting layer cake in a cup. It’s perfect for celebrations, weeknight treats, or potlucks because it’s easy to scale, make ahead, and customize. If you’re in the mood for other no-bake creaminess or berry-forward parfait ideas, check out this fresh twist on a strawberry version at Strawberry Cheesecake Parfait (No Bake) – Fifteen Spatulas or this approachable guide for variations at Easy No-Bake Cheesecake Parfaits – Just a Taste. Give this recipe a try, share photos of your layers, and let the simple joy of a no-bake dessert brighten your next gathering.
No-Bake Cheesecake Parfait
Ingredients
For the crust
- 1.5 cups finely crushed graham cracker crumbs You can use gluten-free graham crackers for a gluten-free version.
- 3 tablespoons granulated sugar
- 7 tablespoons butter (melted)
For the cheesecake filling
- 1 package cream cheese, softened (8 ounces) Make sure the cream cheese is at room temperature for best texture.
- 1 can sweetened condensed milk (14 ounces)
- ⅓ cup freshly squeezed lemon juice Freshly squeezed is best for flavor.
- 1 teaspoon vanilla extract
For the topping
- 1 can cherry pie filling (21 ounces) You can substitute with other fruit fillings or fresh fruits.
Instructions
Preparation of Crust
- In a small mixing bowl, combine the graham cracker crumbs, granulated sugar, and melted butter; set aside.
- Press a small amount together between your fingers — it should hold loosely. If it’s too dry, add another 1/2 teaspoon of melted butter.
Preparation of Cheesecake Filling
- In a medium mixing bowl, beat the cream cheese with an electric mixer on medium speed until smooth.
- Beat in the sweetened condensed milk until combined, starting on low to avoid splattering.
- Add the freshly squeezed lemon juice and vanilla extract and stir well until velvety and pourable.
Layering
- Set 6 plastic, 9 ounce punch cups on the counter or a cookie sheet.
- Scoop 2 tablespoons of the graham cracker crumb mixture into the bottom of each cup and press down lightly.
- Add 3 tablespoons of the cheesecake mixture to each cup and spread out evenly.
- Evenly distribute half of the cherry pie filling between the 6 cups.
- Sprinkle 2 tablespoons of the graham cracker crumb mixture over the cherry layer.
- Divide the remaining cheesecake mixture between the 6 cups and smooth the top.
- Divide the reserved cherry pie filling evenly between the cups and sprinkle with graham cracker crumbs.
- Serve immediately or chill for up to 24 hours before serving.