Mini Pumpkin Pies: A Seasonal Delight for Your Table
As the leaves turn and the air gets crisper, there’s something magical about the arrival of fall that stirs the senses and warms the heart. At the center of this seasonal shift is one ingredient that captures the essence of autumn—pumpkin! And what better way to embrace this beloved squash than with delightful mini pumpkin pies?
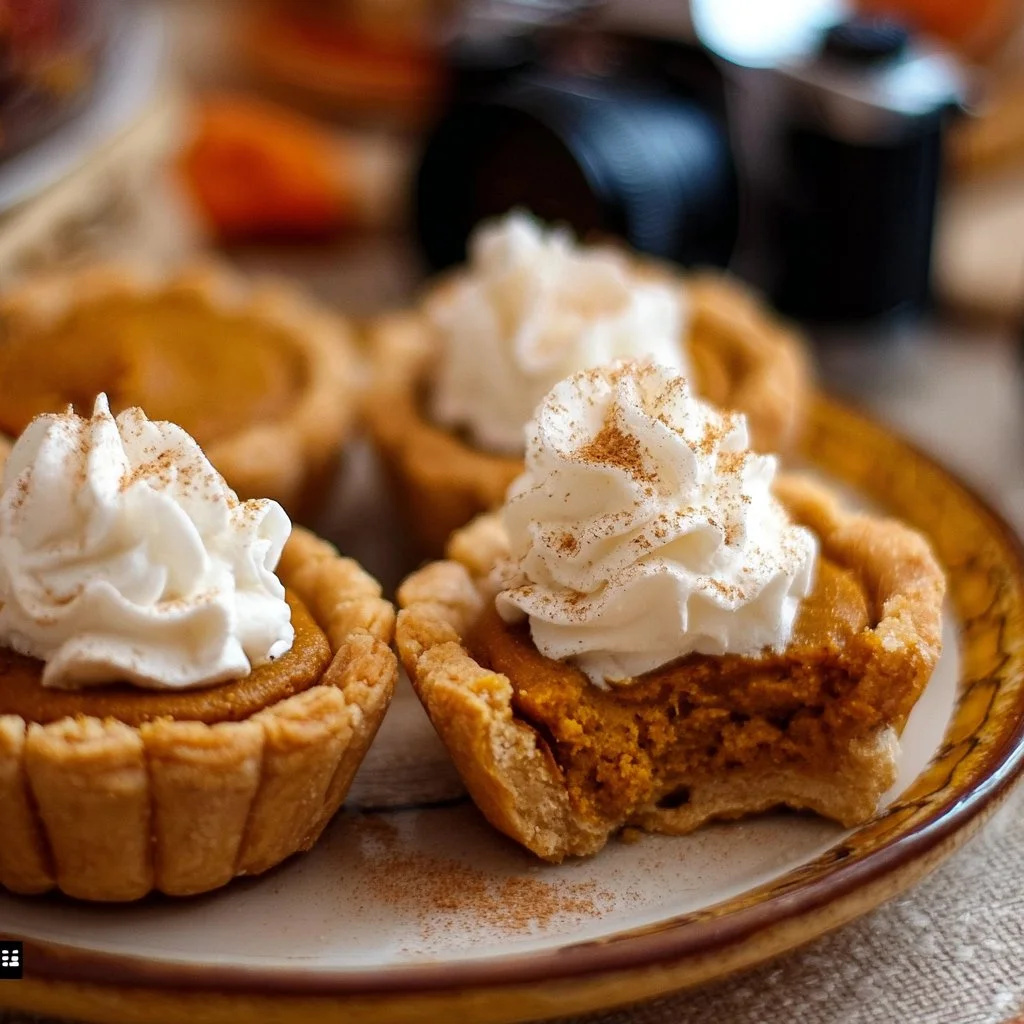
Picture this: warm spiced pumpkin filling nestled in a flaky, buttery crust, perfectly portioned for individual enjoyment. Whether you’re gathering around the table with loved ones for a cozy autumn dinner or hosting a festive holiday gathering, these mini pumpkin pies are sure to bring a smile to everyone’s face. They make the perfect sweet treat to celebrate the season, and the best part? They are incredibly easy to whip up from scratch! So roll up your sleeves and let’s dive into making these charming little pies that evoke comfort and joy.
Ingredients & Equipment
Ingredients
- 1 cup pumpkin puree (homemade or canned)
- 1/2 cup sugar (brown or granulated works well)
- 1/2 teaspoon cinnamon
- 1/2 teaspoon nutmeg
- 1/4 teaspoon ginger
- 1/4 teaspoon salt
- 2 large eggs
- 1/2 cup evaporated milk
- 1 package refrigerated pie crusts (or homemade if you prefer)
- Whipped cream (for serving)
Equipment
- Muffin tin
- Rolling pin
- Mixing bowls
- Whisk or electric mixer
- Measuring cups and spoons
- Baking sheet
- Toothpick (for testing doneness)
Helpful Notes
- For a richer flavor, you can roast your own pumpkin instead of using store-bought puree. Simply cut the pumpkin into halves, remove the seeds, and roast at 400°F (200°C) for about 45 minutes until soft. Let cool, scoop out the flesh, and blend until smooth.
- A good quality muffin tin is essential for even baking; consider using silicone liners for easy removal.
Step-by-Step Instructions
Let’s get started! Follow these simple steps to make your delightful mini pumpkin pies:
1. Preheat the Oven
Start by preheating your oven to 350°F (175°C). A properly preheated oven ensures even baking.
2. Prepare the Pie Crusts
Take out your refrigerated pie crust and roll it out on a lightly floured surface. Using a round cookie cutter or a glass, cut out circles that will fit your muffin tin. Generally, aim for about a 3-inch diameter. Gently place the circles into the cups of the muffin tin, pressing them down to form a little crust.
3. Mix the Pumpkin Filling
In a large bowl, whisk together the pumpkin puree, sugar, spices (cinnamon, nutmeg, ginger), salt, eggs, and evaporated milk until you achieve a smooth and creamy mixture. This delicious batter is the heart of your mini pies, bursting with autumn flavors.
4. Fill the Mini Crusts
Pour the pumpkin mixture into each mini pie crust, filling them about 3/4 full. This allows room for the filling to rise slightly without spilling over.
5. Bake to Perfection
Carefully place the muffin tin in the preheated oven and bake for 25-30 minutes. To check for doneness, you can insert a toothpick into the center of one of the pies. If it comes out clean, they’re ready!
6. Cool and Serve
Once baked, remove the muffin tin from the oven and let the pies cool for a few minutes in the tin. Gently lift them out and transfer to a wire rack to cool completely. When ready to serve, top with a dollop of whipped cream for an extra touch of indulgence.
Tips:
- If you want additional flavor, consider adding a splash of vanilla extract or a pinch of cloves to the filling.
- For a crunchier texture, sprinkle some chopped pecans or walnuts on top of the batter before baking.
Storage, Freezing & Make-Ahead Tips
How to Store Leftovers
After you’ve enjoyed your delicious mini pumpkin pies, storing them properly is essential.
- Room Temperature: If you plan to consume them within 1-2 days, they can be kept loosely covered at room temperature.
- Refrigerator: For longer storage, place them in an airtight container and refrigerate. They’ll keep fresh for about a week.
Freezing Mini Pumpkin Pies
If you want to save some for later—great idea! Here’s how you can freeze your mini pumpkin pies:
- Allow the pies to cool completely after baking.
- Place them on a baking sheet and flash freeze them for about 1-2 hours until firm.
- Transfer the frozen pies to an airtight container or freezer-safe bag, separating layers with parchment paper. They can be frozen for up to 3 months.
Make-Ahead Options
To save time, you can prepare the pie crusts and filling a day in advance. Store the crusts in the fridge and keep the filling in an airtight container until you are ready to bake.
How to Use / Serve This Dish
These mini pumpkin pies are perfect for a variety of occasions. They not only serve as a delightful dessert but can also complement fall-themed gatherings.
Serving Ideas
- Garnish: Serve with a generous spoonful of whipped cream on top, or get creative with caramel drizzle for an extra treat.
- Pairings: They pair beautifully with a cup of warm spiced cider or a rich cup of coffee, making them an excellent choice for brunch or afternoon tea.
Creative Variations
Feel free to explore different flavors by adding chocolate chips to the filling or experimenting with different spices! You could also use sweet potato or butternut squash in place of pumpkin for a twist.
FAQ Section
1. Can I use fresh pumpkin instead of canned?
Absolutely! Fresh pumpkin adds wonderful flavor and nutrition. Just make sure to thoroughly roast and puree it for the best results.
2. What if I don’t have evaporated milk?
You can substitute with heavy cream or a mixture of milk and a little cornstarch (for thickness). Even dairy-free alternatives like coconut milk can work!
3. How long do mini pumpkin pies last?
In the refrigerator, they’ll last about a week. If frozen, they can be kept for up to 3 months. Just remember to thaw them in the fridge before serving.
4. Can I make these mini pies gluten-free?
Definitely! Use gluten-free pie crusts available in stores or make your own using gluten-free flour blends.
5. What should I do if they don’t rise properly?
Occasionally, underbaking or incorrect oven temperature can affect rising. Always ensure your oven is calibrated properly and consider baking slightly longer if needed.
Final Thoughts / Encouragement
There is something truly special about making and sharing homemade treats, especially during the holiday season. These mini pumpkin pies bring warmth, comfort, and a nostalgic taste of autumn to your table. As you embark on this delightful baking adventure, remember that it’s all about creating love-filled moments with family and friends.
So gather your ingredients, invite your loved ones to join in, and create your own batch of these charming little pies. Don’t forget to share your experience and spread the joy—because homemade treats are best enjoyed together! Happy baking!

Mini Pumpkin Pies
Ingredients
For the Pumpkin Filling
- 1 cup pumpkin puree (homemade or canned) For a richer flavor, roast your own pumpkin.
- ½ cup sugar (brown or granulated)
- ½ teaspoon cinnamon
- ½ teaspoon nutmeg
- ¼ teaspoon ginger
- ¼ teaspoon salt
- 2 large eggs
- ½ cup evaporated milk Can substitute with heavy cream or dairy-free alternatives.
For the Crust
- 1 package refrigerated pie crusts Homemade crusts can be used if preferred.
For Serving
- as needed Whipped cream For serving on top of the pies.
Instructions
Preparation
- Preheat your oven to 350°F (175°C).
- Roll out the refrigerated pie crust on a lightly floured surface and cut out circles for the muffin tin.
- Gently press the pie crust circles into the cups of the muffin tin.
Make the Filling
- In a large bowl, whisk together pumpkin puree, sugar, cinnamon, nutmeg, ginger, salt, eggs, and evaporated milk until smooth.
Bake
- Pour the filling into each mini crust until about 3/4 full.
- Bake in the preheated oven for 25-30 minutes, checking with a toothpick for doneness.
Cooling and Serving
- Remove the muffin tin from the oven and let the pies cool for a few minutes.
- Transfer the pies to a wire rack to cool completely and serve with whipped cream.