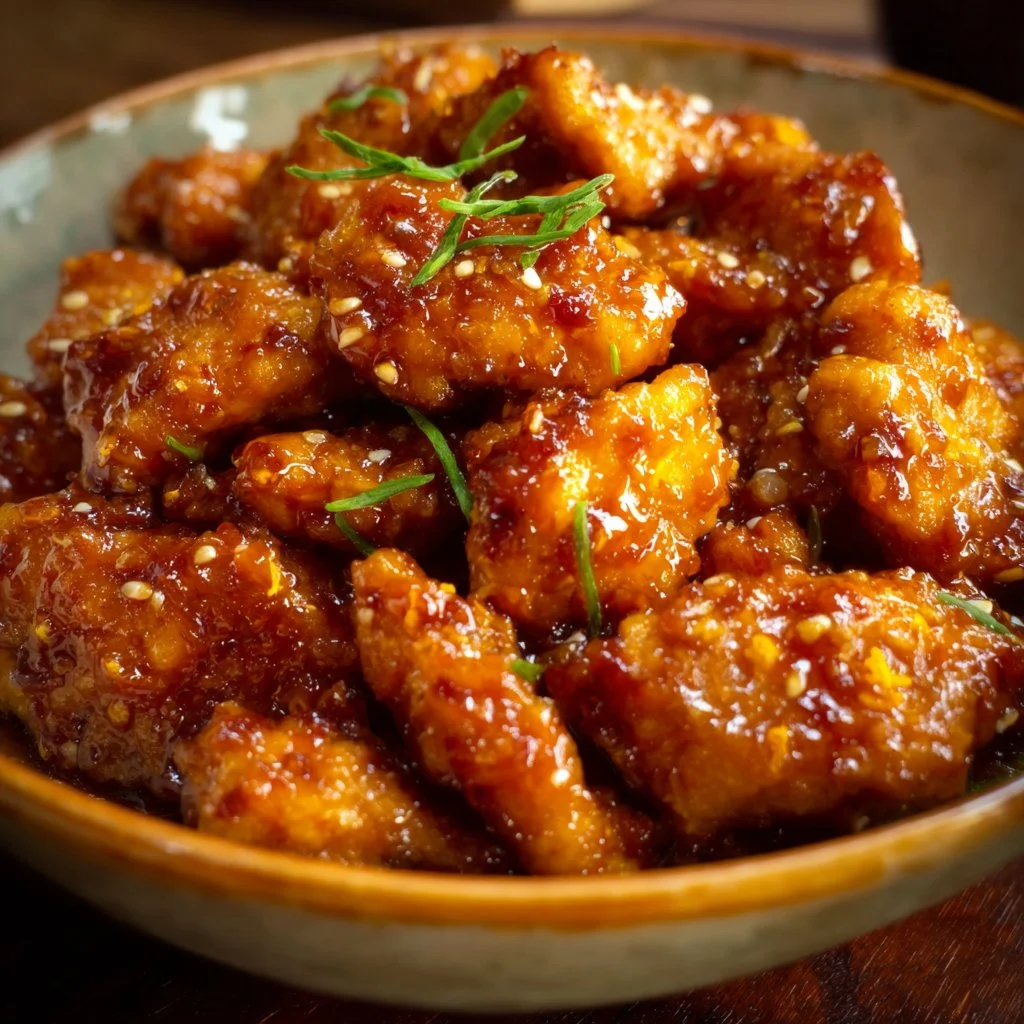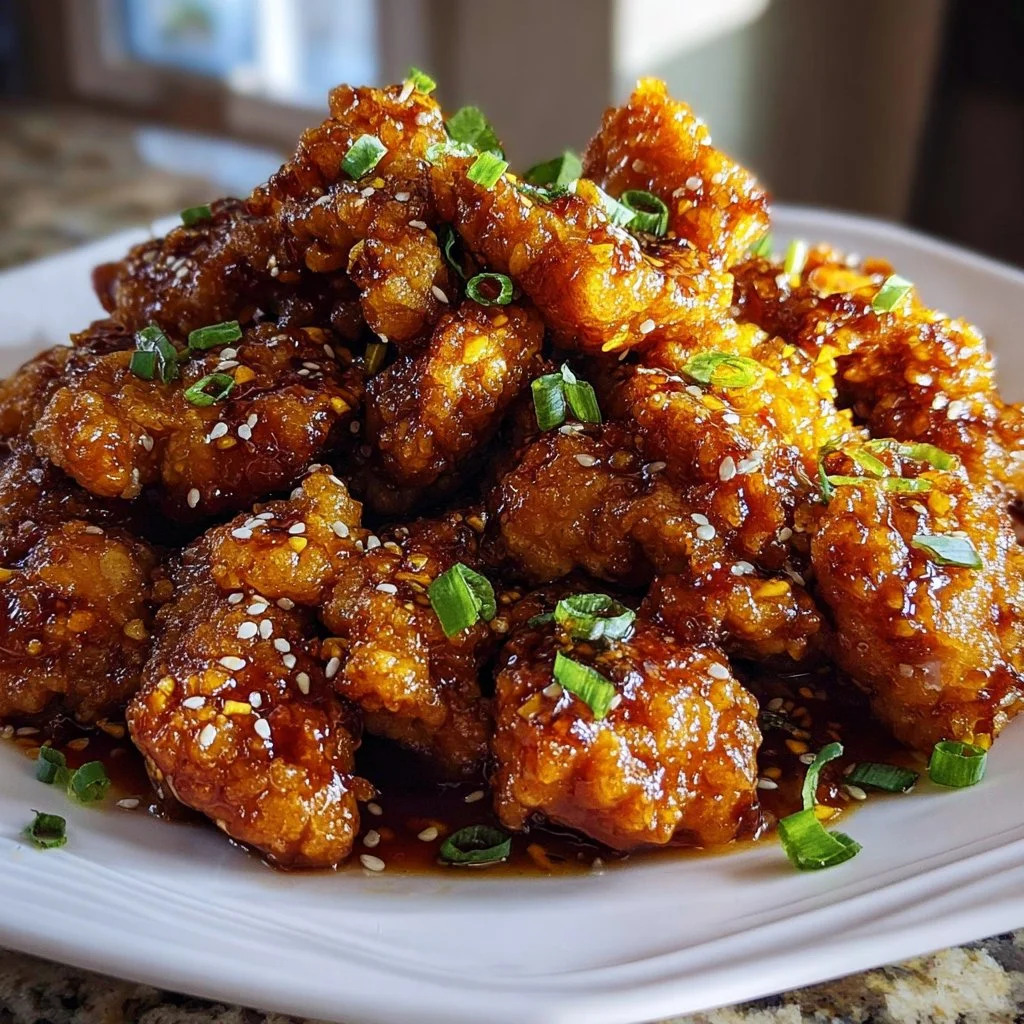
The Ultimate 30-Minute Crispy Homemade Orange Chicken Recipe (Better Than Takeout)
The Ultimate 30-Minute Crispy Homemade Orange Chicken Recipe (Better Than Takeout) is a joyful, fast, and flavor-packed dish that proves you don’t need to order out to enjoy sticky, bright orange chicken with crackly, golden edges. This recipe celebrates tender, halal-friendly chicken pieces encased in a light, crunchy coating and finished with a glossy, citrus-forward sauce—perfect for busy weeknights or a seasonal citrus bounty. With simple pantry ingredients, a quick pan-fry, and a homemade sauce that balances sweet, tangy, and ginger warmth, this comforting classic comes together in about 30 minutes and tastes like a cozy restaurant favorite made by you. If you love quick chicken dinners, you’ll also enjoy browsing 23 amazing chicken recipes for more inspiration.
Ingredients & Equipment
Ingredients
- 1 pound boneless, skinless chicken breasts or thighs, cut into 1-inch pieces
- 1/2 cup all-purpose flour
- 1/4 cup cornstarch
- 1/2 teaspoon salt
- 1/4 teaspoon black pepper
- 1 large egg, lightly beaten
- 1/4 cup water
- 2 tablespoons vegetable oil (for pan-frying)
For the Sauce:
- 1/2 cup fresh orange juice
- 1/4 cup white vinegar
- 1/2 cup granulated sugar
- 1/4 cup soy sauce (low sodium preferred)
- 1 tablespoon grated fresh ginger
- 1 clove garlic, minced
- 1 teaspoon sesame oil
- 1 tablespoon cornstarch mixed with 2 tablespoons cold water (slurry)
Garnish:
- 1/4 cup sliced green onions
- 1 teaspoon sesame seeds
Notes:
- For a halal-friendly meal, use halal-certified chicken and check your soy sauce labeling if needed.
- To reduce sugar, swap part of the granulated sugar for 2–3 tablespoons of honey (still halal) and taste as you go.
- For a gluten-free version, use a certified gluten-free flour blend and tamari in place of soy sauce.
Helpful tools:
- Large skillet or wok
- Medium bowls for dredging and egg wash
- Small saucepan for the sauce
- Whisk and tongs
- Paper towels or cooling rack
- Optional: blender for ultra-smooth sauce, thermometer to check oil or chicken (165°F/74°C), and an air fryer or baking tray if using alternative cooking methods
For another fuss-free chicken weeknight favorite, try our garlic-parmesan crockpot chicken and potatoes recipe.
Step-by-Step Instructions (with tips)
These directions are written to stay close to the easy 30-minute timeline while offering tips to get crispiness like takeout.
1. Prepare the chicken coating
- In a medium bowl, whisk together the flour, cornstarch, salt, and pepper until evenly mixed.
- In a separate small bowl, whisk the egg and water until combined.
- Tip: Cut your chicken into uniform 1-inch pieces so they cook evenly. Pat the chicken dry with paper towels before dipping—this helps the coating stick and stay crisp.
2. Dredge the chicken
- Dip each chicken piece first into the egg mixture, letting the excess drip off, then dredge thoroughly in the flour mixture until fully coated. Press lightly so the coating adheres.
- Tip: Place the coated pieces on a tray in a single layer while you heat the pan; overcrowding will steam the coating and prevent crisping.
3. Make the sauce
- In a small saucepan, combine the orange juice, vinegar, sugar, soy sauce, grated ginger, minced garlic, and sesame oil. Bring the mixture to a gentle simmer over medium heat, stirring until the sugar dissolves.
- Whisk the cornstarch slurry one more time and slowly pour it into the simmering sauce while whisking constantly. Cook for about 1 minute until the sauce thickens and becomes glossy. Remove from heat and set aside.
- Tip: Fresh-squeezed orange juice makes a brighter, more seasonal flavor. If using store-bought, choose 100% juice with no additives.
4. Cook the chicken
- Heat the vegetable oil in a large skillet or wok over medium-high heat. When the oil shimmers, add the coated chicken in a single layer, working in batches if necessary to avoid overcrowding. Pan-fry for 3–4 minutes per side until golden brown and crispy.
- Remove the chicken and place it on a paper towel-lined plate or a cooling rack to drain excess oil.
- Tip: For extra-crispy results, double-fry: fry once until golden, let rest for a minute, then fry quickly a second time for a super-crisp finish. Use a thermometer to keep oil around 350–375°F (175–190°C) for best results.
5. Combine
- Return all the crispy chicken to the skillet (wipe out excess oil if needed but leave a light sheen). Pour the prepared orange sauce over the chicken. Toss quickly and gently until every piece is evenly coated in the sticky orange glaze. Cook for just 1 minute to set the sauce—overcooking can make the coating soggy.
- Tip: If the sauce becomes too thick as it cools, whisk in a tablespoon of warm water to loosen it before tossing.
6. Serve
- Serve immediately over steamed white rice or with steamed vegetables. Garnish with sliced green onions and sesame seeds.
Variations and cooking swaps:
- Oven-baked: Preheat oven to 425°F (220°C). Place coated chicken on a lightly oiled baking sheet and bake 12–15 minutes, flipping halfway, until golden and cooked through. Finish by tossing with warm orange sauce. This is lighter and easier for larger batches.
- Air-fryer: Spray pieces lightly with oil and air-fry at 400°F (200°C) for 8–10 minutes, shaking once, until crisp. Toss with sauce.
- Use thighs for juicier meat; breasts cook slightly faster but can dry if overcooked.
- To make a lower-sugar sauce, substitute part of the granulated sugar with 2 tablespoons honey or 1–2 tablespoons maple syrup and reduce time at simmer to maintain bright flavor.
Storage, Freezing & Make-Ahead Tips
Leftovers are a gift—but keeping the crisp is the challenge. Here’s how to store and reheat for the best texture and flavor.
Short-term storage:
- Keep leftover chicken (if sauced) in an airtight container in the refrigerator for up to 3 days. The sauce will continue to be flavorful, but the coating will soften over time.
Freezing:
- For best results, freeze uncooked, coated chicken pieces on a parchment-lined tray until firm, then transfer to a freezer bag for up to 2 months. When ready, bake or air-fry straight from frozen, adding a few minutes to cook time, then toss with freshly made sauce.
- Alternatively, freeze fully cooked and sauced chicken in a shallow container for up to 2 months, though texture will be softer when reheated.
Reheating (to maximize crisp):
- Oven: Preheat to 375°F (190°C). Place chicken on a rack over a baking sheet and reheat for 8–12 minutes until hot and crisp. Reheat the sauce in a small saucepan and drizzle on, or toss quickly in the skillet for 1–2 minutes.
- Air-fryer: Reheat at 350°F (175°C) for 4–6 minutes, checking frequently.
- Stovetop: For sauced leftovers, a quick toss in a hot skillet for 1–2 minutes will reheat and slightly crisp the edges.
Make-ahead tips:
- Sauce can be made 1–2 days in advance and refrigerated; whisk before reheating.
- Coat chicken and keep in the fridge for up to 12 hours before frying for a quick finish the same day.
Portioning:
- This recipe serves 3–4 depending on appetite. Halve or double the quantities easily; for larger batches, consider baking or using an air fryer for batch efficiency.
How to Use / Serve This Dish
This orange chicken is versatile—serve it simply or turn it into a centerpiece for a seasonal meal.
Serving ideas:
- Classic: Steamed jasmine rice and crisp steamed broccoli or sugar snap peas.
- Lighter: Serve over cauliflower rice with a squeeze of lime for brightness.
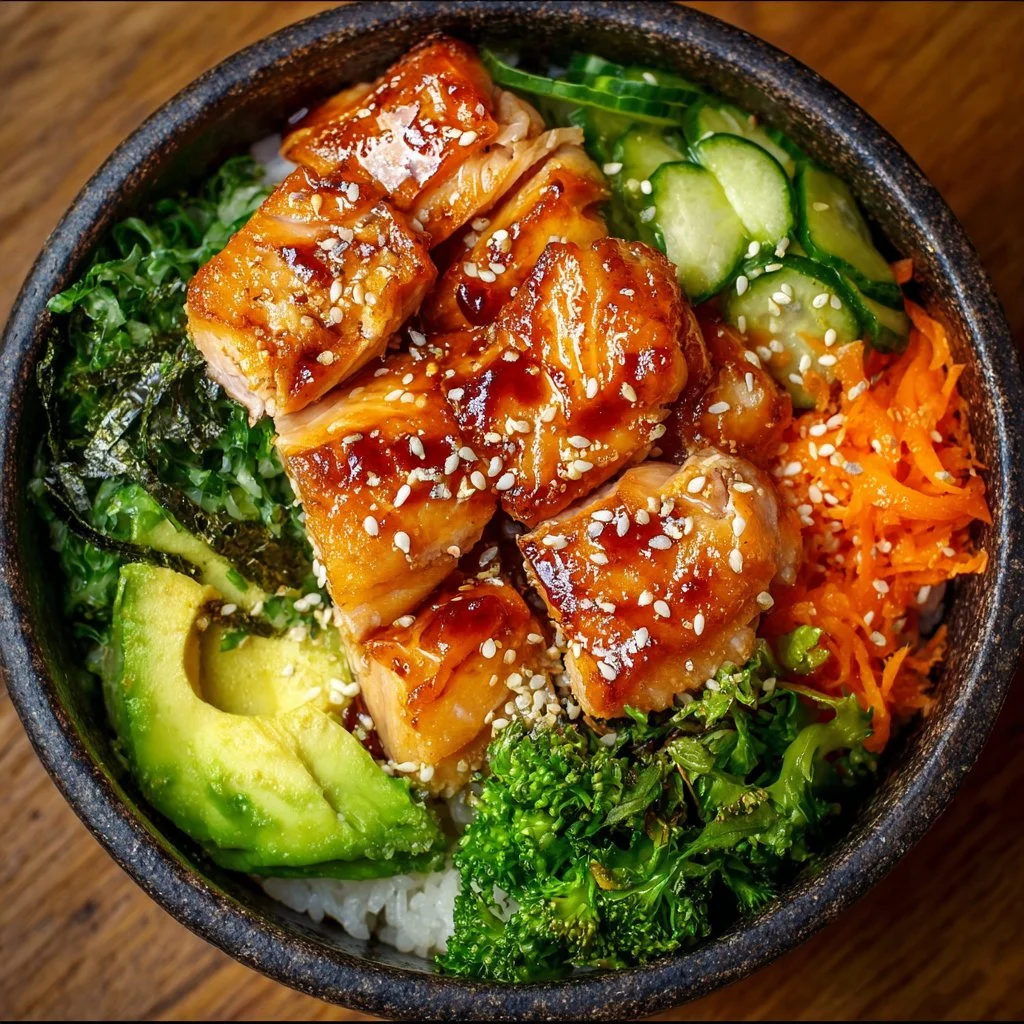
- Family-style bowl: Layer rice, sliced cucumbers, pickled carrots, and orange chicken for DIY bowls.
- Lettuce wraps: Spoon sauced chicken into butter lettuce cups, top with green onions and sesame seeds for a fun handheld option.
- Noodle upgrade: Toss with udon or lo mein noodles and extra scallions for a saucy noodle bowl.
For a cozy seasonal spread, pair this citrus-scented main with comforting sides like Grandma’s Thanksgiving stuffing or simply roast your favorite root vegetables for an easy holiday twist.
Flavor boosts:
- Add a pinch of red pepper flakes to the sauce for gentle heat.
- Stir in a tablespoon of toasted sesame paste or peanut butter for a nuttier depth (still halal-friendly).
- Finish with fresh orange zest for a bright aromatics hit.
FAQ
Q: Can I use chicken thighs instead of breasts?
A: Yes—boneless, skinless thighs are slightly fattier and more forgiving, staying juicier and often tasting more flavorful. Reduce cooking time slightly per side if pieces are larger. Always check that the internal temperature reaches 165°F (74°C).
Q: How can I make this gluten-free?
A: Substitute a certified gluten-free flour blend for all-purpose and use tamari or a gluten-free soy sauce. Cornstarch is already gluten-free and helps maintain that signature crispy texture.
Q: Why did my sauce seize or become grainy?
A: Graininess can happen if the cornstarch slurry isn’t mixed well or if the sauce boils too hard after adding the slurry. Whisk the slurry again just before adding and maintain a gentle simmer while whisking constantly until it thickens. If grainy, strain the sauce and whisk in a tablespoon of warm water to smooth it.
Q: How long will leftovers last?
A: Refrigerated leftovers (sauced) are best eaten within 3 days. Reheat using an oven or air fryer to regain some crisp. For longer storage, freeze up to 2 months following the freezing tips above.
Conclusion
This Ultimate 30-Minute Crispy Homemade Orange Chicken Recipe (Better Than Takeout) is a bright, comforting crowd-pleaser that turns simple pantry staples into a restaurant-quality meal at home. It’s speedy enough for weeknights, satisfying for weekend family dinners, and flexible enough for seasonal twists—fresh orange juice in winter, a touch of honey in spring, or an air-fryer finish for a lighter meal. Try it, tweak it to your taste, and share it with someone you love. If you make it, I’d love to hear how it turned out—snap a photo, leave a comment, or pass this recipe along to a friend who needs a takeout upgrade.
Crispy Homemade Orange Chicken
Ingredients
Main Ingredients
- 1 pound boneless, skinless chicken breasts or thighs, cut into 1-inch pieces Use halal-certified chicken if needed.
- ½ cup all-purpose flour For gluten-free, use a certified gluten-free flour blend.
- ¼ cup cornstarch Helps in creating a crispy coating.
- ½ teaspoon salt
- ¼ teaspoon black pepper
- 1 large egg, lightly beaten
- ¼ cup water
- 2 tablespoons vegetable oil (for pan-frying)
For the Sauce
- ½ cup fresh orange juice Fresh-squeezed is preferable.
- ¼ cup white vinegar
- ½ cup granulated sugar Can reduce sugar by substituting honey.
- ¼ cup soy sauce (low sodium preferred)
- 1 tablespoon grated fresh ginger
- 1 clove garlic, minced
- 1 teaspoon sesame oil
- 1 tablespoon cornstarch mixed with 2 tablespoons cold water (slurry) To thicken the sauce.
Garnish
- ¼ cup sliced green onions
- 1 teaspoon sesame seeds
Instructions
Preparation
- In a medium bowl, whisk together the flour, cornstarch, salt, and pepper until evenly mixed.
- In a separate small bowl, whisk the egg and water until combined.
- Cut the chicken into uniform 1-inch pieces and pat dry with paper towels.
Dredging and Cooking
- Dip each chicken piece first into the egg mixture, then dredge thoroughly in the flour mixture.
- Heat the vegetable oil in a large skillet or wok over medium-high heat. When shimmering, add the coated chicken in a single layer.
- Pan-fry for 3–4 minutes per side until golden brown and crispy.
- Remove the chicken and drain excess oil on a paper towel-lined plate.
Making the Sauce
- Combine orange juice, vinegar, sugar, soy sauce, ginger, garlic, and sesame oil in a small saucepan. Bring to a gentle simmer.
- Whisk in the cornstarch slurry and cook until the sauce thickens, about 1 minute.
Finishing Touches
- Return the crispy chicken to the skillet, pour the sauce over, and toss to coat.
- Serve immediately and garnish with green onions and sesame seeds.